

I have a fun project today featuring cardstock from CutCardStock. Anytime you order using this link, I get a little bit of a commission - no extra cost for you! Have you ever made a shaker card? They are so fun and easy. I have a YouTube process video below so go check it out!
I made this custom card for a friend years ago and she needs a few more. She loved it so much, she wanted the same design. Good thing you can save projects in Cricut Design Space. I did change a few things and if you continue reading, I'll let you know.
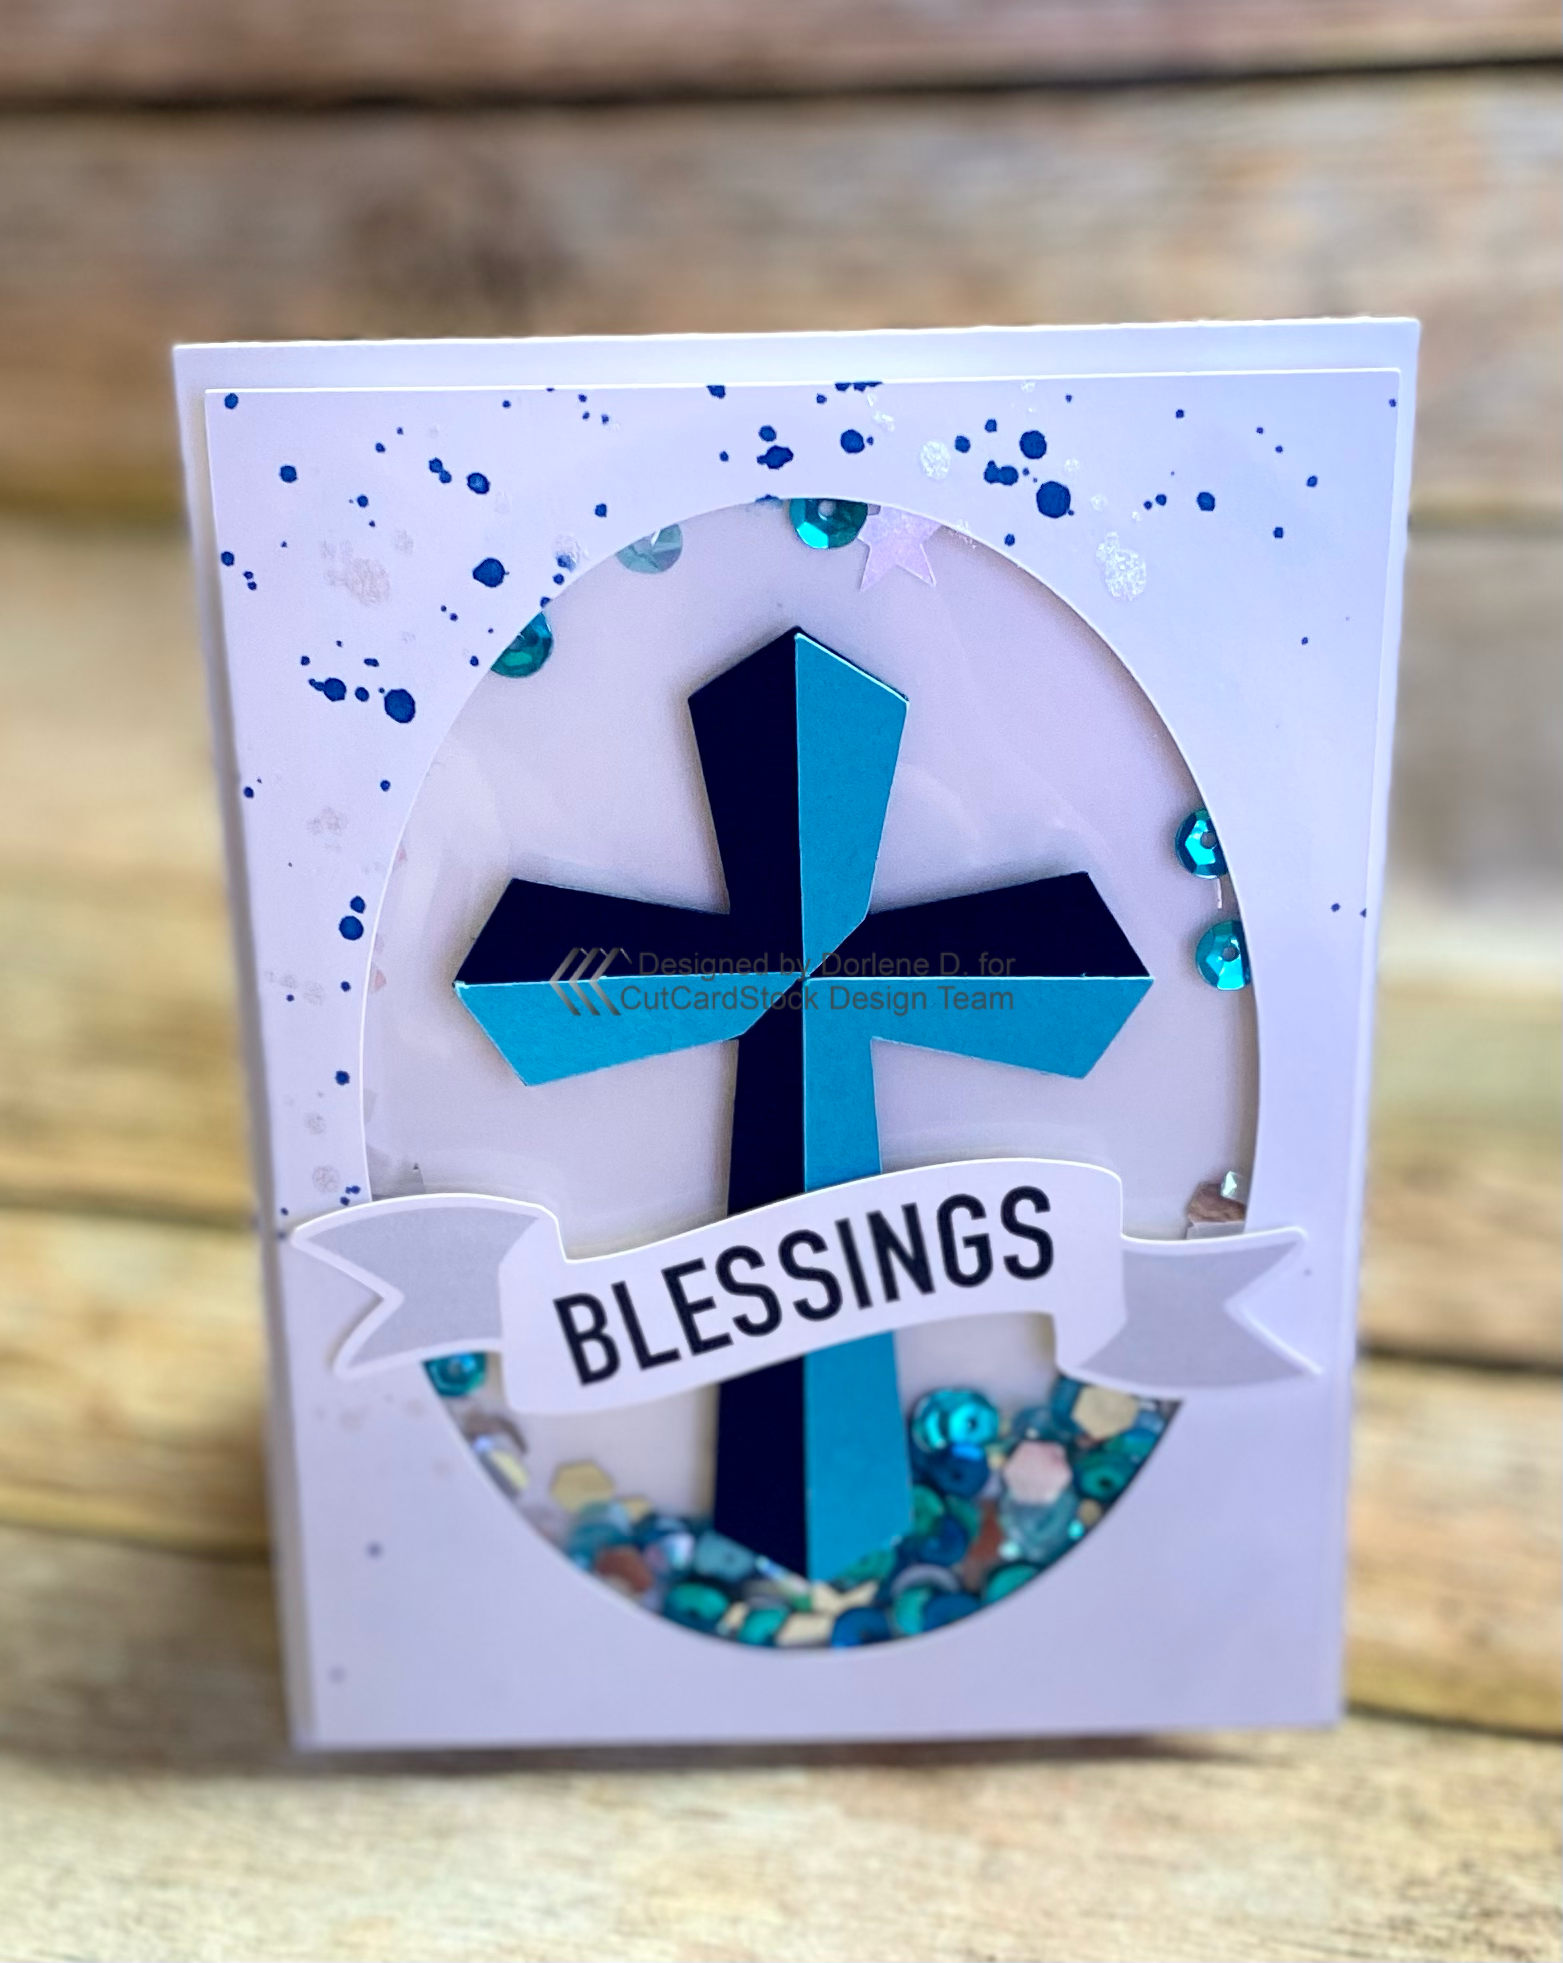
Here's the final project:

And here are the details:
The crosses were cut using a cross image from the New Testament collection in Design Space. All of the colors used are listed below and are from CutCardStock.


So here is where I made a change, on the original card (you can see the post HERE), I cut the banner with cardstock and then stamped the word "blessings". This is fine but one of the letters moved a little. I had to restamp a couple of times before I was satisfied with the end result.
For these cards, I used a banner image and typed the word "bles" and "sings" using the same font & size. The reason why I separated the word in two is because I used the Curve Tool to slightly curve each section since the banner curved differently.
Once the word fit in the banner, I used the Flatten button to flatten the image so I could use the Print & Cut feature in Design Space.
I know it seems like more work, but it looks so good! And, like I mentioned above, I can save the project to use again and again. No smearing ink; no stamp movement and no guessing where to start & end the letters! Click HERE to get the project on Design Space.

Before putting the shaker card together, I added some color splashes to the top left corners of each oval frame. I also cut two pieces of slightly smaller 4 x5.25 pieces of clear transparency for each card to hold all the shaker bits. I adhere one to the back of the oval frame and then the other is attached after adding foam adhesive and filling with shaker bits. This creates a pocket and makes it easier to place on the cardbase. I used Cougar Smooth White Cardstock for the banners, card bases and shaker card base (oval frames). This is by far the best white cardstock I have used and I highly recommend it!
If you want to check out the CutCardStock Blog post click HERE.
The remaining steps are probably best explained through the process video below:


One of the coolest things to do when creating shaker cards is creating the shaker bits. I don't know about you, but I have a lot of sequins, glitter, confetti flakes, beads, etc., to make thousands of shaker cards! I use a small container and then add all the pretties together to make a perfect combination. So sparkly and pretty!
No comments:
Post a Comment
Thanks for visiting. I appreciate your comments. I love sharing my projects with you and hope to encourage you to create things on your own. Thanks again!