A place to showcase my crafts and talk about it...what's better than that? I hope to inspire and encourage others to create things for themselves, friends and family.
I posted this card on my IG on Sunday, June 7th because apparently it was National Donut Day. This card went through some "I don't know if I like it" moments but I kept going and eventually ended up with a card that I loved.
These faux postage stamp collection cards are so fun to create. I used my Cricut to cut the base and all the mats & pieces needed to complete the card. I went ahead and cut pieces for three cards even though I only used one set (for now).
You can find the Design Space file HERE. *This is going to give you the paper portions but not the stamped images.
I may go back and add some sprinkles but as of right now, it's done.
Be sure to watch the process video to see all the steps.
Oh, I have a fun masculine card for you today. I am using Crafter's Companion Time Piece embossing folder from Jenlee Schoolcraft for half of the card front. The other half are strips of scrap paper.
You can watch the process YouTube video but this card is pretty simple.
Jenlee Schoolcraft website is your Go To for budget friendly new and gently used crafty projects. You'll find a great assortment of items at excellent prices AND if you use my name, Dorlene as the coupon code, you'll receive 10% off your total. Can't beat that!
I used a stamp Sophisticated Animal for the focal image on the card front and two different circles. One cardstock and one in vellum. I love the way this turned out. It's so unique and perfect for a birthday celebration!
Happy National Strawberry Day. I swear there's a national holiday for just about anything but hey, it gives me excused to make theme specific cards!
I created this card by adding red watercolor paint on a thick piece of white cardstock. Then, I created my own patterned paper by stamping two different strawberry stamps and some paint splatter around it.
Once that was dried, I heat embossed a sentiment on patterned vellum and adhered this panel to the patterned paper using four white brads.
Hello! This card has so much going on. Watercoloring, embossing, stamping, vellum and brads.
Check out the process video on my YouTube channel and follow the Instagram Hop starting on my IG account, @3sons_and_astar
Hey there! Not only are these cards fulfilling my Sizzix Sidekick challenge but also the Create Three Ways IG challenge. The IG challenge is to take one item and create three different cards using it.
I used the Hello Puddles stamp and die set to make 3 cute Get Well cards:
FSJ is no longer in business but that doesn't mean you can't make a similar card. There is a process video so you can see how two of these were created. Here's a hint, I used stencils, vellum, and a circle punch.
Check it out:
And don't forget about the IG hop to see what others created! My IG is @3sons_and_astar
Do you struggle making masculine cards? I know I do. I decided to create one for this card sketch by Sketch n Scrap.
I used a stamp set from Fun Stampers Journey (currently Spellbinders) to create my background and focal images for this card. The sentiment is from CTMH.
To create the background, I placed three of the stamps on the acrylic block and stamped them across the piece of 5x3.75" red paper using Versamark Ink; sprinkled white embossing powder over the images and then used a heat gun to set. I found a blue piece of cardstock in my scrap bin and cut it to 5.5x1". Card making is the perfect time to use paper scraps!
I stamped the sentiment directly on a piece of white cardstock measuring 3.5x2". The two focal images were stamped and fussy cut on more scrap paper before adding to the left of the sentiment box.
The inside greeting was stamped in the middle of the card but also some beer bottles lined the right side. I'll tell you a secret...I wasn't planning on putting those bottles on the side, but I got some ink smudge there so instead of freaking out...I decided to embellish.
I found the little clip on my desktop so I decided to add that with a little rolled piece of twine. That little bit plus some stars were the only embellishments needed to complete the card. Nothing fancy but perfect for a masculine birthday card!
Be sure to check out Sketch n Scrap for your card & layout sketches. They post two of each sketches a month on their blog and on their FaceBook group.
Do you have a hard time making masculine cards? I think most of us do but I made one for the Sketch n Scrap card sketch #248 and I love it.
There were scraps of animal prints on my desk so I decided to use them for this card. I also used the back side on one of the papers for the white cardstock. This worked well because the patterned paper was a heavy weighted paper.
The stamp set that was used is from Fun Stampers Journey which is now a part of Spellbinders. I don't know if it's available any longer, but it is a good one!
The image was colored using a variety of alcohol markers and the sentiment used is an older CTMH stamp set.
See the process here:
Be sure to visit the Sketch n Scrap blog and/or Facebook page for all the sketches available and lots of inspiration.
Today’s rainbow challenge is YELLOW. I used a two layer stamp set from Altenew for this card. I used two different yellow inks for the flowers and two greens for the leaves.
To add more color after stamping, I used a yellow chalk pencil on the petals. This made a huge difference!
I dipped into my yellow paper scraps for all the papers needed and then added enamel hearts and yellow splatter to complete the card.
Check out the YouTube process video below:
Altenew Spring Daisies stamp set
Heidi Swapp for the heart enamel dots
Yellow Color Silk (splatter) from FSJ
Ink pads from CTMH
I decided to challenge myself to make a series of cards using each color of the rainbow. I’m creating and posting them in ROYGBV order. Click on the CHALLENGE label to see the past two card posts and get the YouTube links.
Oh how I love an easy fun fold card! This one was quick and actually pretty easy to create. I used Granny Smith green cardstock and Cougar Smooth White cardstock from CutCardStock and the green polka dot patterned paper from The Basics 8" paper pad from Hobby Lobby.
This card is featured at the CutCardStock blog. Check out the blog for other projects! My recommendation is to watch the YouTube video because it may be easier to follow.
Once all the patterned pieces are adhered to their correct places, cut a shape out of the front of the card. I used a circle, but you can use any shape.
Adhere the right side of the accordion piece to the right side of the inside right side of the card. Adhere the tabs to the back side of left side of the accordion piece; then fold up the accordion, add adhesive to the front of the tabs and then close the card. Now the accordion is attached to the inside of the card!
When looking through the cut shape from the outside, adhere the decorated cut shape to the portion of the accordion that is showing through. This allows it to swing.
Cutting Dimensions:
Card Base: 5.5 x 8.5"; scored at 4.25"
Accordion Piece: 5.25 x 6"; scored at 2" & 4" on the 6" side
Tabs: Two .5 x 4"; scored at 2"
Pattern Paper Pieces:
Card Front: 4 x 5.25"
Strips for the Inside: Two 1.75 x 5.25"
White:
Strip for Inside: 1.75 x 5.25
I also used white for the circle that swings out. This is the same size as the circle you cut from the card front.
My "use my paper kits" mission is still going strong. I saw this cute layout sketch and decided to use it for a 5x7 photo I have of my granddaughters last 4th of July.
My hope was to use scraps for it but I ended up cutting a few strips off full sheets of patterned papers. I'm ok with that since this is an older kit and I'm on a mission to bash them! I still have plenty of full sheets & most of the sticker sheet left.
Check out the process video here:
Here are some photos:
Products used:
Stars & Stripes Paper kit from Close to My Heart
Embellishments from Pebbles
Enamel dots/stars from my stash
Color Silk; Sparkle from Fun Stampers Journey (Spellbinders)
Sketch is from IG @christys_beautiful_life which was posted on @piececraftlove story.
Be sure to click on the subscribe button to see all my YouTube process videos. I post at least two a week with one always on scrapbooking and the other is whatever I'm creating in the Command Center.
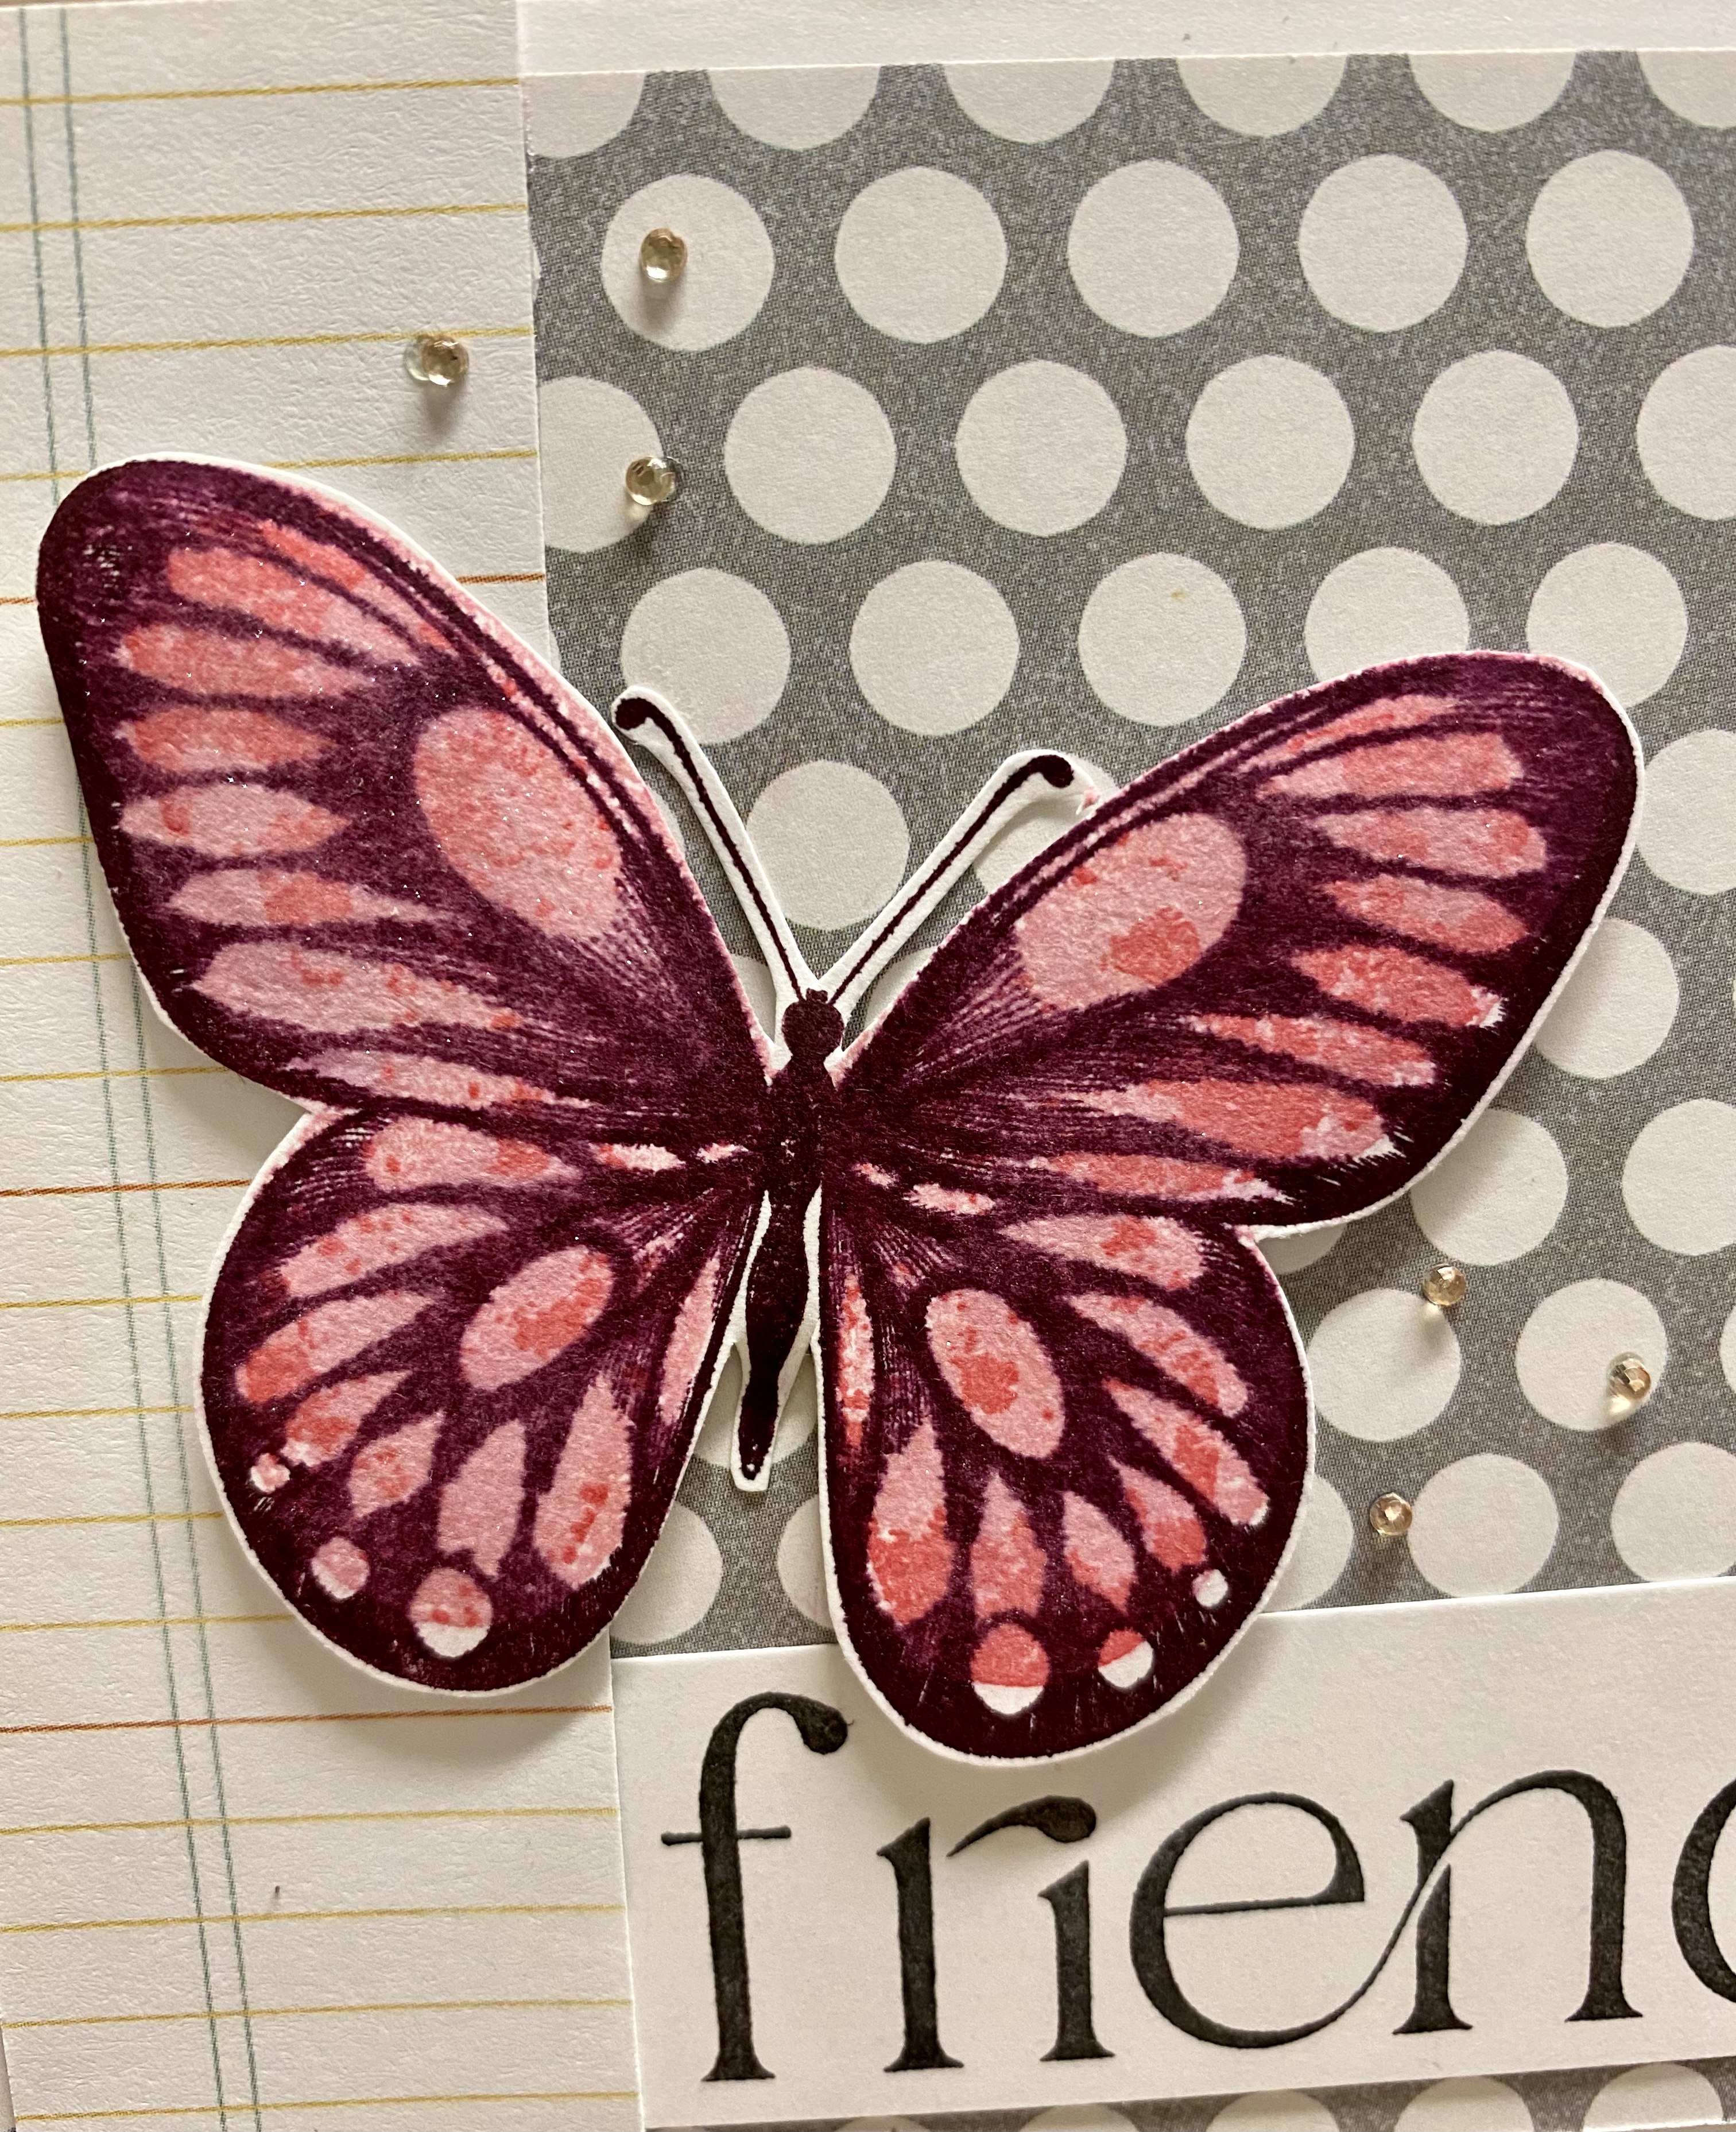
I'm back on the Sketch n Scrap blog with a beautiful butterfly friendship card. Sketch n Scrap has two card sketches and two scrapbook sketches per month and they are fabulous! Here's my card:
And the sketch:
Another view:
Card sketches are so easy to follow and I mostly followed it exactly as is with the exception of not having scallops on the left side strip.
The butterfly stamp is a 3-layered stamp and so pretty! I added some tiny rhinestones and Glitter Marker to add a little bling to it as well.
Check out the YouTube process video:
Products Used:
Stamp Sets: Sentiment (CTMH You Can Do Anything); Butterfly (FSJ)
Inks: SU! xx and xx; CTMH Blush
Rhinestones: Close To My Heart
Patterned Papers from my stash
Be sure to click over to the Sketch n Scrap challenge site to link your own card or layout!
Well, I'm glad that I decided to start a Messy May series this month because I'm having a lot of fun getting messy! I needed more bags for my Monthly Card Kits so I made some.
Close ups of the bags:
Aren't these fabulous?! I was gifted this large white butcher paper roll and love how I am able to make my own bags with it.
The YouTube video:
If you are interested more in my Monthly Card Kit, click on the tab from the home page.
Products Used:
Stampin Up! Products: Highland Heather and Pale Plum ink pads, Flowing Flowers and Gorgeous Grunge stamp sets
Fun Stampers Journey/Spellbinders Products: Sweet Berry, Green Olive and Pineapple Smoothie acrylic paints
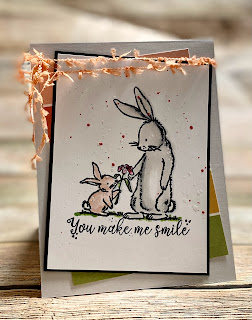
I gotta tell ya...I love this card. The bunnies are so sweet and coloring them in was so easy using alcohol markers!
I have not invested in expensive Copic markers but purchase alcohol markers in sets at Tuesday Morning, Ross and other discount stores. To me they do the same job and look just as good. The key is using a light, medium and dark shade when coloring.
Check out the quick video...I even show my face in this one!
Products Used:
Stamp Set: CTMH
Markers: Variety of generic alcohol markers
Ink: Archival Black
Sparkle and Outrageous Pink Color Silks from FSJ of Spellbinders
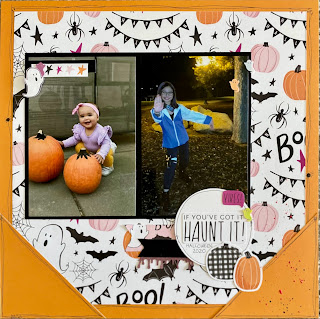
I’ve mentioned it before and I’ll let you know again, my friend has her own scrapbooking website that is all scrapbooking ALL the time. She hosts classes, tutorials, Zoom crops, etc and it’s free. There is a paid membership option too which has tons of benefits and you should definitely check it out HERE.
I was a Design Team member when she first opened the site - I took a break and now I’m back!
Here’s a sketch:
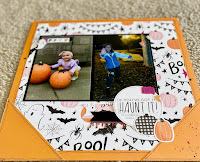
And here’s my layout:
A process YouTube video:
Details:
Boo kit by CTMH
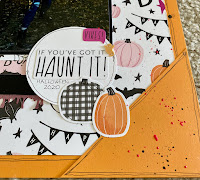
Splatter is Bubblegum and black color shine by Spellbinder
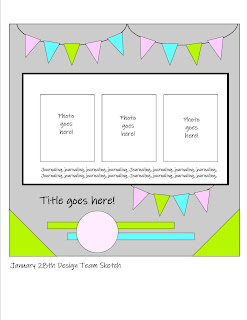
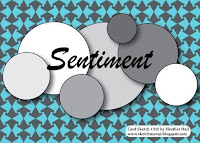
Time for another sketch at the Sketch N Scrap challenge blog. I love using sketches as a jump off point when making cards or layouts. SNS has two layout and two card sketches each month. Be sure to check out the blog for inspiration.
Here's the sketch for the card:
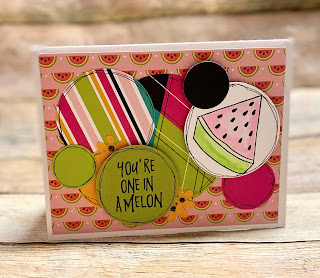
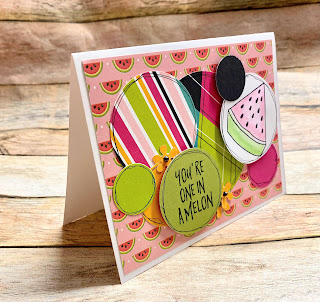
And the completed card:
I used some leftovers from a 6x6 pad, cut and punched a bunch of circles in different sizes. I used a stamp set from Fun Stampers Journey for the sentiment & watermelon slice.
I found those little yellow flowers on my desk and added black centers with some Nuvo drops.
Your turn...create a card inspired by the sketch and link it to the SNS blog before the end of January.
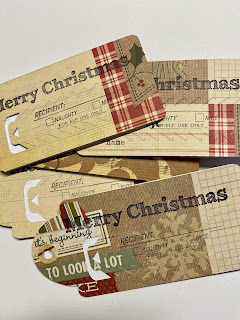
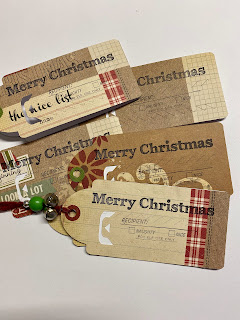
Here it is…the last day of 2021 Twelve Days of Christmas Tags!
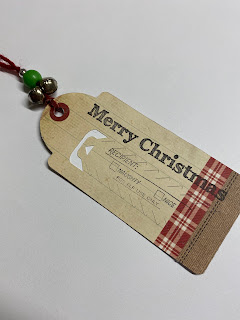
I used the Cricut to cut these “tear away” tags. I got the SVG from Jennifer Maker’s website. She provides lots of great instructions and free SVGs on there.
I used two different stamps for each tag. Both stamp sets are from Fun Stampers Journey (Spellbinders).
Then punched out circles for the hole re-enforcers, some yarn & beads and jingle bells to finish them off!
Before the top and bottom of the tags are adhered, be sure to write the name of the recipient on the designated area. How fun are these?
I used a sheet of paper that has a full sheet of 4x6 cut-a-parts to make them so they have a collage look. I love it!
Be sure to leave a comment for an entry in the 12 tags giveaway. I’ll draw a name by the end of the week. Good luck!