Friday, July 29, 2022

TGIF; Thankful Friday #232


Another Friday is here and for that I am thankful. I started doing s condensed version of TGIF Thankful Friday on my InstaGram account @3sons_and_astar. If you'd like to share what you're thankful for, feel free to do that here or on IG.

What am I thankful for this week? A middle of the week day off! I decided to take Wednesday off and it was nice to wake up late, lounge around and just have the day off to do whatever I wanted.  My daughter and I went to our local thrift store and bought a super cute framed picture for my son; donated some books at the library; shopped at the Dollar Tree and bought ice coffee (slushie for me) from McDonald's.  And then, I didn't even cook dinner!  We went out.

The week went by so quick!

I hope you enjoyed your week and remember no matter what, there is always something to be thankful for!

Thursday, July 28, 2022

Scrappy Collage Card

If you're like me, you have a lot of paper scraps. And if you're a mixed media artist, many of those papers are painted, stenciled, stamped, etc. I have my junk papers, gel printed papers and plenty of others that I keep collecting. I can't seem to throw anything away!


I've made these scrappy collage cards before and the recipients really love them. You can check these cards out HERE. I don't know if there are any rules or guidelines to creating these type of cards, but I just go by what looks visually pleasing to me. I think the hardest part is knowing when to stop.

It's always good to have some sort of focal piece. In this collage, the focal piece originally started as the blue circles, but since they were off to the side, I felt it needed something more centered. I stamped and popped up a sentiment to finish the card.


I rarely sew on paper, but I felt this one needed the sewn border. I was happy I had black (I would have been fine with white too) thread in my sewing machine because I wouldn't have used it if I had to change thread - yes, I can be lazy!

Check out my process video and I hope it inspires you to grab your paper scraps and create your own! 


I have a ziplock bag that I hold my small paper scraps and is usually the first thing I grab when I'm creating a small project. Also in that bag are scraps from cuts that were made using my Cricut. Most end up like stencils and others are something like those blue circles. I'm telling you, I KEEP EVERYTHING!

If you are in need of inky fun papers, let me know. I'd love to share some of mine.

Wednesday, July 27, 2022

Rapunzel Cake Topper; Cricut Project

Cake toppers are becoming my favorite things to create! This is a simple one but with all that glitter paper, it sure does pack a punch!

The height of this cake topper is just under 6" and perfect for a small cake. I used the offset feature in Design Space for the "4" and the birthday girl's name "Carina". In fact, I used the offset feature for the name twice to give it more dimension.

The Rapunzel image was from the internet and I used the Print & Cut feature with an offset in Design Space.


The key to a great cake topper is layers! There is plenty of 3D foam adhesive on this one.

Look how great it looks on the cake!


I didn't film a process video on this one but click HERE, HERE and  HERE to see two other cake toppers that I created.


Monday, July 25, 2022

MIR February, 2021; Scrapbooking Layout

I'm almost caught up with my scrapbooking...who am I kidding? I'm not caught up nor will I be for a long time! But I feel like I am so there you go!

I like to do Month In Review layouts for those occasions that only took a photo or two and don't always require an entire 12x12 layout. This one started as a MIR but quickly became a layout about two of our February birthday babies - my son and my niece.

I wanted to match the orange in my son's hoodie and knew I had this The Guy paper pad that would work out great for these photos. I used a sketch and mostly matched it as it was intended but I don't always do that.

Here are some close ups of the clusters.


All the embellishments were pretty much from this paper pad with the exception of a few birthday stickers and of course enamel dots.  I love using what I have and this is a great example of it.

Here's the YouTube video:


The sketch was from Scrapbooking With AnnMarie which is a website that is all scrapbooking! Great challenges, sketches, tutorials and socializing. There is a free and paid membership option.


Friday, July 22, 2022

TGIF; Thankful Friday #231


Happy Thankful Friday! This has been another rough week with DS1 in and out of the hospital. I'm thankful for charity, sponsorships or whatever you want to call it when a hospital foundation will assist financially if you don't have coverage. I'm also thankful for programs such as GoodRx which can significantly lower your prescription costs.

You don't realize these things are available when you have insurance but it is SO helpful when you're between insurance plans.

How about you? What are you thankful for this week? Share in the comments here or on my IG account @3sons_and_astar


Thursday, July 21, 2022

LeAnna and Llamas; STDA Layout

This layout was created using a sketch from Scrapbooking With AnnMarie (Scrapbooking The Day Away). Even though most of it is covered, I love the large circle in the middle of the layout. It sure does give direction to the photos.


I had this paper pack (CTMH) for years. I have almost put it in the giveaway pile many, many times but I just love the patterns. It has a homespun, farmish feel and knew it would be perfect for these photos of my granddaughter and the llamas. The labels are from a pack that I purchased years ago by Jillibean Soup. They made a great addition to my embellishment clusters!


Check out the YouTube process video to see how I played with the embellishment placement and finally finishing the layout!


Tuesday, July 19, 2022

Escape Room; CutCardStock Layout


Hi there, I made another fun layout using CutCardStock papers and my Cricut. Have you ever participated in an Escape Room? Oh my, they are so much fun but can be a little stressful. My kiddos and I decided to do one last year. The theme was Prison Break and unfortunately, we didn't break out before the alarm was triggered.

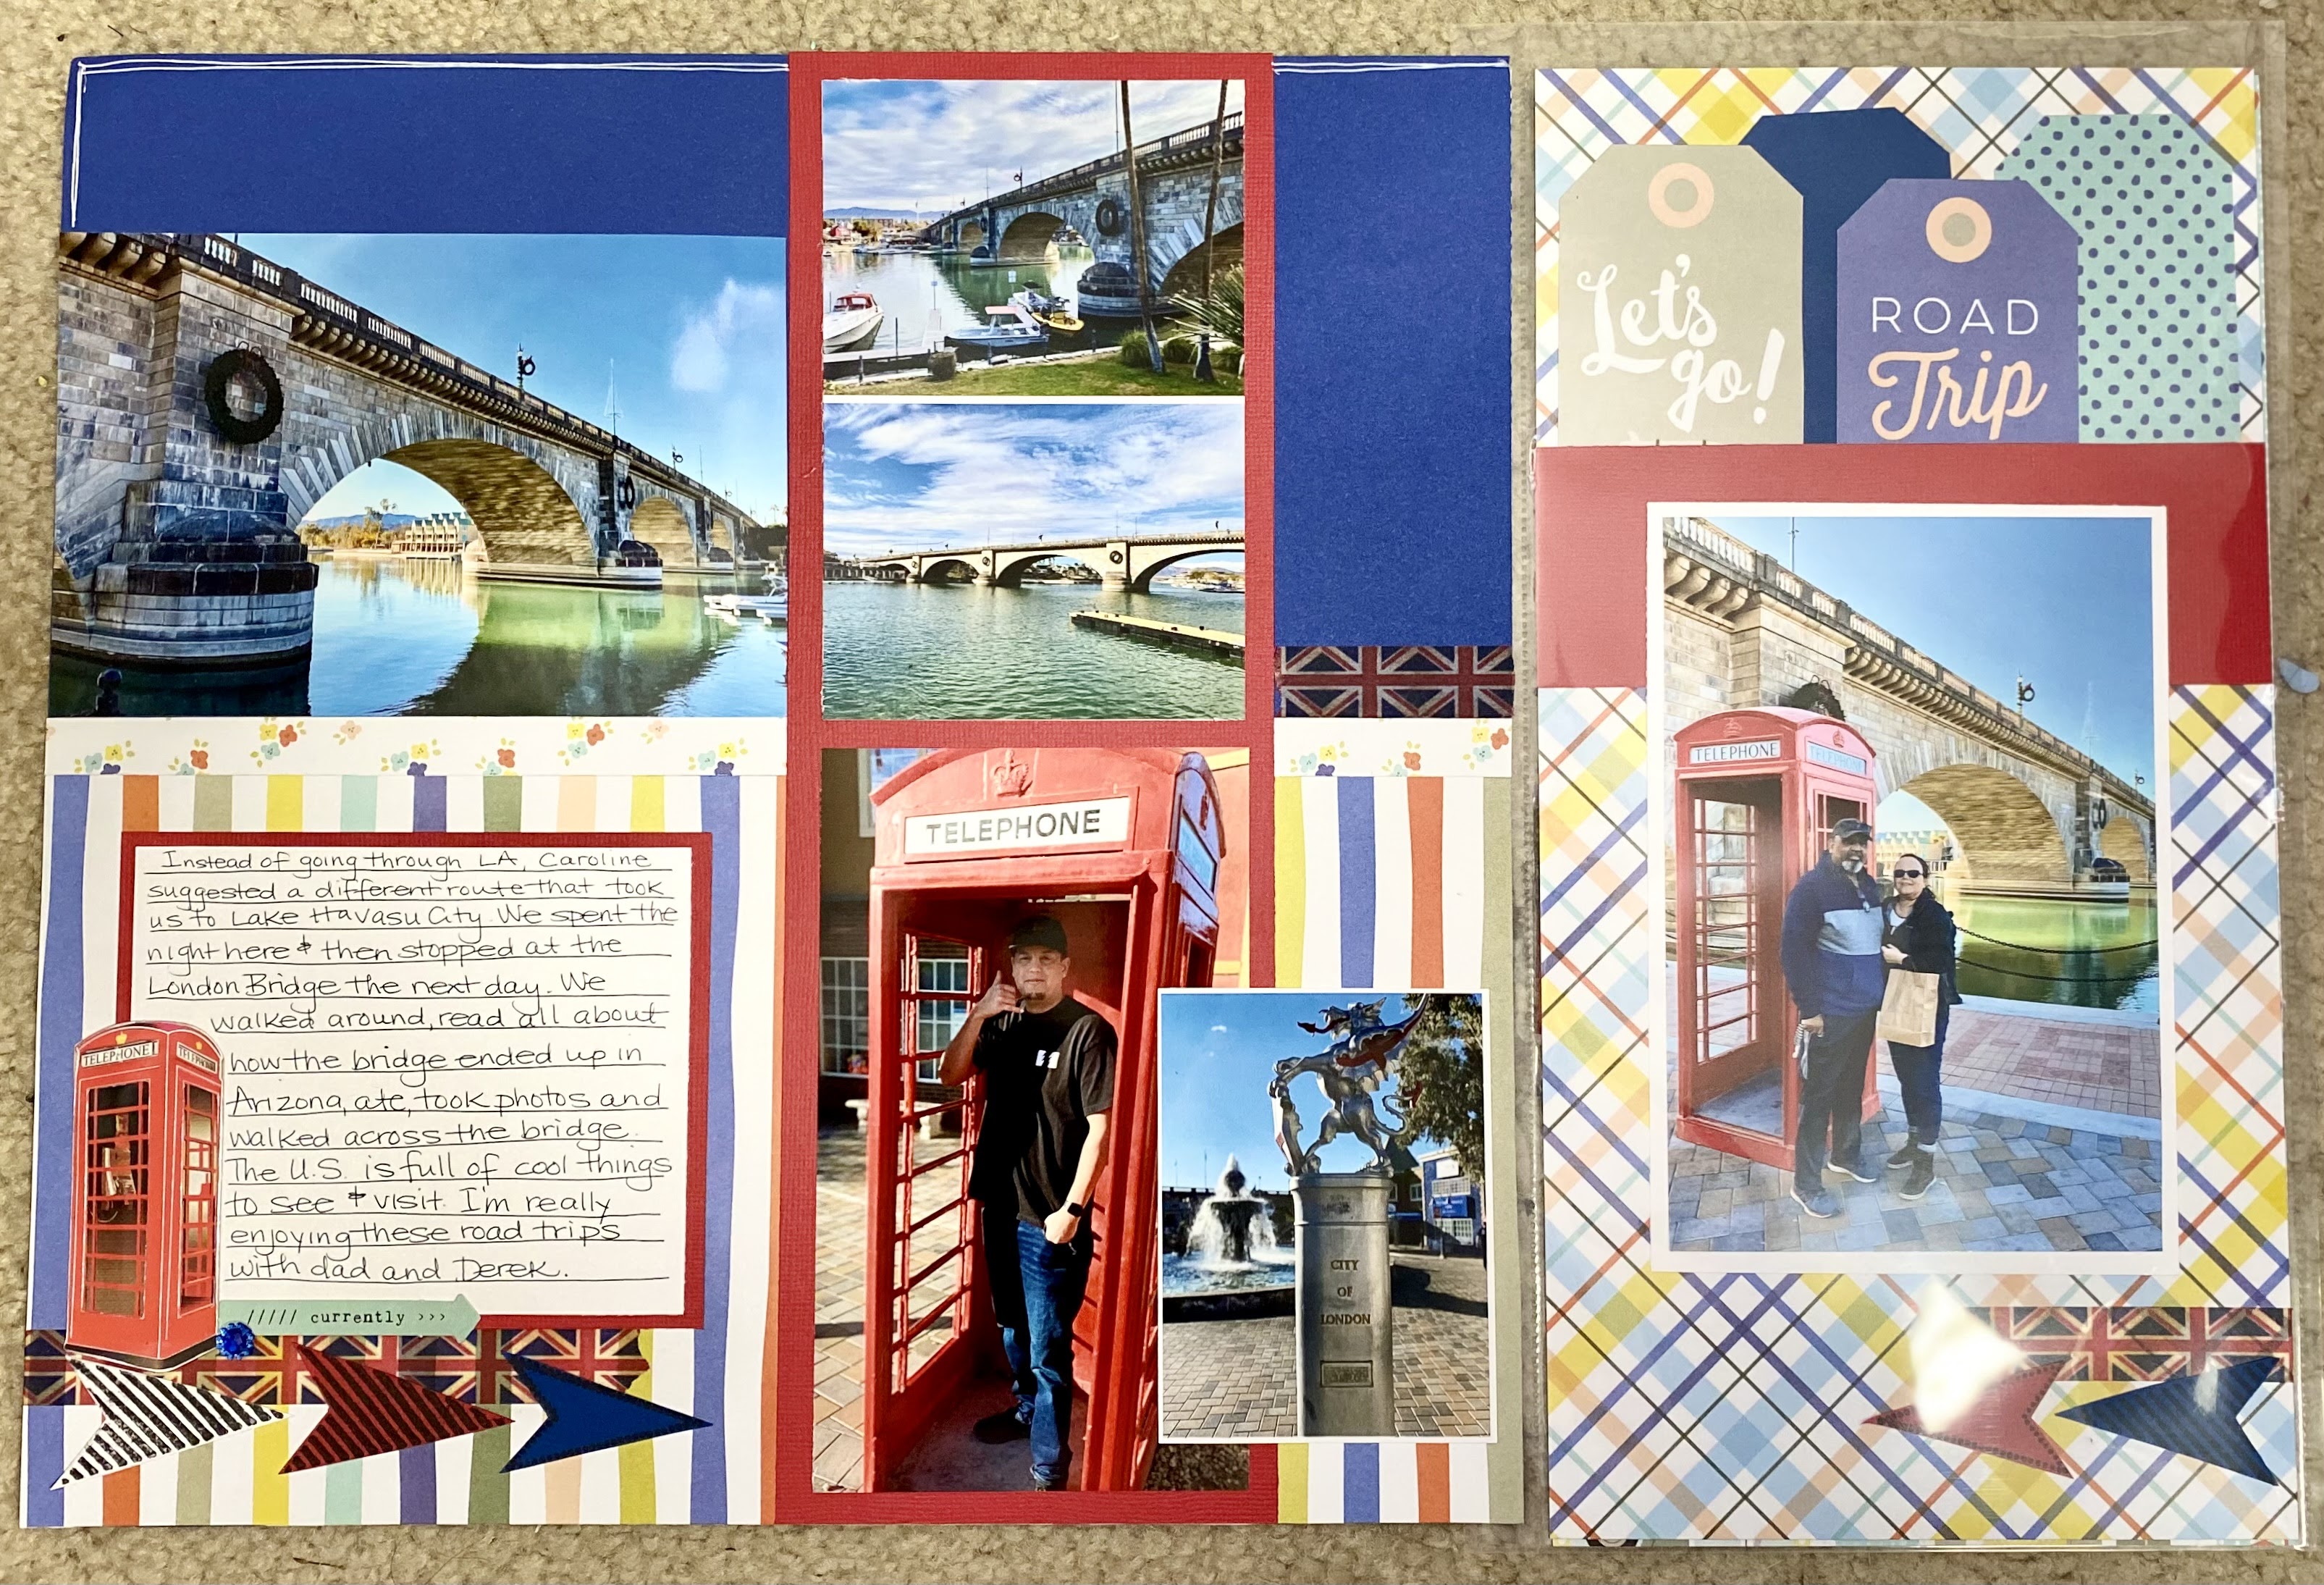
We did take some photos once we were done and of course, I needed to scrapbook them. This layout took awhile to start since I wasn't sure what color scheme to follow or theme. So, I took direction from the photos. The Escape Room staff provided us with photo props so I ran with those bright colors and emojis.

All the papers/cardstock are from CutCardStock - mostly the Pop Tone Assortment Pack. All of these colors can be purchased in an individual pack. I cut the Wedding Cake white cardstock into an 11x11" square and matted it with a piece of Black Cardstock. The colored strips were all 11" tall by 1ish width.  I used scraps for these strips, but you could use an 8.5x11" piece of paper for these.

Before adhering the white 11x11" square, I gutted the inside of the black cardstock. Both of these cardstocks are a great weight so I wanted to cut down on the thickness and keep some of that black cardstock for another project!

To do this, I used my paper trimmer and set the blade at 1.5" from the edge and cut each side stopping at 1.5" from the other edge.

Each strip was adhered to the center of the white cardstock using a centering ruler in no particular order.

Isn't that fun!?!

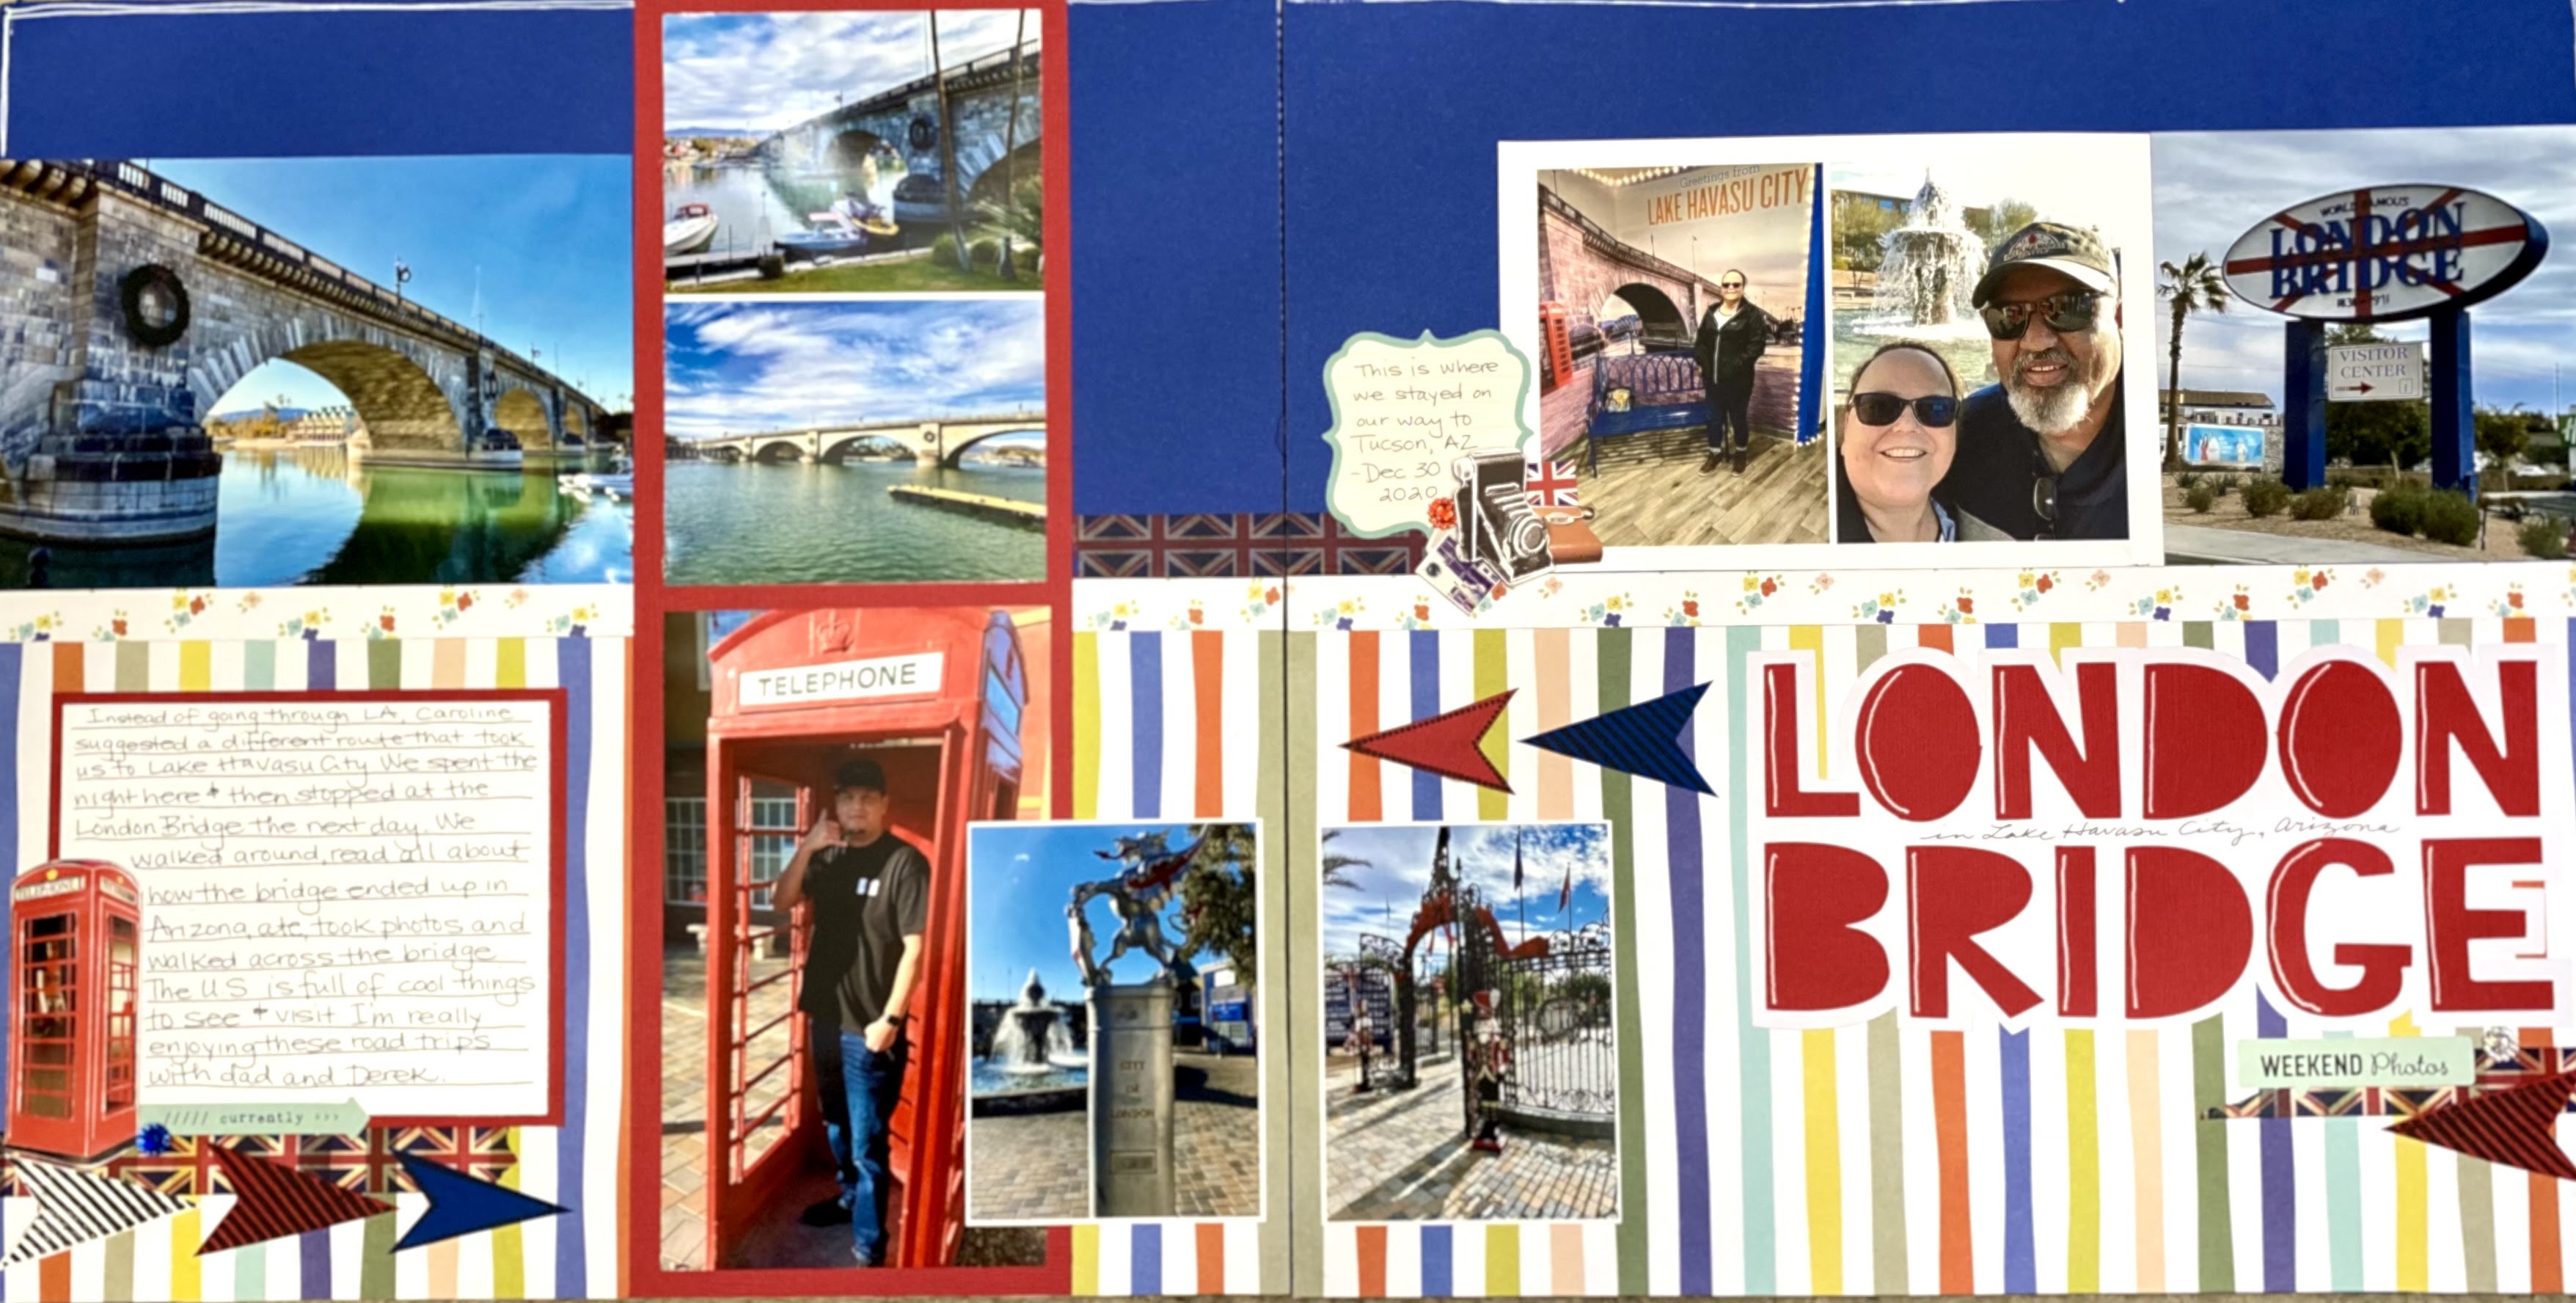
Once I adhered the strips, I used splatter, stamps and various inks to create a little interest before adhering the photos, title and embellishments.

The word "escape" was already in Design Space so I tried to emulate the look by using different fonts for the word "room".  I placed the magnifying glass behind the "c" before creating an offset of the entire title. I love how this turned out!

Here are some close ups of the final layout and to check out the CutCardStock Blog post, click HERE.


Products Used:
CutCardStock in Basis Gold, Pop Tone Blue Raspberry, Pop Tone Red Hot, Pop Tone Cotton Candy and Pop Tone Green
CutCardStock in Wedding Cake White and Black
Stamps:  Ink Road Stamps 
Emoji Die Cuts by Simple Stories
Splatter:  Color Silks in Black Licorice and Silver
Emoji Washi Tape


Monday, July 18, 2022

Stencil Cards

Have you had a chance to play with these layered stencils? I made the prettiest cards using two different sets. Although they are a little pricey, I do recommend that you try them at least once. Purchase a stencil that you know you'll use often.

When I first use the stencils, I'll copy the sample as far as colors, etc., until I get a good feel for the stencils.

These cards were simple to make because of the layered stencils - just add a sentiment and some bling and you're all done!

Check out the YT video for the cards:

Aren't these gorgeous!?!

The sentiment stamps were a gift from a close friend. They do not have a company or stamp name on them.

The stencils are from PinkFresh Studio.

Friday, July 15, 2022

TGIF; Thankful Friday #230


TGIF and Happy Thankful Friday!

This week I'm thankful for my daughter. She's off work over the summer and she's been helping me so much with cooking and cleaning. It's so nice to come home to a clean kitchen and food on the table!

Even though we're knee deep into SRM (Summer Reading Marathon), she is still taking time away from her books to help me out!

How about you? What are you thankful for this week? Feel free to share in the comments below.

I'm going to start posting these Thankful Friday posts on IG. Check it out @3sons_and_astar

Hope to see you there!

SNS Layout Sketch; Page AZ


Another great layout sketch from Sketch n Scrap this month! I did the 12x12 and then a 6x12 flip flap. It’s also the second side of another layout I made of the same visit.


I love the blue plaid paper that was used. Now I have to share something funny- I thought I only had a small piece of it and needed to really stretch it out over this layout and the two 6x12 layouts. When I put away the brown scraps, I found a whole other sheet of it!


These are the two 6x12 layouts stacked for the photo. 

Be sure to check out Sketch n Scrap blog for more inspiration and to link your interpretation of the sketch. 

The other layout that coordinates with these is HERE.


Thursday, July 14, 2022

6x12 Layouts

Do you create different size layouts in your scrapbooks? I love using these pocket pages that vary from 12x12, 8x12, 6x12 and even 6x6 sizes. I took so many photos of our time in Lake Havasu City, Arizona but didn't want to make more than a two page 12x12 spread. I mean, I guess I did, but I shortened  them!  Here they are next to the 12x12 layouts that they are sandwiched between.


I used this 6x12 protector and added another five photos! These layouts are pretty simple, but I did love the way they turned out. I tried to emulate the full two page spread by using the same paper pack, stamped images, washi tape and other embellishments.


Check out the process video. I hope it inspires you to create different sized layouts in your scrapbooks.  I purchased my page protectors from Close To My Heart (CTMH), but I'm sure you can find them from other vendors.


Tuesday, July 12, 2022

Junk Journal Updo; Focus on the Good

It's been fun going back into my Junk Journal and completing some of the "unfinished" spreads in there. I love that most times, I have no idea how a spread is going to turn out and I LOVE THAT! This one page spread became a two page spread when I decided to include the leafy vine across both sides.


Check out the YouTube process video:


I hope it inspires you to do something similar. Remember, nothing is trash when it's in your craft room, be sure to keep all the pretty things and I'm sure you'll find a spot for them - especially in the Junk Journal!


Saturday, July 9, 2022

Another Triangle Fold Card; CutCardStock

I’m on a roll with these triangle fold cards! I used Basis Pink Cardstock for the base. The Basis Cardstock is 80# so it’s a great weight for cards! 

I created a process YouTube video that you can watch for instructions on making this fancy fold card.  Click   Hereto view.

The daisies, leaf and ladybug were all cut with my Cricut and Pop Tone Assortment pack also from CutCardStock. Be sure to click HERE to see the blog post on the CutCardStock Blog.

Both patterned papers were from my pink scrap pile and cut at 5.25x4 using a triangle template to cut the corners. 

Sentiment stamps are from Close To My Heart. I love stamp sets that have a stamp for the front and inside!


Friday, July 8, 2022

TGIF; Thankful Friday #229


What am I thankful for this week? This week I'm thankful for the fact that our neighbors have decided (for the most part) not to shoot off illegal fireworks. Oh my, it has been awful this past month or so but they are only coming very far between.

It's been crazy and our poor dog, Gracie is so freaked out! But it seems to be better (knock on wood) so that is what I'm thankful for this week.

How about you? What are you thankful for this week? 

Thursday, July 7, 2022

London Bridge; Using Stamped Images on Your Layout

These are the last full layouts for my 2020 year. We visited the London Bridge in Lake Havasu City in Arizona. I used a really basic layout to lay my papers down but then jazzed it up with some stamped images, stickers and random die cuts.

Check out the YouTube video to see the process and here's some photos:


Left and Right:


And finally some close ups of the clusters:


The patterned papers are from the Let's Go kit from PhotoPlay
Gemstones from Queen & Co.
Font:  BFC Paper Craft in Cricut Design Space
Everything else is from my stash

Isn't this a fun layout spread?  I can't believe I had a washi tape of the British flag. That was an awesome find!

Tuesday, July 5, 2022

SNS; Fancy Fold Belated Birthday Card

I took a sketch from Sketch n Scrap and changed it a little to work with this fun Triangle Fold Fancy Fold card.


 And here's my card:
Inside:

I used double-sided paper for the front and inside from my scrap pile.
Pink Cardstock is from CutCardStock
Stamps are from CTMH and Stampin Up!
Alcohol markers to color the stamped gifts.

The triangle template was made by cutting a 3.5x2.75” rectangle and cutting it in half diagonally.

Check out the quick process video on my YouTube channel:

I am making so many fun fancy fold cards for my Monthly Card Kit and realized that I haven't been creating them outside of my MCK and that's why I decided to do something a little different with this sketch.

Be sure to click over to Sketch n Scrap to join this challenge along with any of the other three challenges there. They have two card and two scrapbook layout sketches per month and lots of great projects from the DT (hey, that's me) and linkers.

Friday, July 1, 2022

TGIF; Thankful Friday #228


Hi there, happy Friday and happy Thankful Friday! This week I'm thankful for FaceTime. I may have mentioned this before but isn't this modern technology pretty cool? I mean, I can see my mom and actually sign with her (she's deaf) when she's in a whole other state. I can also talk to my granddaughters when we need a fix.

And with the right phone plan, it's all free!

So yup, that's what I'm thankful for this week. How about you? What are you thankful for this week? Let me know in the comments. 

LTCCB; I'm Back!


Hey there, I've returned as a Design Team member for the Love To Craft Challenge Blog. I love to create so it's perfect for me. LTCCB has changed their challenges to six weeks versus a monthly challenge so you have from July 1st through August 15th to link your Anything Goes project.

The thing I love about this challenge blog, is that it's not just a paper crafting blog, it's a "whatever you're crafting" blog. We want you to share your craftiness!


For this challenge, I did decide to showcase a handmade card with fun stamping. I had a request for a dragonfly card so I pulled out all my dragonfly stamps. Little did I know that I had six of them!


The stamp I selected is the one that I stamped in Electric Lime. I also used a purple watercolor pencil to add some color to it.

The black inked dragonfly was an afterthought. I started putting the other stamps away but I really liked this one so I thought...hmmm, what if I stamp this one over the green dragonflies? You know what? I LOVE the way it turned out!

I hope you do too! I also used a stitched rectangle die to cut out the panel and added sequins as well.

Don't forget to link your crafty project to the LTCCB challenge blog before August 15th.