Friday, January 12, 2024

Stamped Sympathy Cards

I received a request for sympathy cards so I figured I’d make a lot and add some to my card box. 

I'm so glad I decided to use my MISTI to stamp these flowers because I had to press a few times to get a good ink impression. I'm sure I need to toss a lot of my ink pads because some of them I've had for more than 15 years!

These cards use two different stamp sets from Stampin Up and they are both old sets that are no longer available. I love this flower stamp set since it gives the illusion of layered stamps with each impression. 

The first thing I did was stamp the sentiment on a 4.25 x 5.5" white cardstock base and then I stamped the same sentiment on a scrap piece of paper to create a mask. I used a magnet from the MISTI to hold it down while I stamped the flowers around it. I'm so glad I went with a monochromic color scheme on these cards. They are so pretty!


Check out the YouTube process video:

I tied metallic thread around the card and added some gems to pretty it up.

They are really very simple, but oh so pretty. I hate that I get many requests for sympathy cards but it’s a reality and sending cards is so important during this time.


Products Used:
Stamp Sets: Flowing Flowers and Heartfelt Sympathy from Stampin Up!
Cardstock:  Cougar Smooth White, Wild Blueberry, and Sand Castle
Ink Pads: Ballet Blue, Brocade Blue and Marina Mist for the blue card and So Saffron, Groovy Guava and Tangerine Tango for the orange card.  I also used black archival ink for the sentiment.
Metallic Thread from my stash
Gems from Hobby Lobby (I realized as I was putting them away that they are Glow-in-the-Dark gems...interesting!)

Wednesday, January 10, 2024

Hello December 2021 MIR

I love doing the Month In Review (MIR) layouts especially for December. For 2021, I took so many photos that I had to create more full layouts than normal which is fine with me! I did, however, get 11 photos on this two-page spread!


I filmed the process and it's on my YouTube channel. Be sure to check it out!


This layout used only one piece of double-sided patterned paper and some red cardstock scraps. I used some snowman and tree Cricut cut outs that I did years ago. The title was created by combining the words "hello" and "December" together and then creating an offset around it.


The background was created by cutting four 2" strips and four 1" strips. I adhered the strips two on top and two on the bottom on both sides. The red 4.5x12" red vertical strips was a much needed after thought which led to the two .5x12" strips on the left side. Color, color, color! I love it!


I have noticed that collecting Christmas papers is my hobby, so I need to really get in my collection and use these papers. Many I donated to my "Trash to Treasure" pile to bring to any future crops but I really need to use more so I can purchase more! LOL Isn't that how it's supposed to work!?!
 

Sunday, January 7, 2024

Winter Cardinal Card; Printable Cuttable Creatables


Happy New Year! I’m excited to announce that I’m staying for another term on the Printable Cuttable Creatables Design Team. 

Since winter is still here, I decided to create a card using the Winter Cardinal on Branch E567 cut file for the focal image.

I’ve said it before and I’ll say it again, I love that the cut files come with more than one way to cut them. For instance, with this one, you can either cut the pieces where it fits like a puzzle or they lay on top of each other. I’ll be honest, I wasn’t sure which one I preferred so I decided to cut both. I mean, if you’re making one card, you may as well make two!

After uploading the image into Cricut Design Space, I decided to create a base for my birds by duplicating the image (assembled) and then Uniting the entire image together.


I changed the red to white before cutting the pieces. By doing this, it allows me some guidance on where the pieces are to be placed. (This helps this woman’s old eyes but is not necessary to create the card.)

After placing all the pieces on my work surface, I used liquid glue to adhere the pieces together.

So pretty! To add some sparkle, I added some clear sparkly Nuvo drops to the snowy areas.

As I waited for this to dry, I went back to Cricut Design Space to make a frame for my cardinals to rest on. I decided to create a tunnel card effect for two reasons, one I love the look and two, I really couldn’t decide which patterned paper I liked for the card background so I was able to use all three!

I used the Shapes option in Design Space to create the tunnel frames. First, grab the square and unlock the size to create a 5.25 width by 4 height rectangle. You’ll want to duplicate the rectangle and change one to another color because we will be making two frames. Then insert an oval (also from Shapes) onto your canvas and play around with the size to fill most of the first rectangle as shown below.

Change the color of the oval so you can see it more clearly in the rectangle. Once you decide on the size. Use the Align function at the top menu bar to center align the two. Now select Slice at the bottom right corner to remove the oval.


For the second rectangle, use the same oval but make it smaller than the first one then repeat the aligning and slicing process as above.

You’re tunnel frames will look like this:


I cut one piece of patterned paper at 5.25x4” (without an oval) and adhered it to the A2 card base. Then adhered the smaller oval frame to that solid piece. I added foam adhesive to the back of the larger oval frame to give it some height.


I also added foam adhesive to the cardinal & branch and liquid adhesive to the branch tips that will be resting on the frame.

To finish the card, I added Nuvo drops to the center of the frame. It certainly gives a snowy appearance.


I love how this card turned out. The bird was so easy to put together and the card is so pretty. I’m so glad I decided to make two and both methods of cutting were easy so whichever one you choose, I’m sure you’ll be happy.


Be sure to check out the Printable Cuttable Creatables Blog for all sorts of inspiration. The DT has some wonderful and amazing projects - check it out!

And don't forget to use my discount code when purchasing files. 3SONS15

Friday, January 5, 2024

TGIF; Thankful Friday #299


Is it Friday already? I just went back to work on Wednesday from the holidays and it's nice to have a short week.

So this week, I'm thankful for a short work week (and a short post)!

How about you? What are you thankful for this week?

Thursday, January 4, 2024

Layered Birthday Card; CutCardStock


When I need a quick card, I turn to my Cricut and CutCardStock papers to create something pretty and this card is no exception! 

I found this pretty layered card in Cricut Design Space and knew it was perfect for a quick card. I love the pearlized paper, Jetstream from CutCardStock so I matched the other two colors to coordinate with the layers.

I used Jetstream, Pewter and Wedding Cake White for the layers of this card and Cougar Smooth White cardstock for the card base. I used my fingers and tweezers to remove all the cut out pieces before layering them with liquid adhesive.


Before adding the layers to the card base, I decided to add script patterned paper to the back.  Wow! What a difference! I love that simple addition.

Check out the process video to see how it's put together:


Check out my post on the CutCardStock Blog by clicking HERE. 

Tuesday, January 2, 2024

Big Title Layout

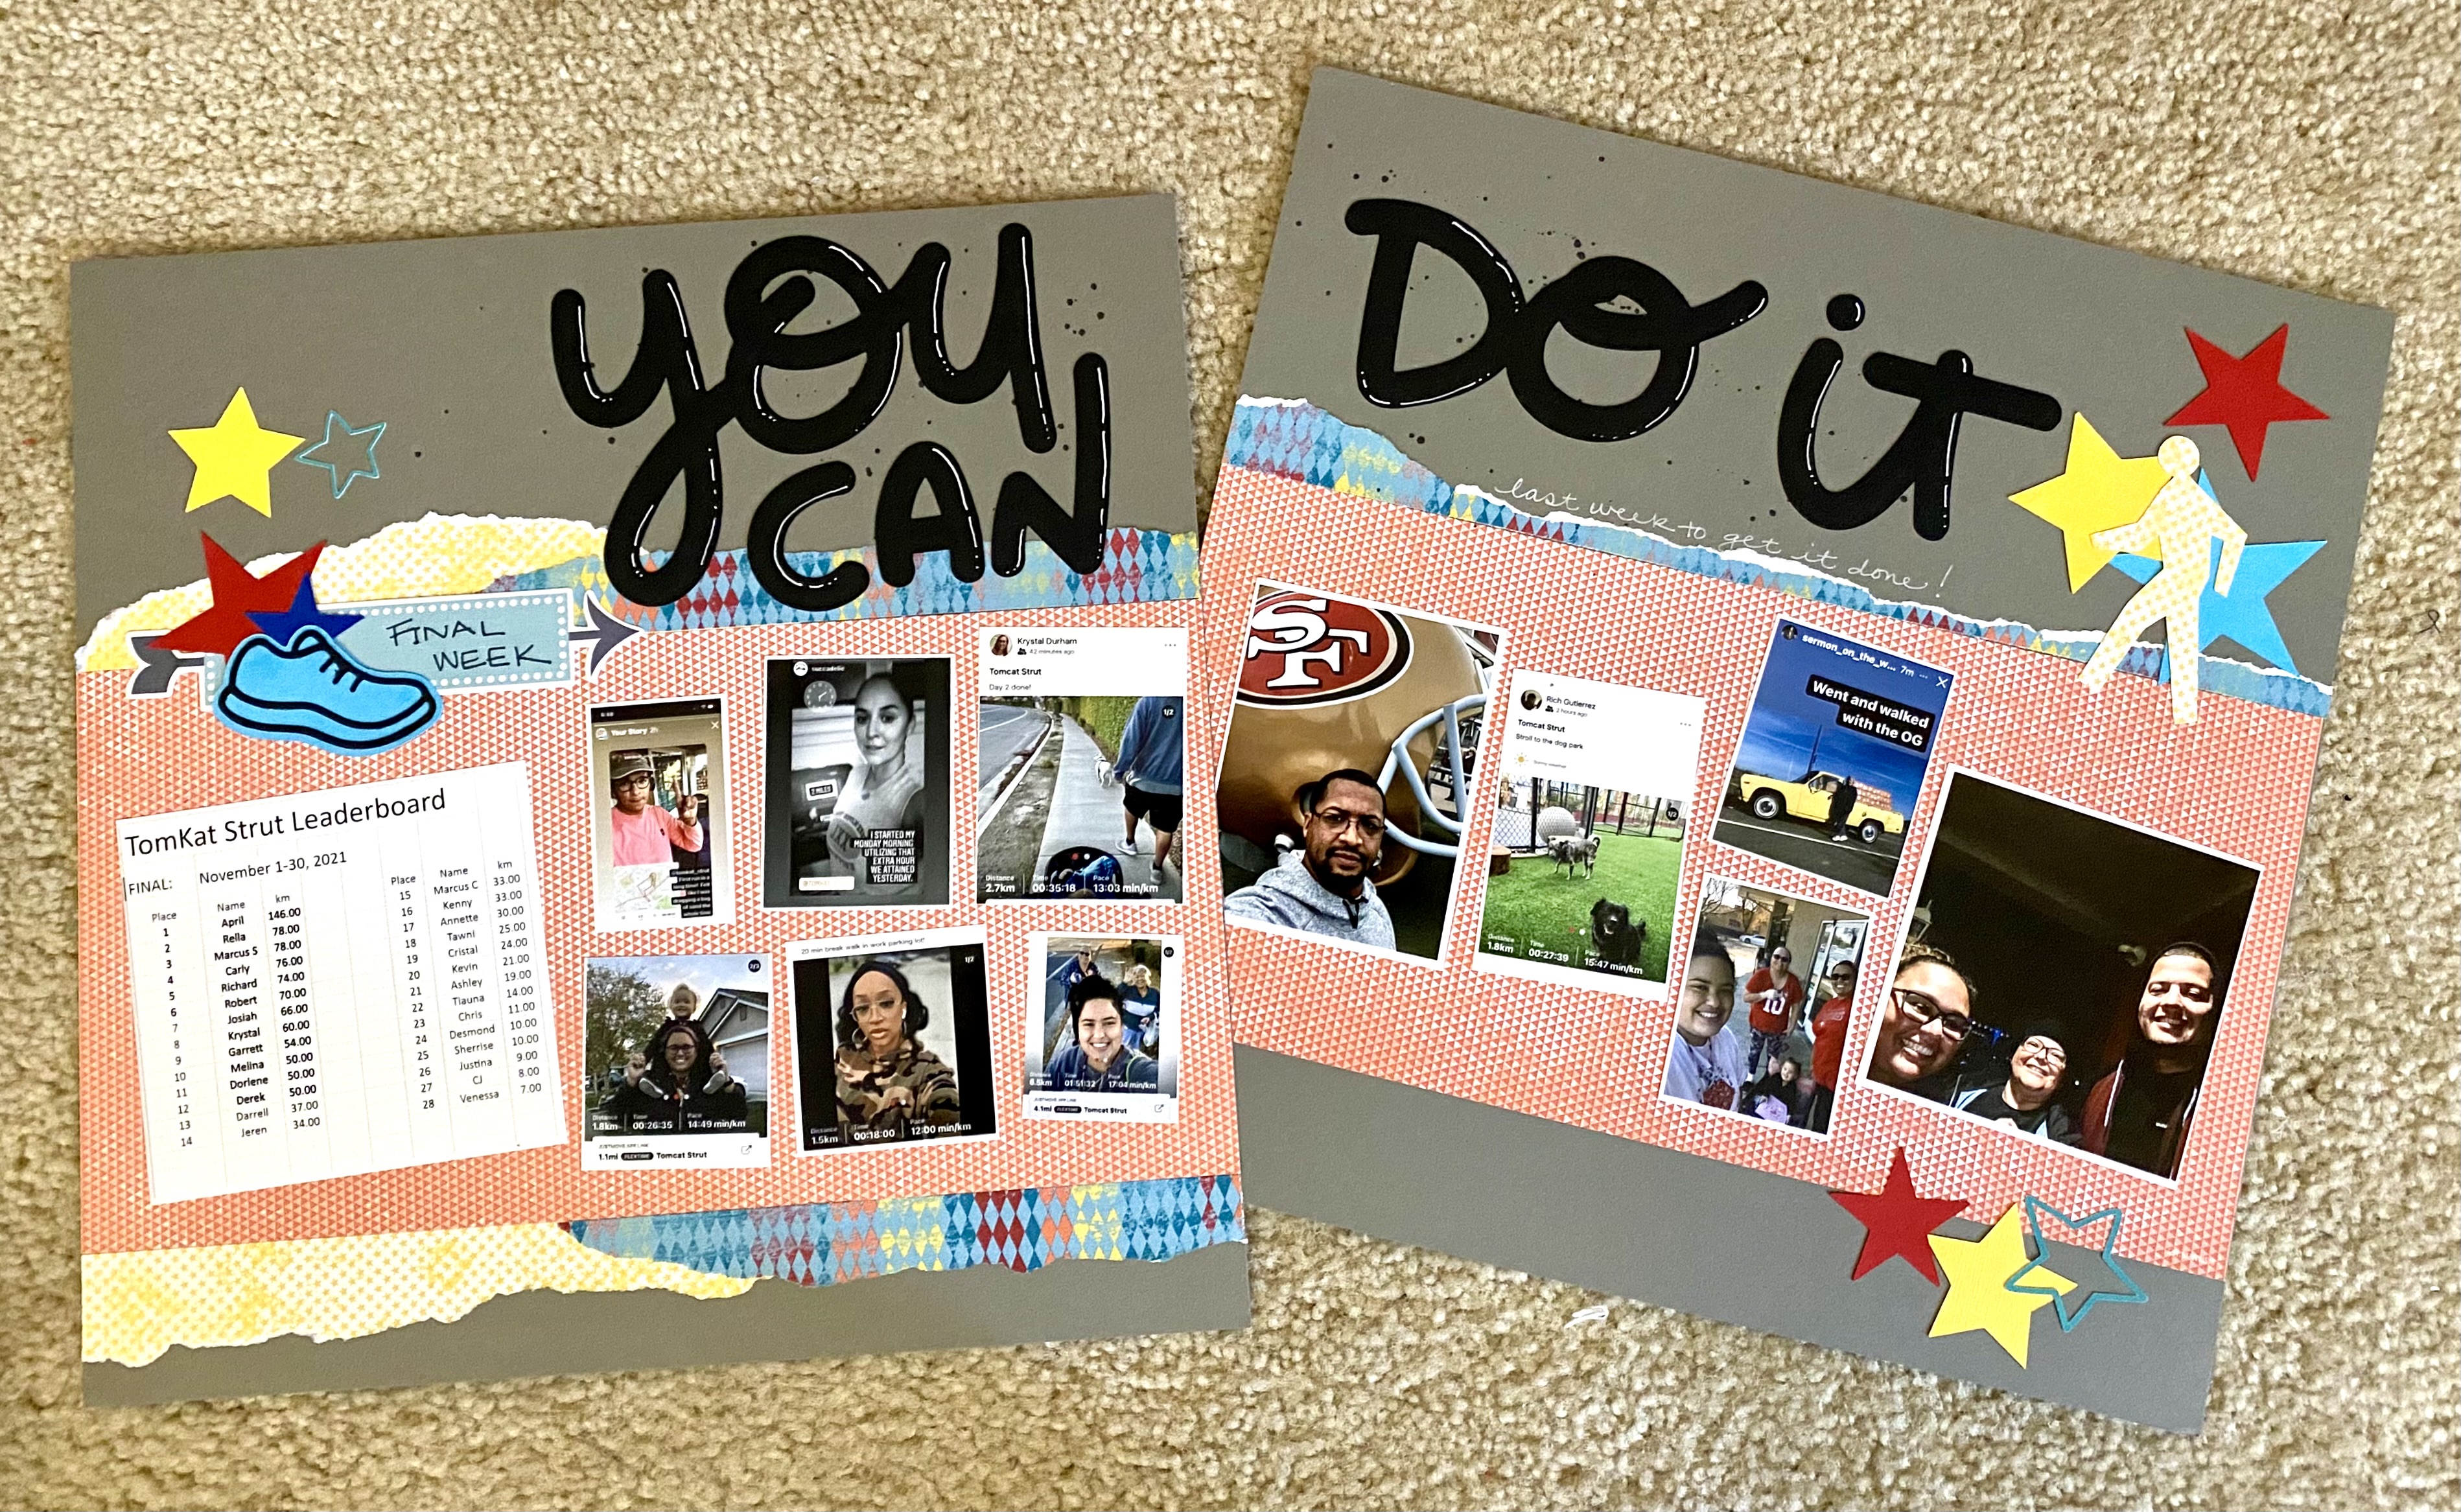
Hi there. You know I love working with sketches and when I saw this one from Cassie Wiscarson, I knew I wanted to challenge myself with it. But what I also decided to do was stretch this single page sketch into two.

I decided to use the photos from the First Annual TomKat Strut since I had so many different size photos and I knew this sketch would hold many of them. To get these fun small prints, I use the collage feature on a 4x6 size photo at my local Walgreens. I'm sure you can do something similar wherever you get your photos printed.


I cut a 12x12 piece of patterned paper into two 6x12 pieces and used scraps from the paper collection for the torn pieces to place above and below the main horizontal strip.


Check out the process video to see how I put this together. Because of the different sized photos, I got 12 of them on this layout!


Products Used:
Pewter and Black Licorice cardstock are from CutCardStock
Patterned Papers are from Stampin' Up!
Stars & walking embellishments were cut with the Cricut. 
White gel pen is a Gelly Roll pen from Sakura
Black splatter is Black Licorice Color Silk from FSJ (Spellbinders)

Monday, January 1, 2024

LTCCB; Venti Cup


It's time for another six week challenge on the Love To Craft Challenge Blog. I love this challenge blog because it's for all kinds of crafters not just paper. Which is perfect for me because I am a multi-medium type of crafter. I love all things crafty!

As you can imagine, I've been concentrating a lot on holiday crafting but I didn't want that to be my January 1st project, so instead of holiday decorations and gift tags, I am showing off a cup that I made for a gift. This project can be done anytime of the year.

I have a pretty good stock of these venti sized cups and I really need to make more of them. There are lots of designs in Cricut Design Space, but I purchased this one from Dottie Digitals. 


I love the metallic gold and white against the black cup. So pretty! And if you're wondering, I purchased the cup from Cups4Us.


Be sure to click over to the LTCCB to be inspired by all the DT projects and don't forget to link your own crafty project as well!