A place to showcase my crafts and talk about it...what's better than that? I hope to inspire and encourage others to create things for themselves, friends and family.
Hi there and happy Thankful Friday! This week I’m happy for my two work besties that retired today. I’m so sad but thankful for all the years of friendship and so many memories!
I'm still scrapbooking Easter 2022 although I've moved away from these photos for other layouts, I still need to get them done! I decided to use a Sketch n Scrap sketch for these photos and to extend it to a two pager. Sketch:
I chose this sketch because of all the paper strips. What a great way to use a kit and/or scraps! I'm still using the Hop To It collection from Photo Play with the hopes to use as many of these pieces as possible. Layout:
I'm excited to say that I used most items from this kit. I love when I go through my stash!
The pattern paper strips are cut at 2.5x10.5” and the white banners at 2.75x10.5”.
Be sure to check out the process video here:
You can check out the sketches on the Sketch n Scrap Monthly Challenge Group on FaceBook or on their blog. Even though I am no longer on the Design Team, I still love their sketches and plan on using them often!
Oh, how I love this pocket that I just completed in my Little Golden Book Junk Journal! After a trip to a succulent nursery, I saw a Rattlesnake plant and fell in love with how beautiful it is!
It really looked like someone painted the smaller leaves inside the larger paddle leaves. Oh So Beautiful! I wanted to emulate it in my junk journal. I know I didn't do the plant justice, but I still love all the bright colors in this envelope pocket page that I just completed. So much brightness with the blue painty papers and all the green tones! LOVE!
Take a look at my YouTube process video to see how this started and ended. This may be the first spread in my junk journal that ended up like I intended!
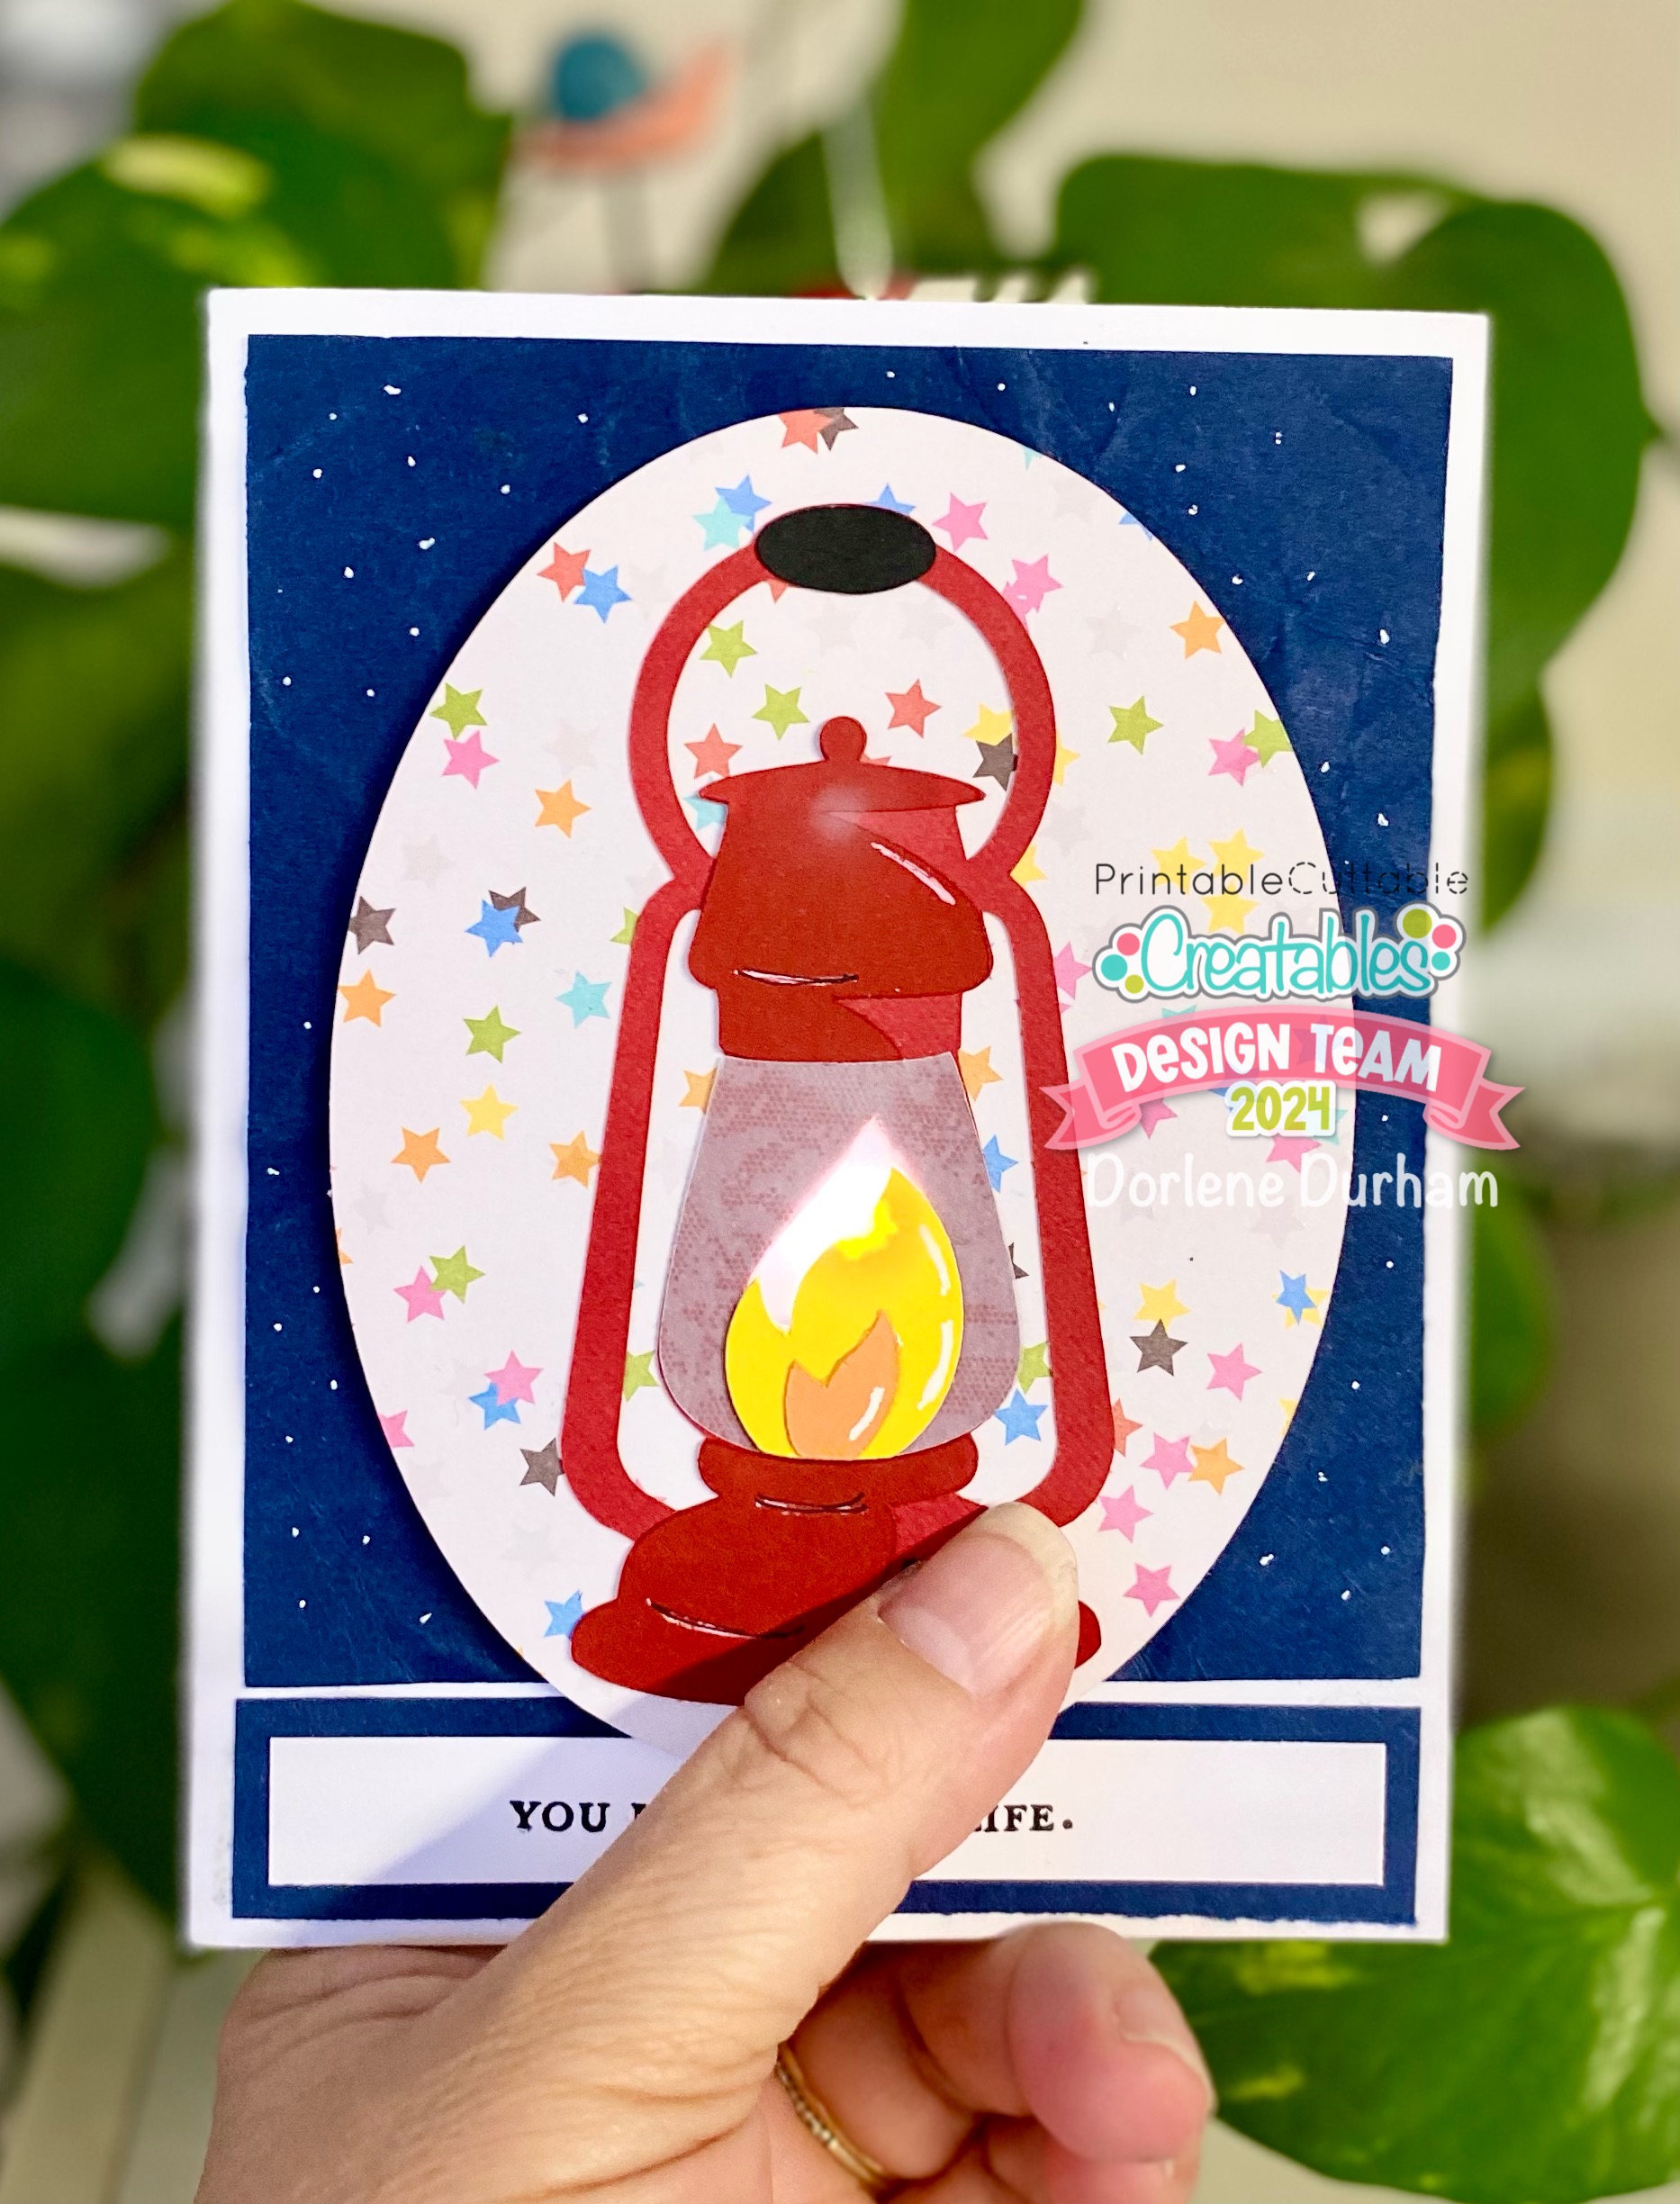
Oh boy, do I have a fun card to share! I used the Lantern E555 SVG file from Printable Cuttable Creatables and decided to make a light up card. I purchased light mechanisms for card making a few years ago and have been afraid to use them - but not anymore! I purchased the mechanisms from Pear Blossom.
I used two pieces of red cardstock for the lantern - one for the base and the other for the highlights. After cutting the pieces, I realized that the two reds I used were very closely matched. I grabbed some red ink and a finger dauber and decided to add some color to the highlight pieces.
Once the red ink dried, I placed all the pieces on my work surface. As always, I lay the pieces together before adding any adhesive. I used a piece of blue vellum for the “glass” instead of cardstock. I needed it to be more transparent since the light is going to shine through it.
In order for the light to shine through, I needed to cut a hole in the lantern base. I used the flames to determine where to place the hole and used sharp point scissors to cut it out of the back.
Hey, it almost looks like I know what I’m doing! I really had no idea but it all worked out! If you’d like to watch the process, check out the YouTube video on my channel.
I’m not sure if you can see the small opening right above the flame to the left but that is where I’m focusing on putting the light.
I eyeballed where to place the lantern because that will determine where to put the light mechanism and where to put the “PUSH” stamp. (The PUSH stamp was also purchased from the Pear Blossom booth but is from xxx)
Here’s the final card:
And what it looks like when the button is pushed:
To make sure the light will shine through, I also had to cut a hole in the star oval. I didn’t worry too much about exact placement as long as the hole was around the flame. Foam adhesive was placed around the light mechanism and around the oval to keep the oval/image even.
The blue cardstock on the card front was placed incorrectly, but when I tried to remove it, it wrinkled and tore a bit. Guess what? I then decided to purposely ball it up to make it very wrinkly before straightening it out again. I love how this OOPS became a piece of interest on the card front. And a few white dots makes it look like a dark starry sky!
I have two more of these light mechanisms and now that I’m no longer afraid to use them, you better believe they’ll be showing up somewhere else soon!
Hello and Happy Thankful Friday! I've been sick for most of the week, but I am thankful that I'm getting better. I have lots to be thankful for because I am able to take time off work when I'm sick; I am able to rest when I'm home; and I am able to get better.
What are you thankful for this week? Leave a comment below!
I’m participating in a YouTube hop with Rediscover Your Stash which is a Facebook group. This month is journaling. If I’m being honest, I’m really not sure what that means. So I talk a lot about journaling while creating this one page layout.
I’m also using a sketch from Stick It Down
And here’s the layout. Journaling and all!
I used a paper pack from CTMH and embellishments from Pebbles. The rectangles are all 3.5 high; one is 11”, 7.5, and 3.5 square.
Earlier this month, my daughter and I decided to clear out and organize the closet in the Command Center. We found lots of goodies (and junk) in there! I found a box of 1,000 library check out cards so I decided to see if anyone in the Junk Journal FaceBook group that I'm a member wanted some. Wow! I got tons of responses and was able to mail out a lot of these cards!
Many people asked if I wanted anything in return and I declined since I already have my own overflowing stash...well, that didn't stop them from sending Happy Mail! It did indeed, make me happy!
Look at all this!
I figured if I have all the new stuff, I may as well work on a new spread in the Junk Journal.
And here's the final two page spread:
Watch the process video for all the details, but as you can see, I go from here to there back to here and then there again! I love that about these junk journal/art journals. It's such a freeing way to create art!
I use acrylic paints, spray inks, bottled inks, ink pads, gesso paint pens and lots of homemade marking tools!
I found an editable file in Cricut Design Space that was designed for a T-shirt but decided to change it a little and make it into a cake topper. I have not played with pens in the Cricut so instead of cutting each letter, I used the Print/Cut function for the words.
I added two offsets and stars to add more layers and to make it really pop. The thing with cake toppers is layers and more dimension! Watch my process YouTube video to see how I completed it.
Hubby sure does love chocolate cake, we knew for sure we'd have one of those AND a cake topper is the best way to dress a store bought cake up!
I have this file in Cricut Design Space and you should be able to edit the years and words. Get the file HERE
Hubby goes by OWO as his "grandpa" name. When asked what he wanted to be called as a grandparent, he said, "Old Wise One". So, OWO for short and so much better! Let me tell you, it is so cute when the granddaughters call him that.
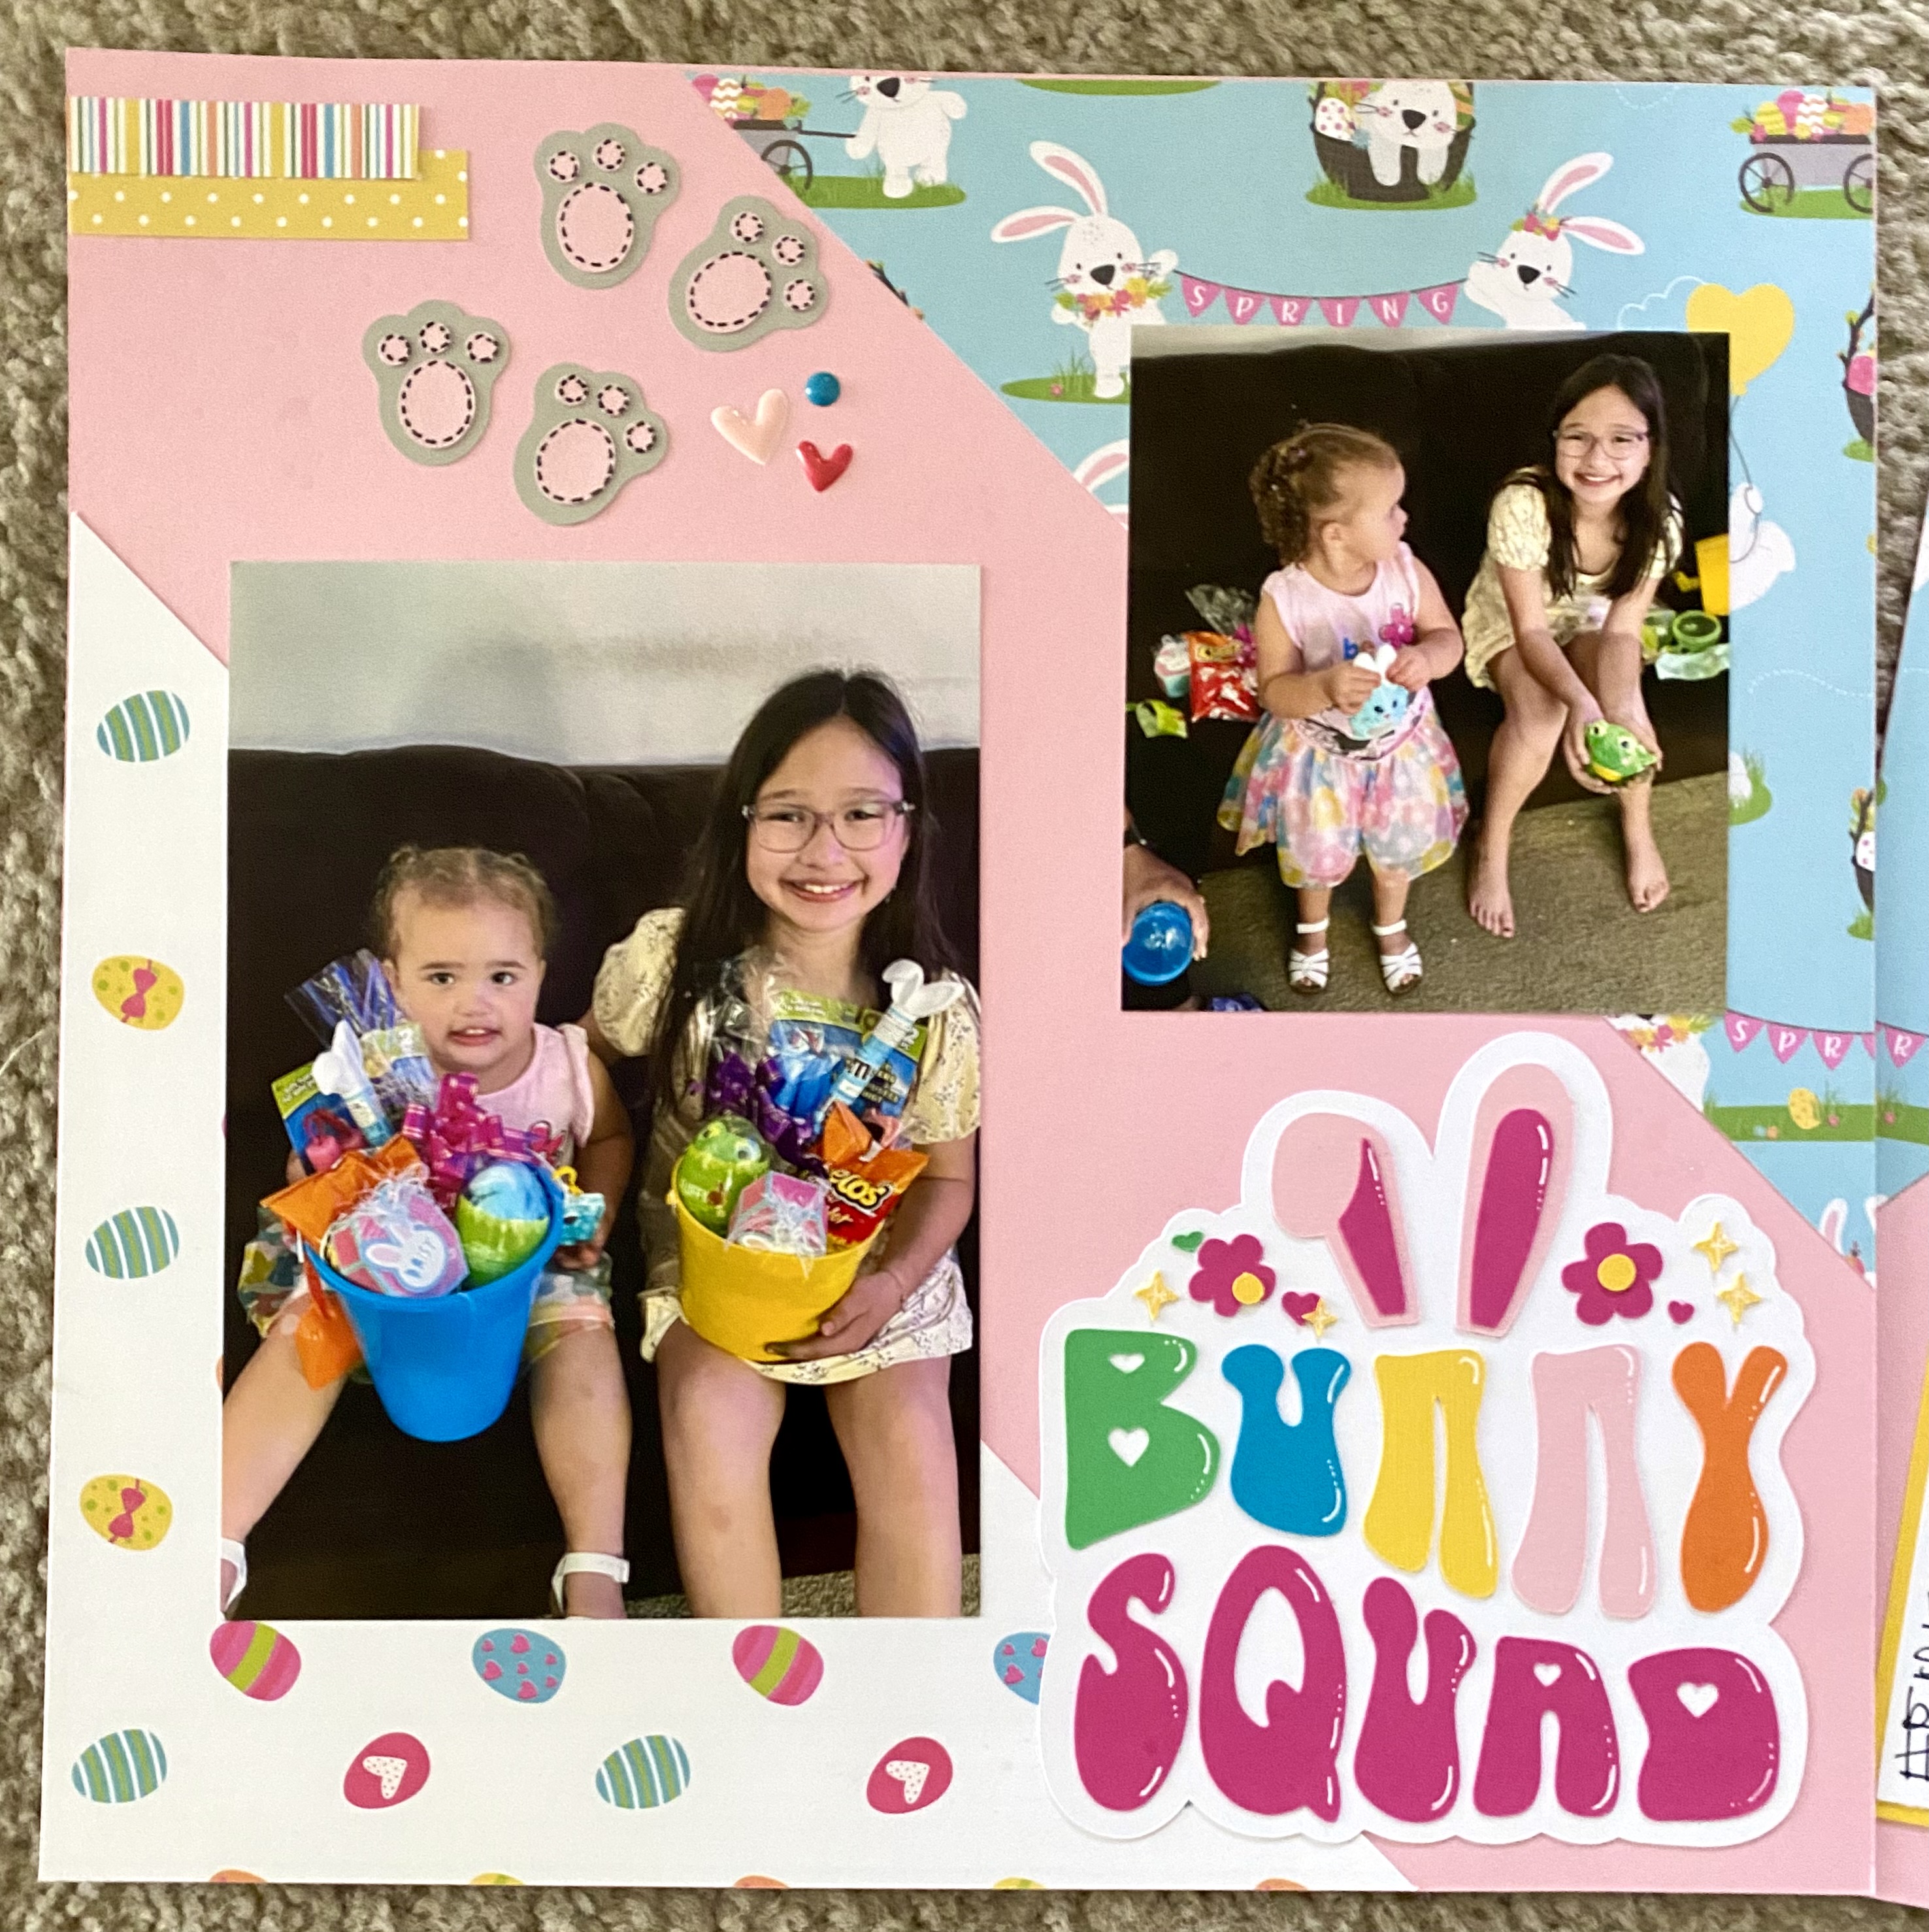
I'm still scrapbooking 2022 and now it's Easter. I can't believe how much the girls have changed since these photos were taken. I am using the double page sketch by Stick It Down for this two page spread. They have a two page, one page and card sketch every month on their FaceBook page. Check it out!
Here's the sketch:
And here's my layout:
I have to be honest, it took a little bit to figure out the triangle pieces, but I ended up cutting the top triangles from an 8x8" square and the bottom triangles from a 9x9" square. TIP: It's best to use a print that is not directional like the Easter eggs, this was a much better choice!
All the embellishments and title were cut using the Cricut. You can copy the title and embellishments from my Cricut Design Space project by clicking HERE. How cute is that Bunny Squad title!?!
I changed the sizes and the location of the photos to fit my needs but pretty much stayed with the general sketch. I was able to get four photos, a big title, journaling and some fun embellishments in!
Be sure to check out the YouTube process video for all the details.
Products Used:
Photo Play Hop To It Paper Pack
CutCardStock Carnation Pink Cardstock
Variety of cardstock color scraps for the title, journaling box & embellishments
Enamel dots and hearts from my collection.
Sparkle splatter from FSJ (now Spellbinders - I do not think they have this product any longer)
You can link your own project to their FaceBook page and just take a peek and be inspired by all the beautiful layouts!
It's Friday people! Time to let you know what I'm thankful for this week. This week my nephew and newest niece were married in Las Vegas! What a beautiful wedding and so much fun. It's always good when family gets together. Could have done without the Vegas HEAT, but it's June and we are in Vegas so it's all good.
This week, I'm thankful that I'm part of two families that actually get along and enjoy each other's company. What a blessing and definitely something to be thankful for!
I purchased a class from Scrapbook Generation years ago on using your 6x6 papers and the sketch within the class was perfect for these three 4x6 photos. The paper pad & embellishments are an old Basic Grey kit that just happened to be on my desk.
I also used some die cuts to embellish and complete the layout.
A couple of tips shared during the video:
Using unwanted paper for your layout base
Peel off the chipboard layers to make your chipboard embellishments less bulky
I love when different lines still coordinate with each other. Don't you?
Watch the YouTube video for the process.
This layout is actually pretty simple and showcases the photos. I probably should add some journaling and I may later but I did end up adding the date to it after filming.
Products Used: Basic Grey Die Cuts White spray by Dina Wakely Puffy Star Stickers by CTMH
Does anything say summer like popsicles!?! I don't think so! I used the Summer Popsicles ES029 from Printable Cuttable Creatables for this super fun and bright summer banner that I added to a wooden sign. I purchased the wooden sign from the clearance aisle at Walmart last year so it was nice to finally use it!
There are six different popsicles and that was exactly the amount I needed for my project. I pretty much copied the colors exactly as designed with the exception of changing the pink to yellow on the Neapolitan one. I wanted it to look like my favorite ice cream truck popsicle, the Chocolate Bomb Pop. Where's the ice cream man when you need him?
As always, I lay down the layers before adding any adhesive. This ensures that the pieces are layered correctly and I won't get adhesive in wrong areas.
Because I am making a banner, I created these banner tabs on the canvas in Design Space. I did this by adding score marks to each end of a rectangle and centering a hole between the edge & score lines on each side. Once I did that, I selected all the pieces and hit the Attach icon.
I learned to add these tabs instead of punching holes in the actual images. They are hidden on the back! So clever.
I found the words “hello Summer” in Design Space and used white vinyl to add it to the black round board. I can’t tie a decent bow so I gathered lots of bright ribbon and tied them together to create a rag bow at the top. So cute!
I love how it looks on our inside door (white) as well as our outside door (red). It just pops!
Be sure to head over to the Printable Cuttable CreatablesPrintable Cuttable Creatables site to take a look at the SVG files and be inspired by all sorts of projects from the DT. Use code 3SONS15 for 15% off your purchase!