A place to showcase my crafts and talk about it...what's better than that? I hope to inspire and encourage others to create things for themselves, friends and family.
Do you ever create a layout and then realize you still have enough photos for a second page? To make sure they coordinated, I used similar embellishments and color scheme. This time, I used products from Wild Whispers - their Talk Foodie To Me collection. It worked perfectly!
I had a lot of fun creating the embellishment cluster and even included a photo! The key to a good cluster is to keep everything close. I like everything to touch so they look like they belong together
I'm still scrapbooking the photos from our CA-UT-AZ-CA road trip in 2020. I took so many pictures and I want all of them to be included in these layouts. These photos are from the Chapel of the Holy Cross church in Sedona. It is so beautiful nestled in the red rocks.
I created the title using the Cricut. I knew I wanted to incorporate a circle at the end of the title so I used the "curve" feature to curve both Holy and Cross. Once I had the placement, I attached the words to the circle (this is how you can ensure that they are cut in the circle). I then used the offset to create a border around the entire title.
This layout is pretty simple so I used some yellow ink and a paddle brush to add some ink to the words within the circle, added some random script generational stamping to the upper right and lower left corners before calling it done.
Happy Friday! Well, it happened, I caught Covid. I had one really bad day and then the rest mostly just really tired. Sure there are cold symptoms but nothing too bad.
I’m thankful for a couple of reasons, most of my family caught it at the same time so that helped with quarantine; it was a mild case for all of us; and hopefully we won’t catch it again.
In the meantime, I’m still healing but I’ll be fine
What are you thankful for this week? Please share in the comments
Have you been to Sedona? Gosh it’s beautiful and restful. This was one of our stops from CA - UT - AZ - CA and we did rest here. Although there are many, many beautiful hiking trails, we decided to take it easy. We did take a mini- bus tour so we were able to enjoy the beautiful town.
I love the embellishments that I was able to cut using my Cricut. And those green strips from scraps was another way to add color to the layout.
Make sure you check out the YouTube video for all the details:
Having the Cricut is such a great tool especially when you need to make a quick gift. My DIL has purchased a theme specific birthday shirt every year for my granddaughters. LeAnna is on her 12th birthday and of course as a preteen, her tastes have grown up a little. Gone are the Disney princess T's.
That's OK since grandma can whip up anything (well mostly anything) she needs!
This year she wanted a Stranger Things shirt so we chose this one...Hellfire Club.
I added the data looking 012 at the bottom right side to indicate that this is her twelfth birthday. I chose this font to emulate the tattoo on Eleven's (and One's) wrist.
She loved it and so did I. I purchased the SVG from SyDesignUS on Etsy for $1! The only thing I had to do prior to cutting the image was to attach the colored pieces together so they would cut out in order and how I needed them for easy transfer.
My crazy granddaughter! LOL
If you're an InstaGram user, be sure to follow my account @3sons_and_astar to see all my posts!
I created another fun layout using CutCardStock cardstock, the Cricut and a stamp. Check out the post on the CutCardStock Blog for another look.
To start this layout, I searched Cricut Design Space for a food quote and found this one. I knew I wanted the words to be big and cut into the piece of cardstock, not on top of it. To do that, I attached the title to an 11x11 piece of Basis Red Cardstock.
Here's what it looked like on my screen:
And here's the cut out:
Once I added the banner on the top right corner, I knew it needed more to this base. I pulled out a food truck stamp, layed the cut out letters to cover the Wedding Cake White Cardstock and stamped the truck in rows to create my own patterned paper.
Oh, it was coming together and then I saw that big OOPs on the right side just under the banner. I forgot to mask the white border to avoid stamping on the white layout base. UGH!
So, I grabbed a piece of the Basis Blue Cardstock used for the banner and cut two strips and added them to the left and right sides of the red cardstock. I also did the same thing with Basis Gold to create a color block going vertically.
I created a fun embellishment cluster by adding some banners, a stamped & colored food truck, sticker, enamel heart and a black road for the truck to rest on.
A journaling block on the lower right corner helped balance the page.
Here's a close up of the cluster:
I honestly had some difficulty with this layout and it went through multiple stages before I called it DONE. I hope this encourages you to "not give up" and create something you love!
Be sure to click over to the CutCardStock Blog for more inspiration and check out the CutCardStock website for all your cardstock needs!
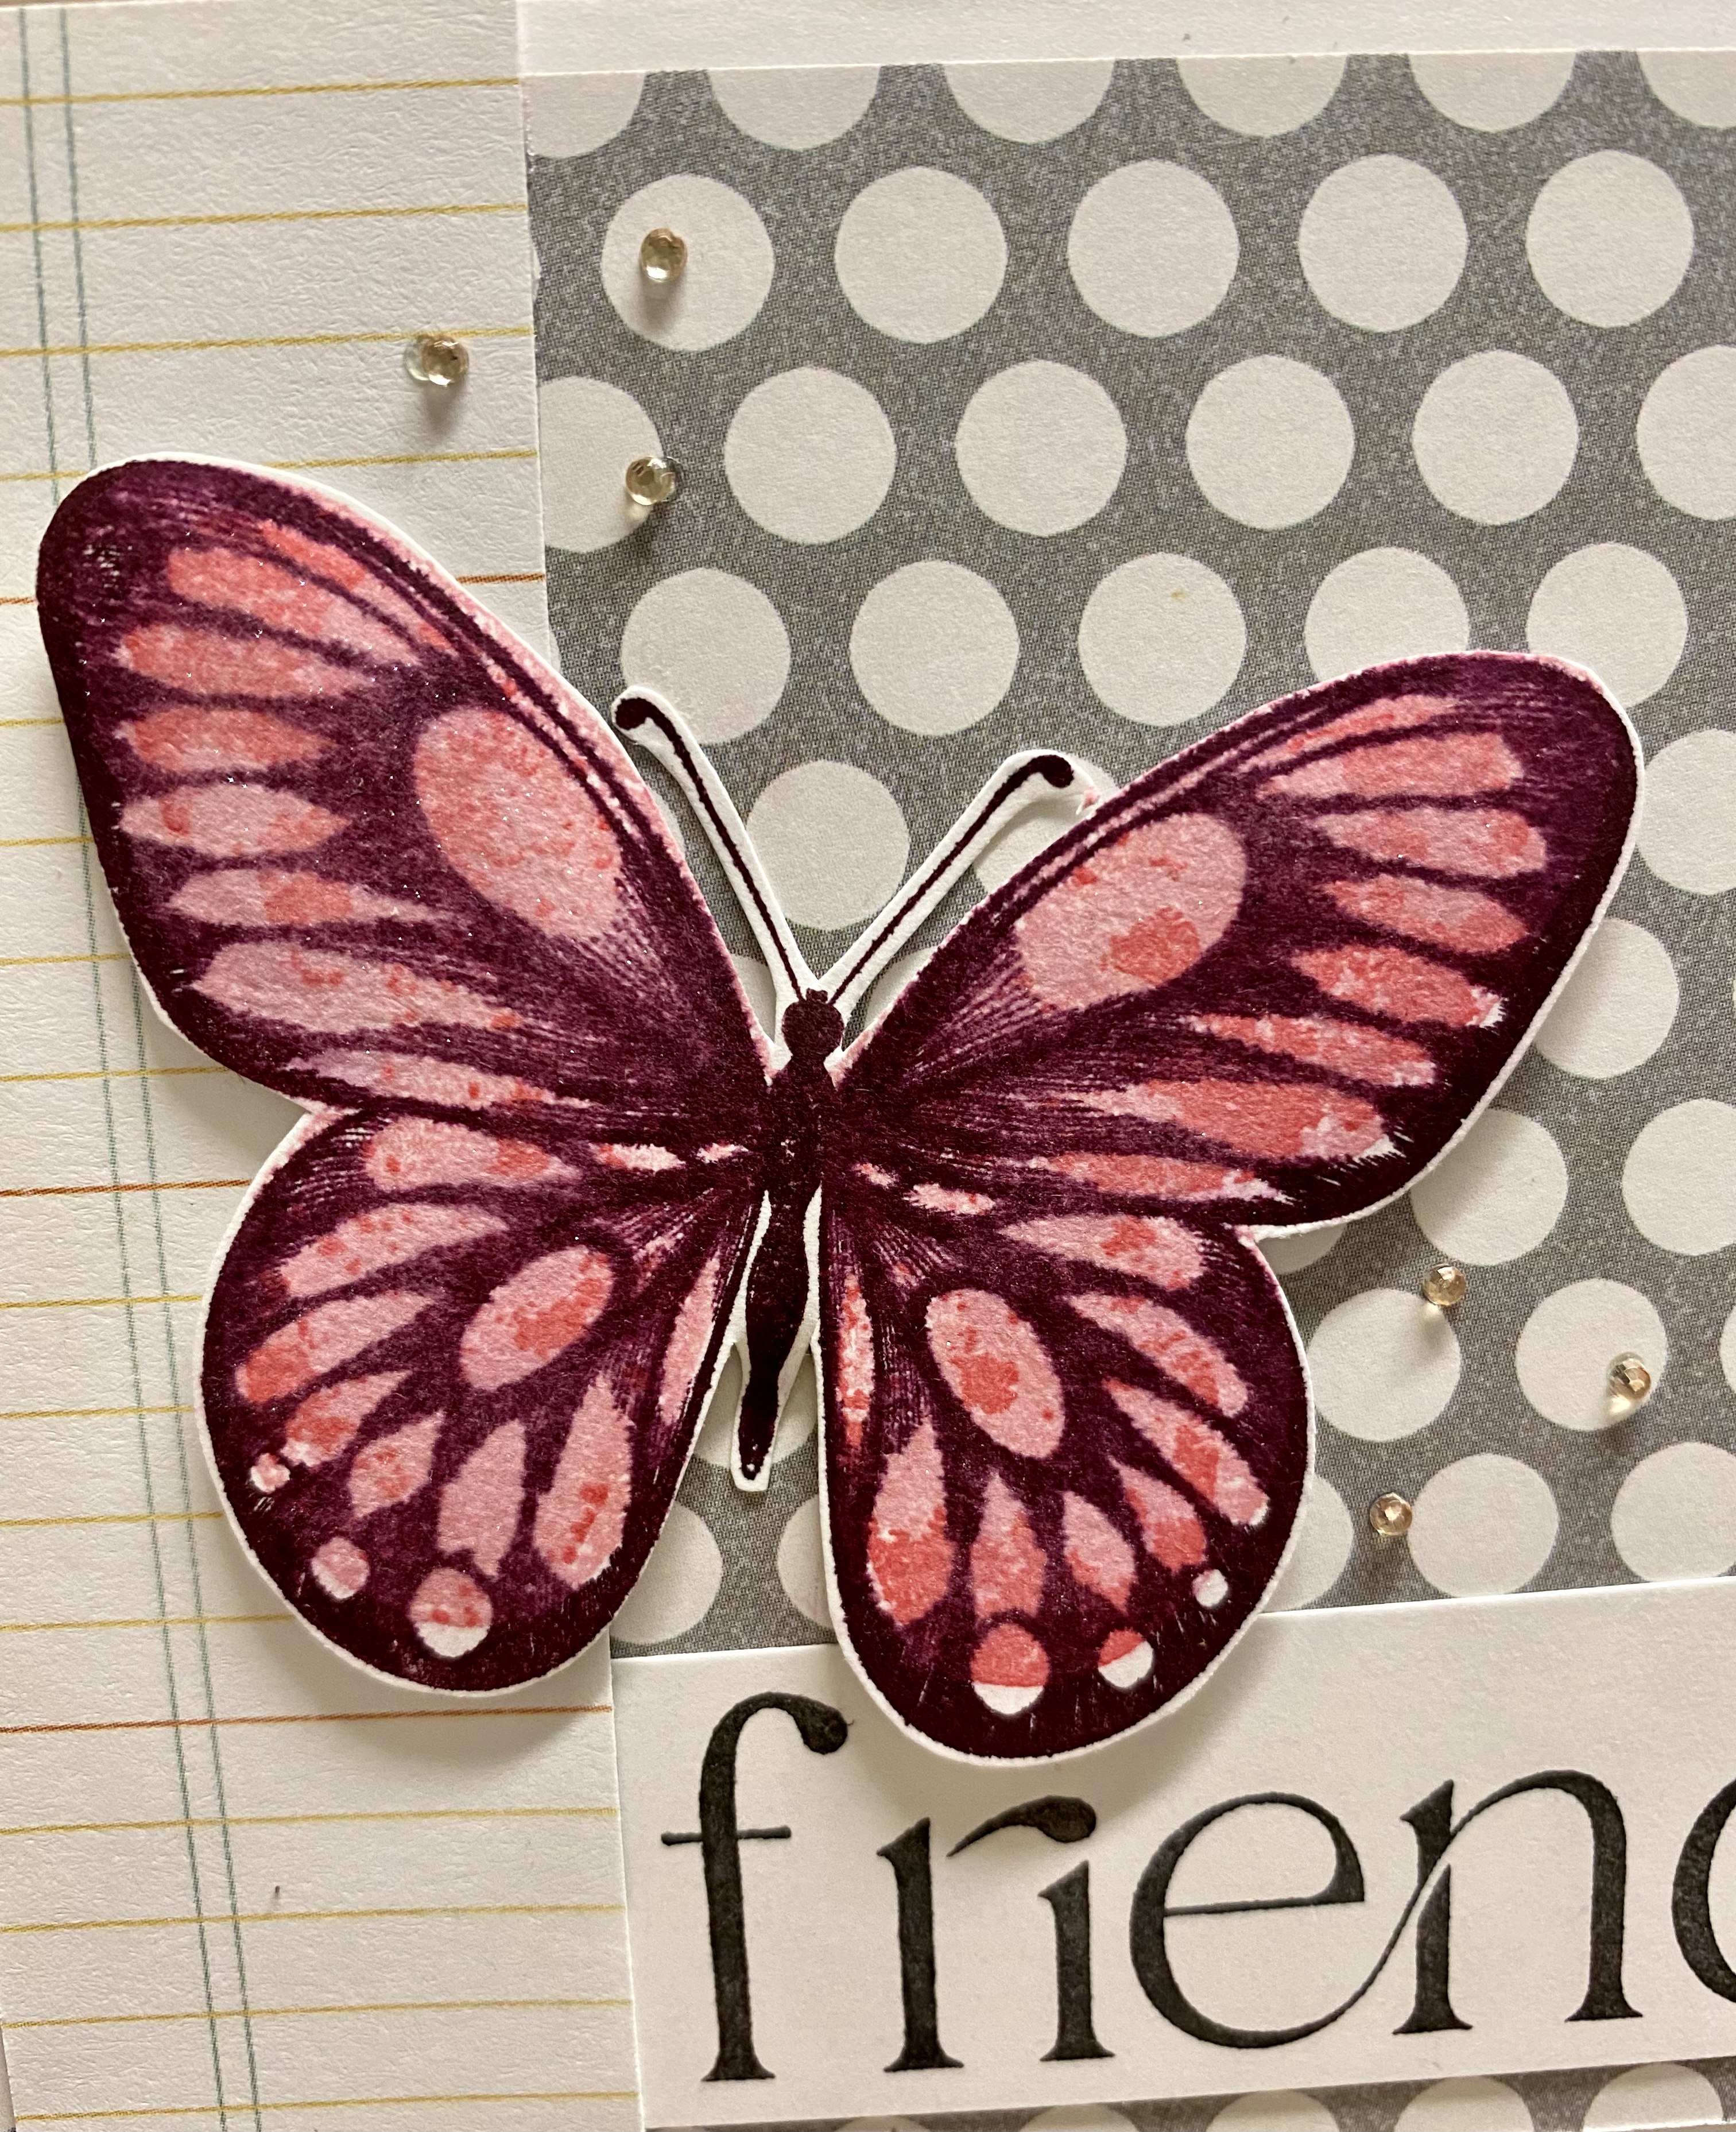
I'm back on the Sketch n Scrap blog with a beautiful butterfly friendship card. Sketch n Scrap has two card sketches and two scrapbook sketches per month and they are fabulous! Here's my card:
And the sketch:
Another view:
Card sketches are so easy to follow and I mostly followed it exactly as is with the exception of not having scallops on the left side strip.
The butterfly stamp is a 3-layered stamp and so pretty! I added some tiny rhinestones and Glitter Marker to add a little bling to it as well.
Check out the YouTube process video:
Products Used:
Stamp Sets: Sentiment (CTMH You Can Do Anything); Butterfly (FSJ)
Inks: SU! xx and xx; CTMH Blush
Rhinestones: Close To My Heart
Patterned Papers from my stash
Be sure to click over to the Sketch n Scrap challenge site to link your own card or layout!
TGIF and Happy Thankful Friday! I always say, no matter what, there is always something to be thankful for and this week I had to repeat this. Without getting into detail, we have a big situation coming our way and I'm thankful for hearing some good news in the mix of it.
There's good in every bad and probably bad in every good, but we are going to focus on the good in the bad. My DIL had this quote on her IG account and I think it's perfect for what we're going through.
What are you thankful for this week? Please share here or on my IG account @3sons_and_astar. I'd love to hear all about it!
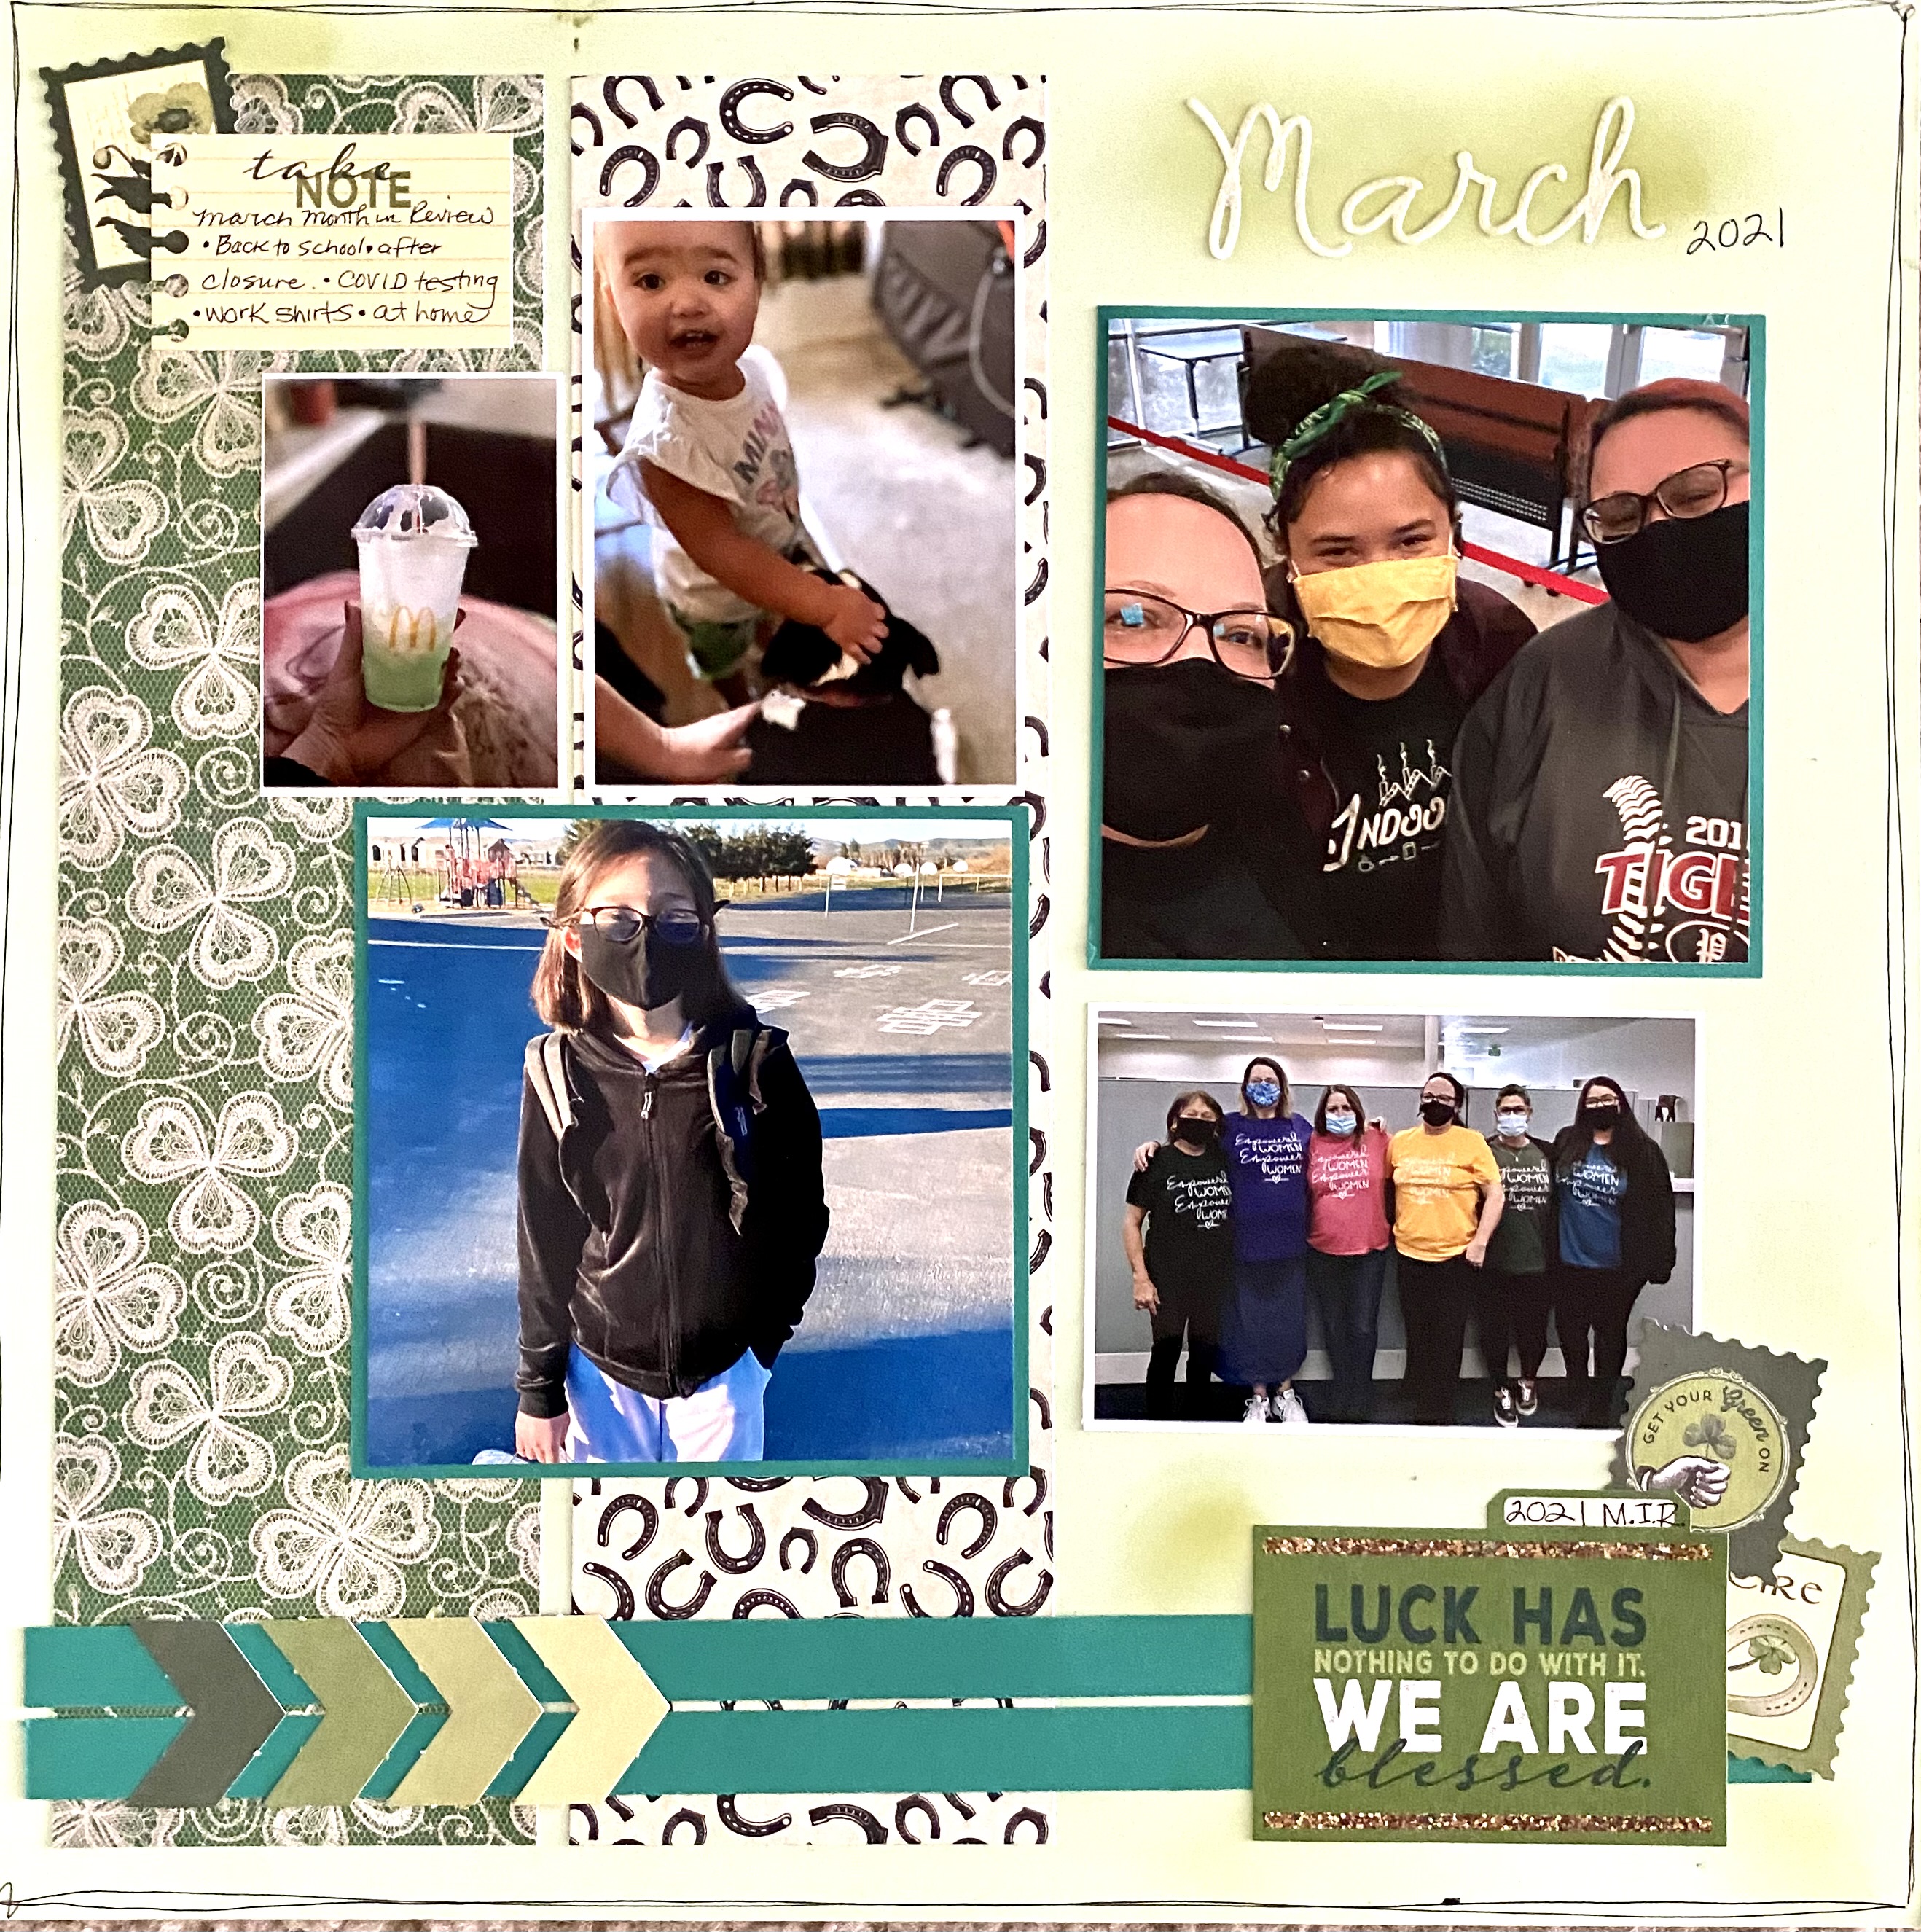
I love doing these Month In Review layouts because none of the photos really go together but it all works! I used a sketch from the Scrapbooking With Ann Marie (Scrapbooking The Day Away) website and came up with this fun MIR layout.
I used St. Patrick's Day paper & embellishments since two of the photos were taken on March 17th and of course the Shamrock Shake!
I love all the green and the quote I used at the bottom right corner.
I did a little inking on the letter stickers (title) and around the layout. I probably would have done more if I thought of it prior to adhering everything on the base.
I think it'll be interesting to see years later that we are wearing masks in (almost) all of the layouts. A sign of the times for sure!
When I saw this sketch from Sketch n Scrap I knew exactly what photos I was going to use. These photos are of the McDonald’s in Sedona. Sedona is known for their beautiful scenery but did you know that their McDonald’s is the only one in the world with different colored arches?
I used the Cricut to create the title, embellishments and journaling spot.
I love the turquoise tones
Check out the YouTube process video for tips for using the Cricut with your layout.
Be sure to link your layout to Sketch n Scrap challenge blog by the end of the month.
Happy Friday! Yes, it's Friday and time for another moment to reflect & share what I'm thankful for this week.
My daughter and I are currently on a Mother/Daughter trip so I got to say, I am thankful for the opportunity to travel.
I'm posting some photos on IG. You can follow me at @3sons_and_astar. I also started posting the TGIF; Thankful Friday posts there to give everyone an opportunity to comment on what they are thankful for the week. I hope you join me there too!
I rarely create girly layouts. I guess with having three boys and a not too girly daughter, it's never been my thing. I was so happy to create one for these fun photo shoot photos of my youngest granddaughter.
Since I'm on the Design Team for Scrapbooking With Ann Marie's website, I used the current sketch and Vintage Girl paper pack from PhotoPlay to create this girly layout. I love using a paper collection since all the patterned papers and embellishments will all coordinate.
Check out the YouTube process video below.
I used the Cricut to cut the 9.5" half circle and my Creative Memories Circle Cutter to cut the journaling circle & mat. The large floral paper is cut at 11x9 and the music paper is cut at 6x9.5".
Even though this was not a particularly girly photo shoot, all the pink & florals worked well with the photos.
I hope you have already hit the subscribe button on my YouTube channel. I post at least two videos a week and one will always be scrapbooking. The other will be whatever it is I'm creating in the Command Center - which is the name of my scraproom.
I try to limit the videos to around 10 minutes or less and don't show when I'm adding adhesive or any of those (boring) things.
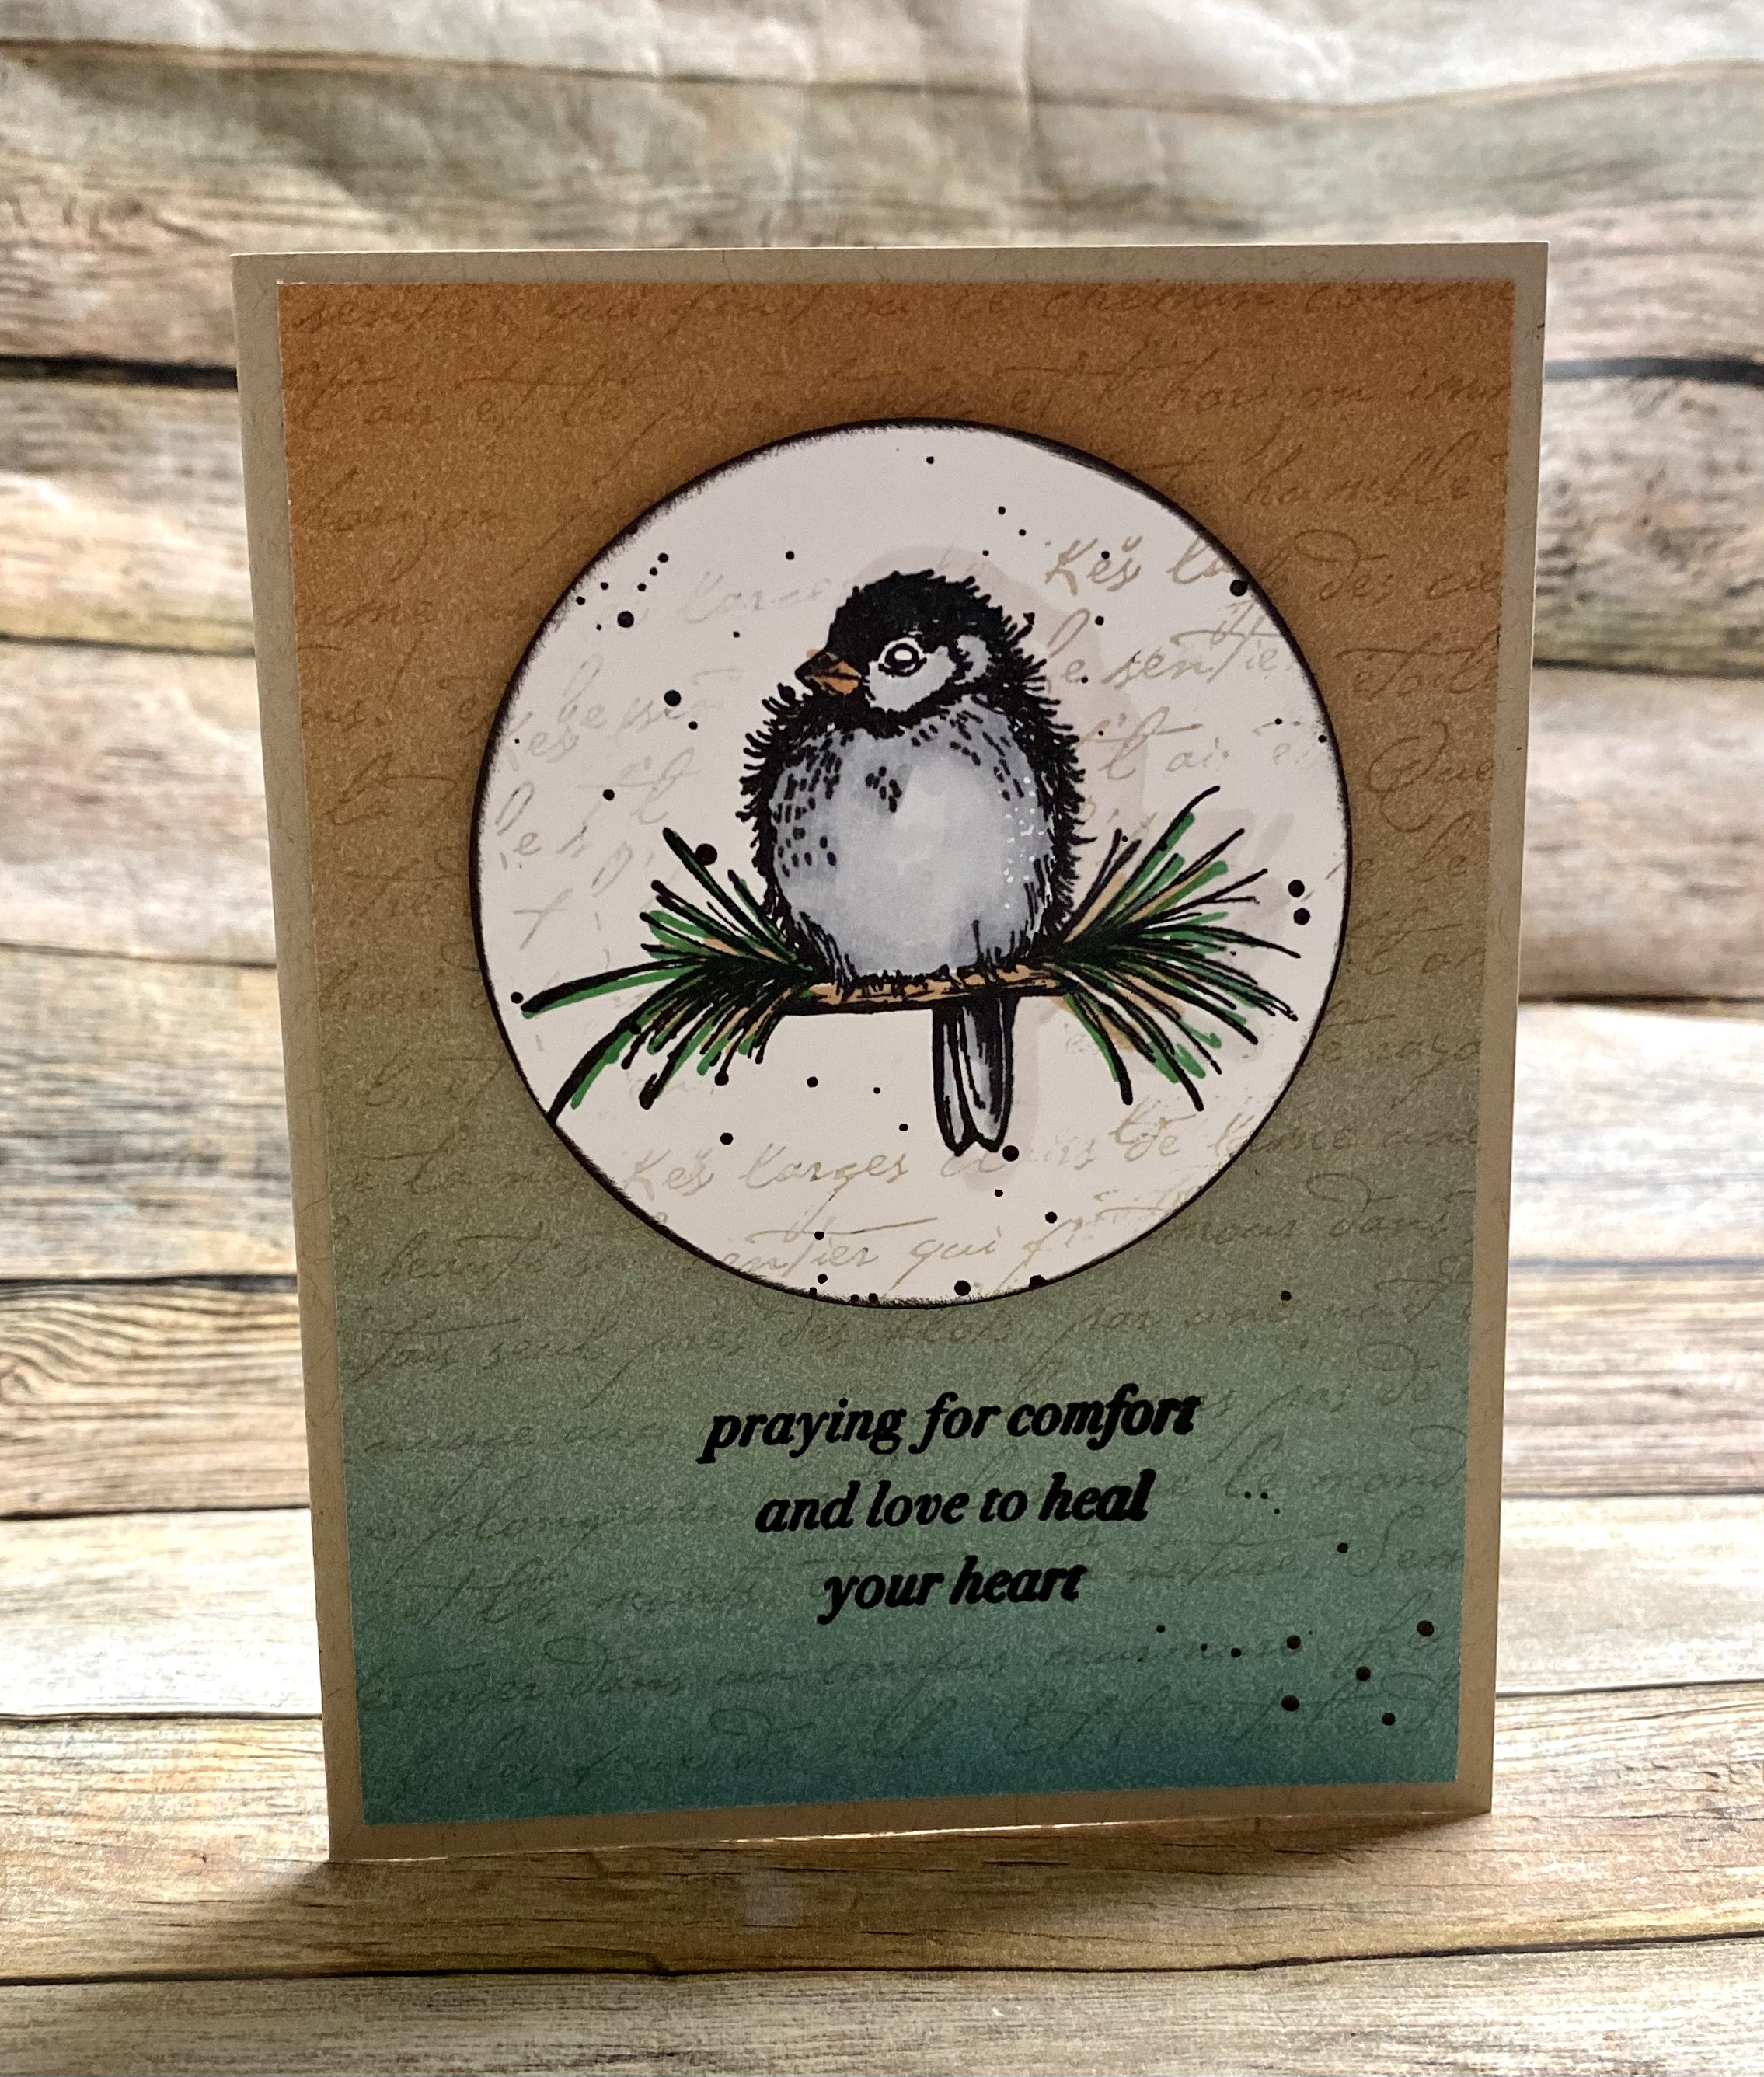
I have been gifted so many stamps from people that I forget what I have. I was digging in my stamps and found this super cute bird stamp. Since I needed a sympathy card, I thought it would be a perfect image.
I stamped him using an archival black ink pad and used alcohol markers to color him in. Originally I was going to make him a bright blue bird, but changed my mind to a more subtle color.
The 6x6 paper I chose for the background has this beautiful color transition but to add a little more to it, I used a neutral colored ink and added a script background stamp to it. Love this detail! I love to use my older supplies and this was a perfect addition. Look how awesome it looks on the bird circle too!
Some white gel pen dots to add a little more to the birdie. It's the little things that make such a big difference!
I used the MISTI to stamp the sentiment because I didn't want to take any chances on messing it up but since I just opened that new stamp pad, I really didn't need to do a second impression.
Watch the YouTube process video for all the details!
Happy Thankful Friday! I'm excited for this week to be over since I'm going on a Mother/Daughter trip next week to Memphis. We're going to Graceland!
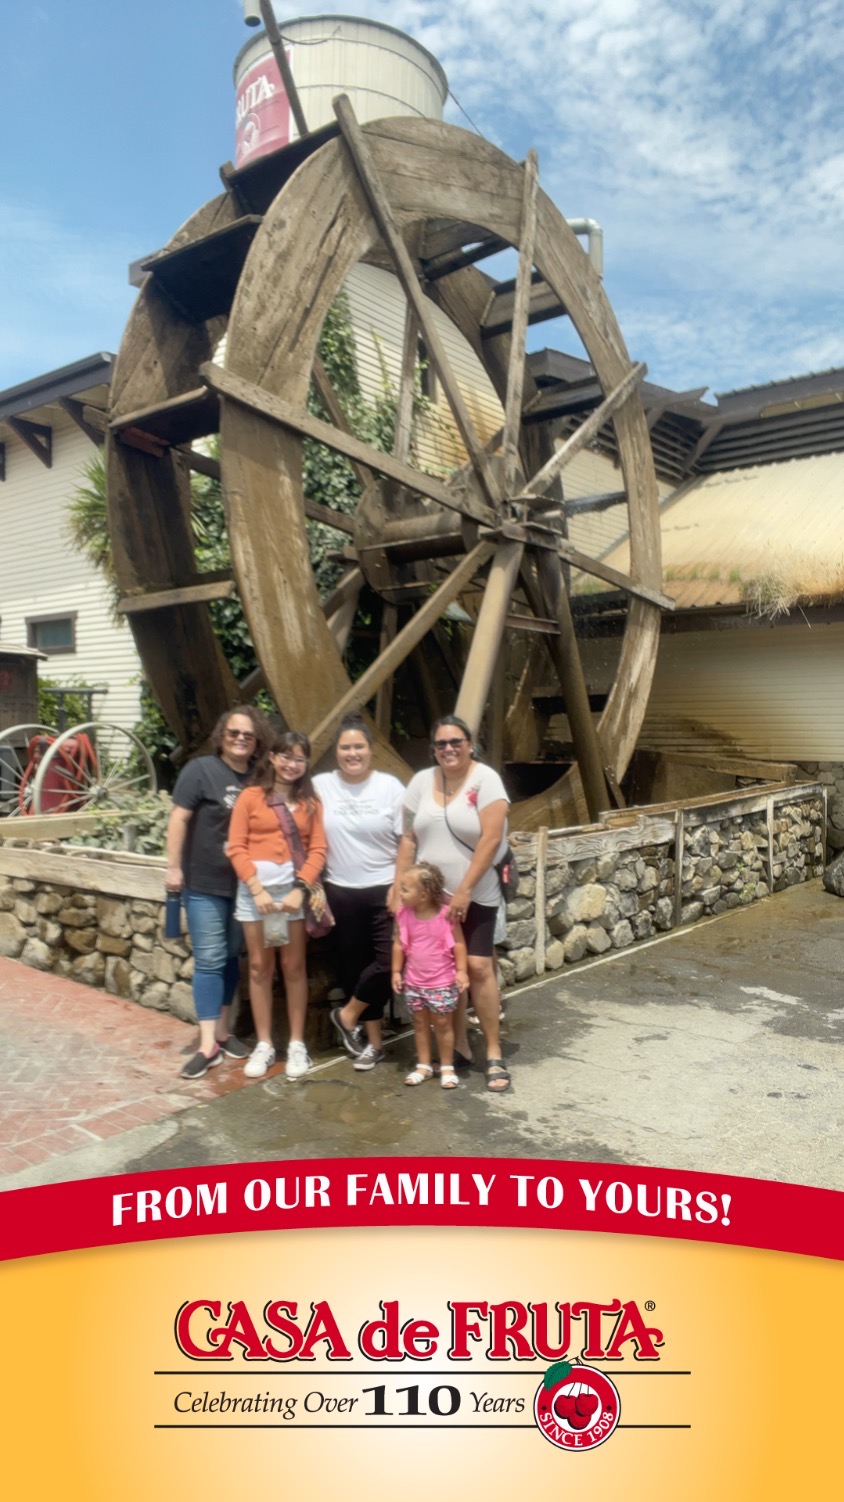
What am I thankful for this week? This week I'm thankful for fresh, sweet summer fruit! I always love the summer because of all the summer fruit and this year did not disappoint. We took a trip to Casa de Fruta and did all the things we can do there like ride the train, the carousel, check out the ducks & frogs, etc., and we also bought some fruit from their fruit stand.
So good! I've been enjoying them all week!
What are you thankful for this week? Let me know in the comments here or on my IG account. @3sons_and_astar
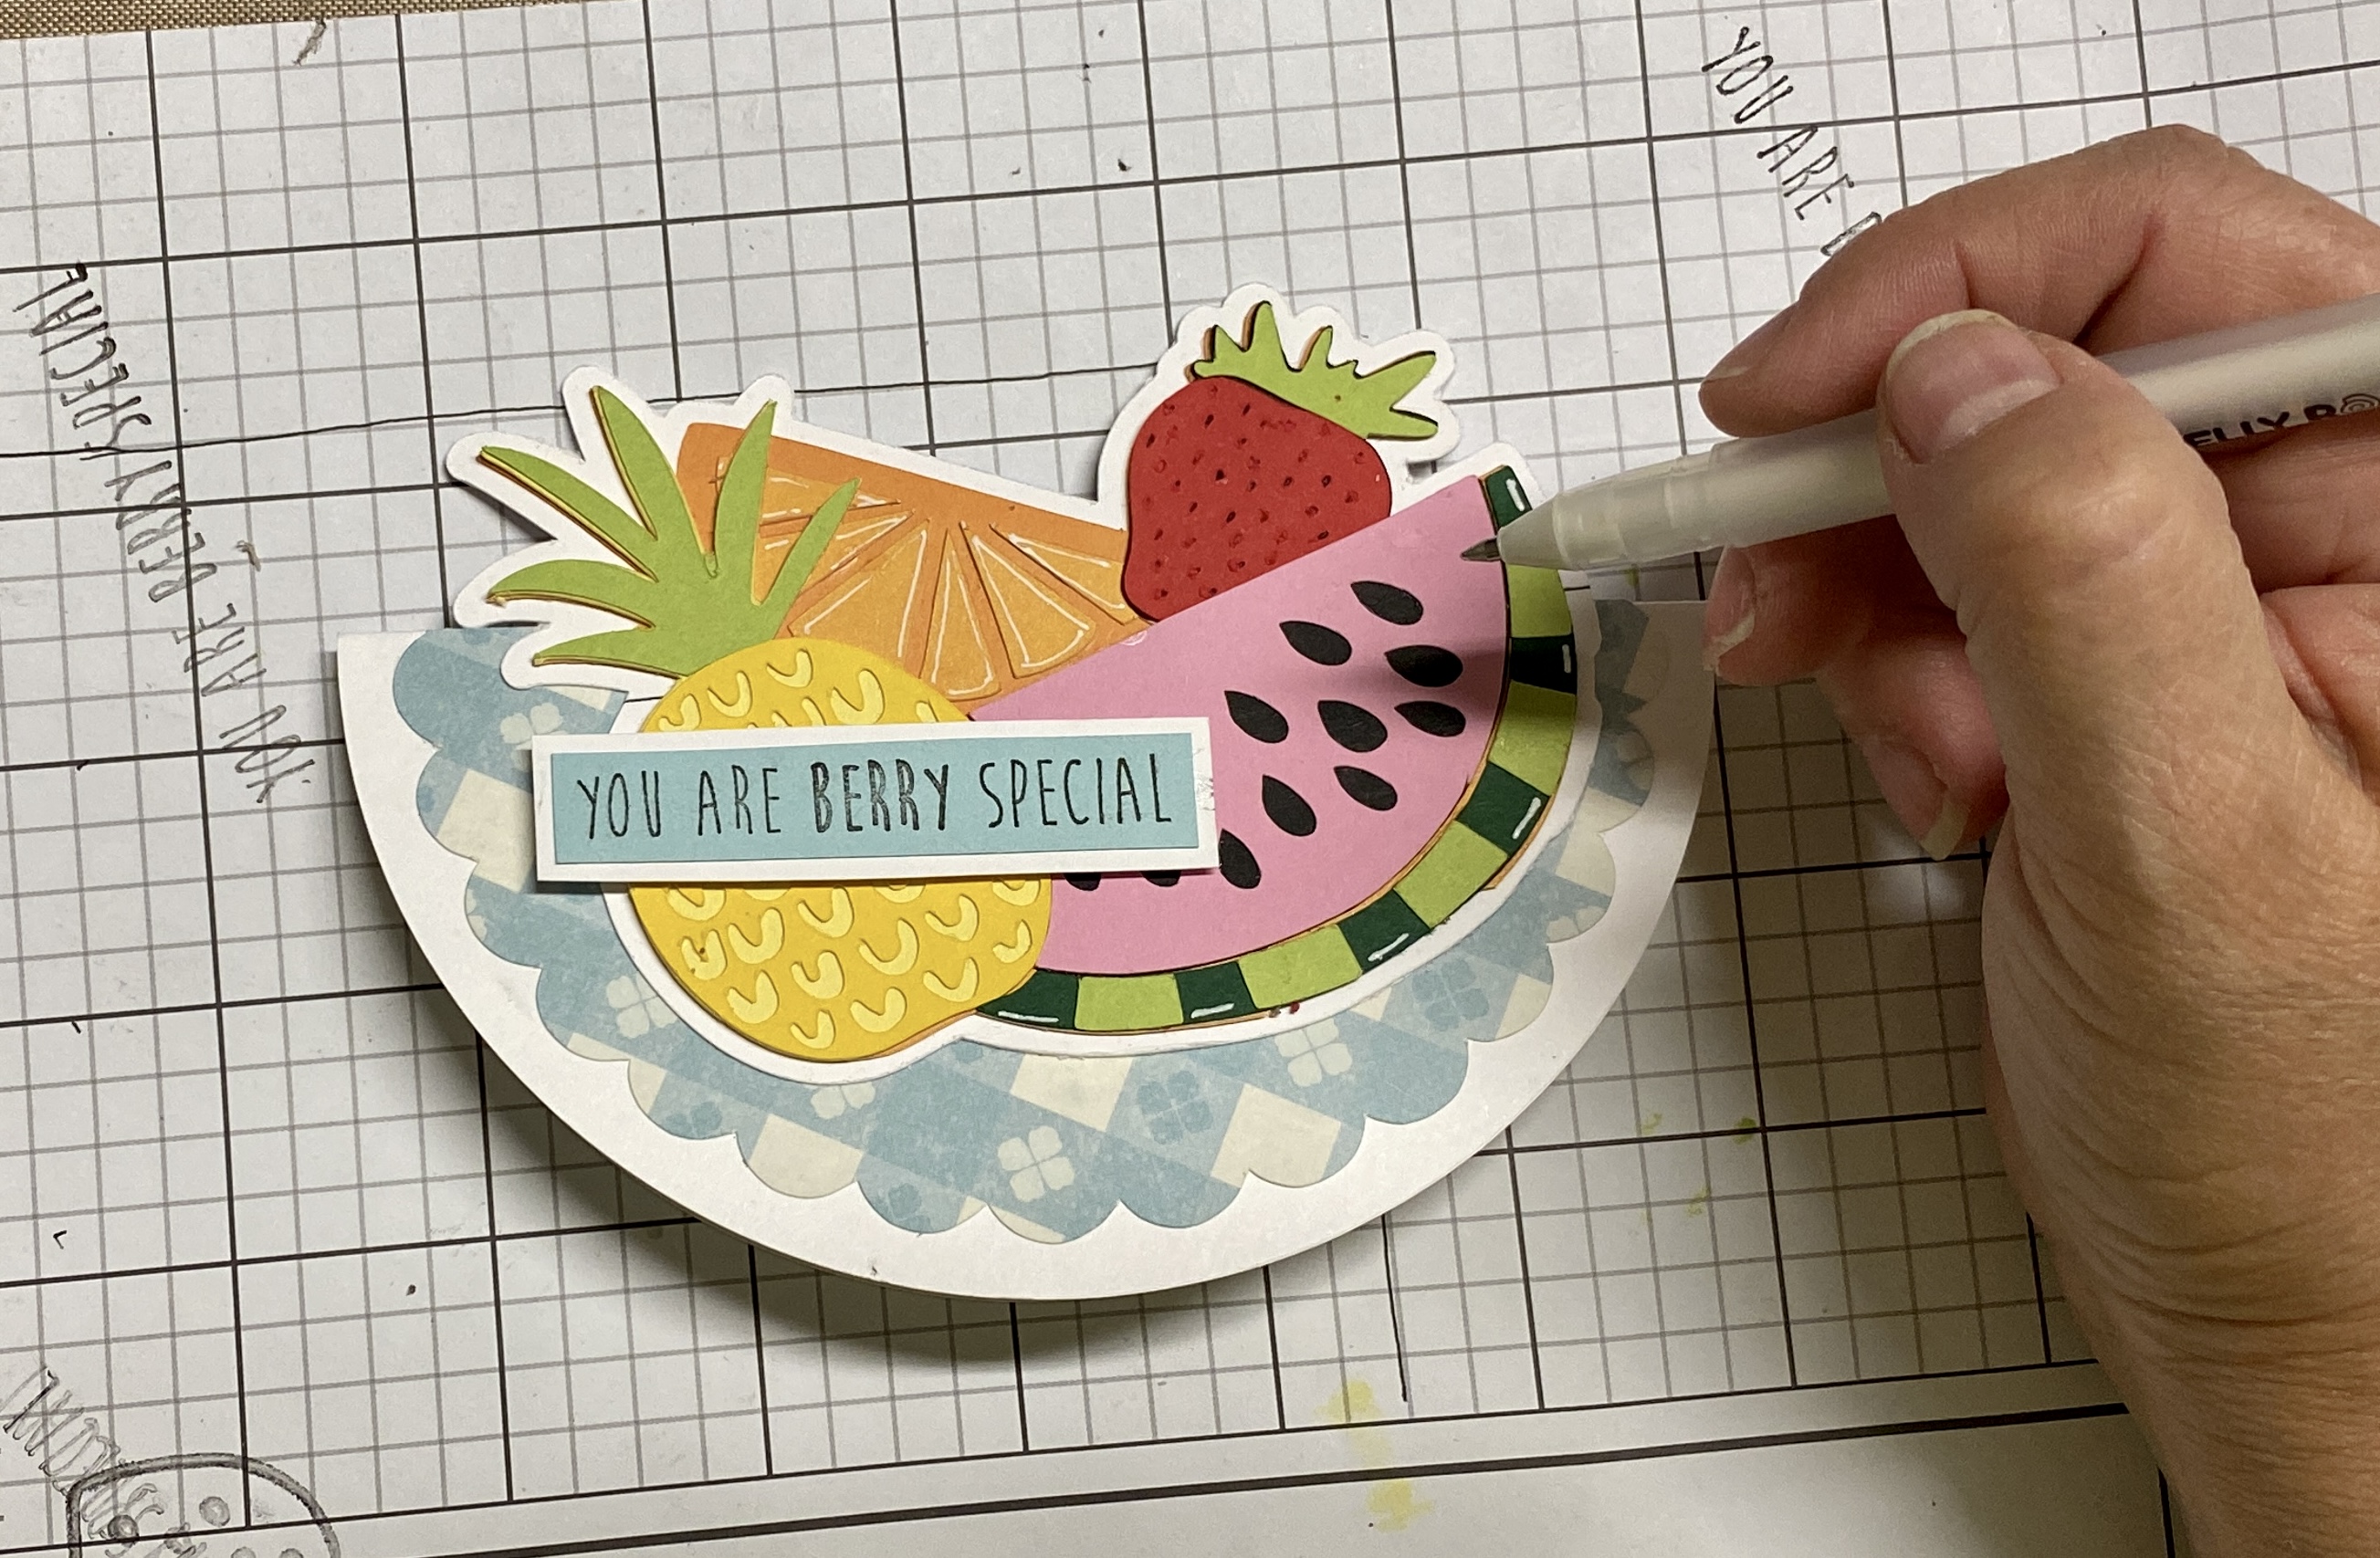
Check out this fun fruity rocking card I made! I have seen these cards before but never tried to make one myself. You can make them any size but I chose to make mine so it'd fit in a regular A2 envelope.
The fruit and scalloped circle were cut using my Cricut. The design was already available in Design Space as a pop up card but I only wanted the fruit bundle.
Using multiple colors from CutCardStock Pop Tone and Basis, I was able to create a fun and bright bundle of fruit! See the list of colors below. If you click on my affiliate link, I get a small commission for all purchases.
Figuring out the placement of all the cut pieces:
To create the rocking base, you basically fold a circle in half and then decorate! Yup, that easy! I used a white base since there was so much color with the fruit and scalloped circle. The scalloped circle is 5" and the circle is 5.5". You can fold the scalloped circle to decorate both the front and back but I decided to cut mine in half and only adhere it to the front since I am adding an easel to the inside.
White pen was used to add highlights to some areas and I popped up the sentiment using foam adhesive.
The important things to remember is the placement of the decorative elements - you don't want it to exceed the 4.25" height in order to fit in the envelope and to keep the card balanced. In other words, don't put too many elements on one side of the card.
Now, you can either put your sentiment and greeting inside the card or create an easel for the inside and writing the sentiment & greeting to the back like I did.
Not sure what I mean? Check out the process video:
I did decide to use this card for my Monthly Card Kit. To read more about the card kit, click HERE or on the Monthly Card Kit tab on the home page.
I created this artsy layout to showcase some photos I took when we visited the San Jose Museum of Art. I didn't take many photos - mostly because I was so engrossed at the art and just didn't think to take out my camera. I do love the photo of my daughter and son looking at the wall art. I had to mat that one so it would stand out a little more than the other photos.
I decided to use some artsy paper for the layout. One was a piece that my daughter had created years ago at a workshop and another was an older gel print that I had done. I stamped the title with a stamp set from Jane Davenport and matted it with black cardstock.
I decided to stamp that quote on the top left and add a sliver of black cardstock just to balance the black in the layout. I probably could have pulled that sliver out a little more, but boy it was stuck!
Some black licorice splatter on the diagonal corners to finish it up. Honestly, I wasn't sure how to embellish this one. I have some art/creative type stamps but those were mostly painting type icons and I didn't think it really fit.
I created a process video of how it came together:
I chose the red cardstock base because of the museum sign. This really could have been any color but I like the pop of red!
Is it just me or does everyone have trouble keeping things straight on the layout? Even with the various rulers, nothing ever seems straight!