A place to showcase my crafts and talk about it...what's better than that? I hope to inspire and encourage others to create things for themselves, friends and family.
Friday! I'm so thankful you're here. This has been a week. Nothing major happened but it was just a week.
This week I am thankful for my granddaughters. They are so sweet and I love that they love spending time with us just hanging out doing nothing significant, just a little bit of everything.
I want to tell you something funny. So yesterday, our oldest who is 12 was on the phone playing a game with her dad. Nothing exciting to mention, but she was actually a little aggressive. Not in a bad way, but in a Durham way. LOL
We can get pretty competitive and when someone does something dumb, we will call them out on it. I thought it was so funny to hear her take that enthusiasm with her - she don't play! Games are serious business!
I love that I see us in her.
What are you thankful for this week? Let me know by leaving a comment below.
This layout is the title page for an I'm creating for the First Annual TomKat Strut (read more about it below).
Although this title page was pretty simple, it still took some time to figure out what I was doing! I don't usually make title pages for my albums but my nephew created the graphic for the strut and the single photo was perfect to introduce the album!
I searched walk, race and marathon in Cricut Design Space and used images I thought would work. I used CutCardStock in Black Licorice, Wedding Cake White, Red, Blue from the Pop Tone Assortment Pack and the yellow patterned paper for the larger walking person image. Get access to the Design Space file here.
I matted the photo in Glama Brown Kraft cardstock to coordinate with the tan in the photo. Basically just trimmed down the Marathon patterned paper to 11x11 and then centered the title & photo.
Watch the YouTube process video to see how it was put together and how I created a pocket to slide in the invitation post to the family.
Products Used:
All cardstock is from CutCardStock (see colors above)
Carnival/Circus Themed Patterned Paper is from my stash. I tried to find a company name, but didn't see one. I want to say it's from Stampin' Up!, but I'm not sure.
Marathon Paper from Scrapbook Customs
Beach Ball Blue Color Silk splash from FSJ (Spellbinders)
Be sure to check out the CutCardStock Blog for so much paper crafting inspiration from cards, party and home decor, scrapbooking layouts and so much more!
Virtual Marathon Details:
My family and I started a virtual 50k marathon named, TomKat Strut to honor the memory of my nephew Tommie. Tommie died in a tragic accident during the Covid Quarantine/Shut Down and we were unable to have any type of memorial service for him.
With virtual marathons becoming a thing and with family being spread out across the US (mostly CA but there are a few out of state), we thought this would be a great way to get "together" in his honor.
If you're interested, you can read more HERE and HERE.
For this post, I decided to make a fun fold card - an easel shaker card to be exact. I thought this easel design would really showcase this cute cupcake especially with some shaker bling behind it.
Cutting & Scoring dimensions are:
Card Base: 4.25 x 11" scored at 5.5" and 8.25"
Card Front: 4.25 x 5.5"
Patterned Paper: 4x5.25"
Two Window Sheets (I used a transparency): 4x5.25"
Since I decided this was also going to be a shaker card, I needed a frame to put the shaker bits in. In Design Space, I created the frame by stacking two different sized rectangles on top of each other - one at 4x5.25 and the second at 3.25x4.5 - I center aligned them & then sliced to make a frame.
Once I was done with the frame, I added the cupcake image to the canvas. I removed the base on the bottom of the image and adjusted the cupcake size to fit inside the frame. You can see that I moved it to the right of the frame and made sure that all it covered a portion of all four sides.
The cupcake ends up being a little smaller than 3x5". Add an offset to the cupcake image; move the cupcake image to the side & then select only the frame & offset and weld them together. This will give the cupcake a place to sit on.
Watch the YouTube process video to get a better understanding on how I did this!
Once all the pieces are cut, I always place them together before adding adhesive. Believe me, this is good advice!
Continue to make the shaker card and once that is complete, add it to the card front.
When making an easel card, you need to add foam adhesive to the tab on the bottom so it will stop the card front from sliding. I decided to add the birthday greeting on the tab instead of on the card front.
You can check out this project as well as other projects on the PCC Blog. This is a great place for all kinds of inspiration from paper, vinyl, HTV and sublimation.
Use the coupon code 3sons15 for 15% off your purchase on the PCC Site!
Even though our newest family member was born on Saturday early morning (and it was technically last week), I am still thankful for this addition and will record it for this week's TGIF; Thankful Friday.
Our little cutie is another female addition to our once boy dominated family. I love that our first three grandchildren are girls!
My emotions were all over the place with her birth and our recent loss, but when we saw her "angel kiss" on her forehead, we realize that she already met her Uncle Tony and he he got to love her first.
So thankful for our family friend who commented about the "angel kiss"; thankful that all went well with my DIL and thankful for the collaboration with the whole family. Of course, DIL did all the hard work, but each of us had our roles in making sure everything went well.
Welcome Jhene! We love you so much!
By far my favorite photo:
What are you thankful for this week? Please share in the comments below!
I've said this multiple times, but if you're not using a sketch for your cards, I'd love to know, why not. Using sketches sure does help with a starting point.
Here's one of the card sketches from Sketch n Scrap for July. SNS posts two card sketches and two layout sketches per month.
I have lots of large sentiment stamps so this sketch was perfect to showcase one of them but what I really like is the tie dye stamping I did to create my own patterned paper! So fun!
I used an assortment of bright colored inks and some black splatter plus a scrap piece of bright orange cardstock to complete the card front. I added a 3.75x5" piece of plain white paper to the inside of the card. I like to do this with dark cardbases. Not everyone has a white pen! :)
Check out the YouTube process video:
Products Used:
Tie Dye stamp set by Hero Arts
Sentiment stamp set by Close To My Heart
Cardstock by CutCardStock
Black Licorice Color Silk by FSJ (Spellbinders)
Be sure to link your card using this sketch to Sketch n Scrap before the end of the month.
I have never created a Christmas project in July even though I hear the term "Christmas in July" all the time. But...there's always a first. Check out the CutCardStock Blog Post to see my project on their blog too.
I purchased this SVG from Lori Whitlock last year thinking I was going to make them for Christmas, but things didn't work out that way. I decided to create it now instead.
Here's the final project:
And here's how I made it:
The first thing after uploading the file into Cricut Design Space is to change the lines that should be score lines from cut to score. Once that is done, attach them.
Got another Cricut project for ya. I purchased some acrylic bookmarks from Caluya Designs because I love her SVGs and was positive I’d love her blanks. In fact, when you order bookmarks, you get all the bookmark SVGs for free! It doesn't get much better than that!
There were so many designs but I whittled them down to these. I thought the snarky sentiments were perfect for my daughter and I to use during Summer Reading Marathon. We started SRM since she was six and she'll be turning 30 this year. It's a friendly competition and we love it!
These bookmarks are fabulous! Besides a good price and quick shipping, the size of the bookmarks are perfect since they will work in a small paperback or a larger hardback. Each bookmark has a protective cover on both the front and back of them to prevent scratching.
This was an easy project since the design was already sized for the bookmarks. The hardest part was choosing which design and then the colors. Since this is a small project, I was able to use scrap vinyl which is always a good thing!
The solid color swish is another SVG available and I added them to the backs for even more color!
I added some torn fabric that I have in my stash on one and a piece of cool ribbon that I bought from the Dollar Tree on the other.
What do you think? Cute, huh?
Be sure to check out the YT process video because there are a few things to be aware of when you make these.
This is a fairly simple sketch but I decided to do something different with it. Instead of a solid piece of paper on the left side, I played around with the Frankenstein technique. What's the Frankenstein technique, you ask? Well basically, you create a new piece of paper using bits and pieces of other papers. Check out the YouTube video showing how I put my Frankenstein paper together:
SO MUCH FUN and I loved how the layout turned out.
I'm still working on my photos from our 2020 road trip from CA-UT-AZ-CA and it's so fun looking back at them. I'm almost done scrapbooking the photos which means another road trip is due! :)
All the stickers with the exception of the one in the middle right (Saguaro) are from a sticker pack I bought at a Five Below store. They were a great find and so pretty! The black & brown labels were bought from Joanne's years - I mean years - ago.
I used the Cricut to cut the letters for my title. I completely forgot to write down the font so I apologize for it. I used a finepoint pen to outline the letters before adhering them to the layout. And I'm happy to say, I used my T-square ruler to help with placement.
Before I forget, I also added some walnut ink to the Frankenstein piece to tone it down a bit and give it a natural look. What do you think?
Be sure to use this sketch and link up your layout to the Sketch n Scrap blog or join the FaceBook group. There are so many great sketches and challenges going on over there!
Happy Thankful Friday! We're in the triple digits this week and next so it's been HOT! We're also on baby watch since my DIL is due any day.
What am I thankful for this week? This week I'm thankful for my mom. So, she's in Hawaii now and they are three hours behind from PST. So, as I mentioned above, we're on baby watch and my phone rings at midnight the other night. Of course, hubby and I jump up because ummm we're on baby watch.
Nope, it's my mom deciding to give me a call via FaceTime. Oh my gosh! Apparently she was scolded by my sister afterwards. OMGoodness, this is so my mom. Well, I think it's most of us, right. I can totally see myself doing the same thing. LOL
What are you thankful for? Do you have something funny happen to you this week too? So simple, but so funny!
Please share in the comments. Hopefully, I'll be sharing some good news and photos soon!
I found a lot of paper scraps on my work area which I used to create the background on this card. Originally I thought it was just going to sit on my desk for just as long as those scraps did, but then I saw this sketch from Stick It Down.
All I needed to do was add a banner and create a focal point for the card front.
I grabbed an older pumpkin stamp from Stampin Up! and stamped a bunch on a piece of paper. I also stamped some on a different piece that I planned to fussy cut. I used a water brush to color the pumpkins; did some random stamping and added some brown color splash to add some more visual interest to the focal point. I love how it turned out AND I was able to use some paper scraps too!
I layered and adhered the three fussy cut pumpkins on the lower edge and used foam adhesive to the middle one to give that a little lift.
A banner punch with "thanks" stamped on it fits perfectly on the top and follows the sketch!
Go to the Stick It Down blog to see more inspiration and get more sketches.
Oh, I'm so glad I decided to join more of these Mix It Up Monday (MIUM) monthly events put on by Anne Veach from Piece Craft Love Clubhouse on FB and IG.
I always say I don't do mixed media in my scrapbooks, but hey, I guess I'm a liar. I realized that all mixed media does not need to be wet mixed media.
And that stamping and inking and splashing, and general mark making is mixed media...DUH. I guess I have been using mixed media on my layouts!
Along with the challenge of using mixed media, we also follow a sketch. This sketch is by Inspired Blueprints and I had a lot of fun with it.
Here's the sketch:
And here's my final layout:
Be sure to follow along with the hop:
Here is the PLAYLIST for this hop! All the videos in one place!
Hi there and happy Friday! This week was so weird with a holiday right in the middle of the week. I’m not complaining. I mean I got the day off so it was all good.
What am I thankful for this week? I’m thankful for great summer weather. Don't get me wrong, it's been hot, almost too hot, but I love the moments spent in the backyard with a fan going and reading a book. The hubs out there with me watching a baseball game.
Such a great relaxing feeling and I'm thankful for it.
How about you? What are you thankful for this week?
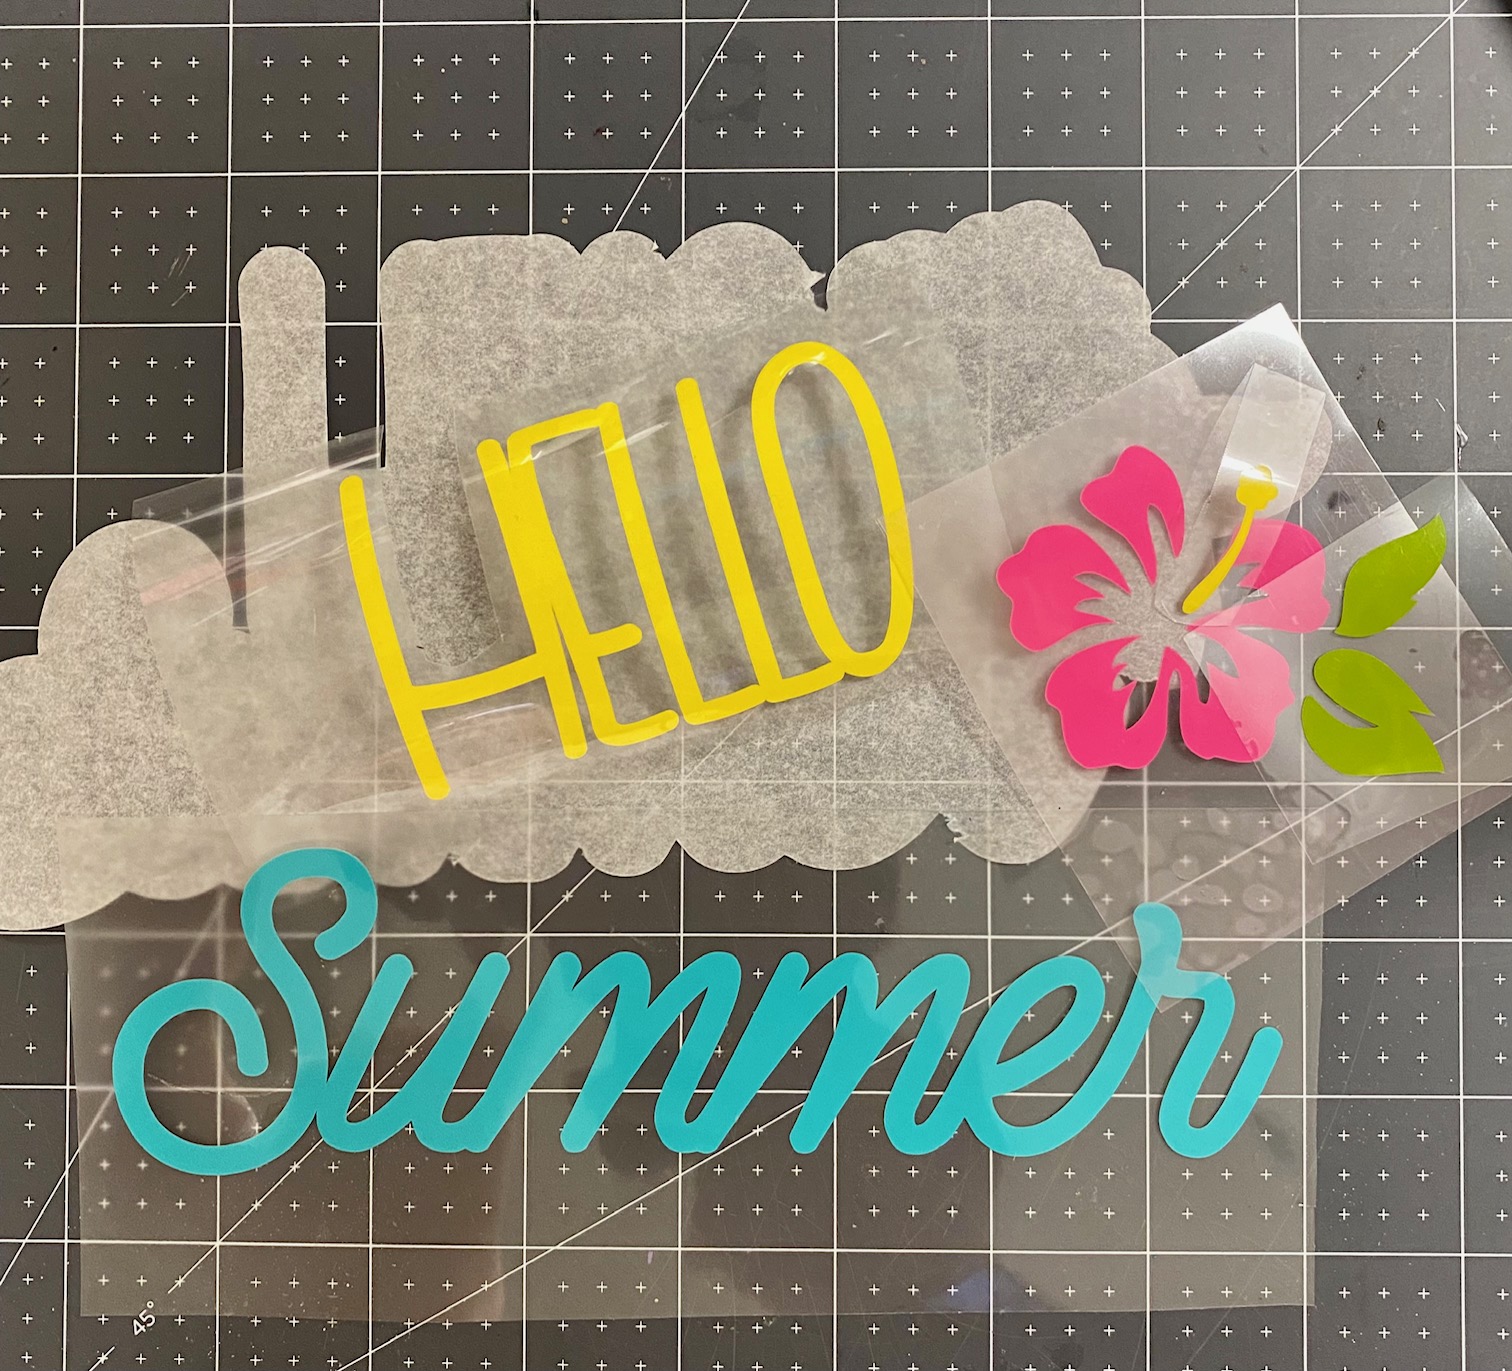
Hi there, I’m super excited to share my first Design Team project with you! Summer is here and I wanted to give a plain black nylon mesh bag an updo. I used the Hello Summer T075 SVG and a variety of bright fun HTV colors I had in my stash.
After uploading the image into Cricut Design Space, I noticed that there’s an offset to the image.
I didn’t need the white offset since I wanted the bright colors to pop against the black tote bag. Therefore, in order to hide the offset while cutting the HTV, I clicked on the eye next to the portion that I didn’t want to cut. See how the offset does not show on the canvas now? This is exactly what I need for my project.
After you click Make It but before you hit the Continue button, be sure to mirror each mat since this is an Iron On project. This is very important! So important that Cricut will also remind you to do it when your setting dial is on Iron On (aka HTV)!
After all the vinyl pieces were cut, I brought back the offset image to the canvas and hid the rest. The reason why I did this is that I needed Parchment Paper or something similar to place inside the bag because of the mesh surface. I didn’t want the HTV to stick to the back of the bag. Instead of using a square piece of Parchment Paper, I decided to cut the offset with it. This will help with placement of the different color HTV AND gives the extra protection.
I tucked the Parchment Paper offset inside the bag
And placed the HTV pieces on the front of the bag using the Parchment Paper offset as a guide. This was a little tricky to keep in place so I used some heat resistant tape to help hold down some areas.
I hope you can see the Parchment Paper offset in this photo, it was really hard to photograph.
Here’s the final result. I absolutely love how this bright image pops on the black bag and really gave this plain tote a big makeover!
I hope you decide to try something like this on your own. One of my favorite things to do is to make something plain, beautiful! Be sure to click over to Printable Cuttable Creatables site to see all the fun images and their blog for project ideas!
Did I tell you I had taken and printed a lot of photos for my granddaughter's second birthday? Well, as you can tell, here's another great two page spread using lots of photos. I emulated the first double spread with the stamping and animal embellishments. You can see the post HERE.
I cut patterned paper into 2x6" strips to go across both pages; did some stamping; created a title in Cricut Design Space, etc. I got TEN photos on this two page spread. I love that!
You can watch the process video on YouTube:
I have at least one more page to do of the photos of her cake. I may stretch it into a two pager just so it fits best in the album. Stick around and see!


.jpeg)
.jpeg)