

Oh boy, do I have a fun card to share! I used the Lantern E555 SVG file from Printable Cuttable Creatables and decided to make a light up card. I purchased light mechanisms for card making a few years ago and have been afraid to use them - but not anymore! I purchased the mechanisms from Pear Blossom.
I used two pieces of red cardstock for the lantern - one for the base and the other for the highlights. After cutting the pieces, I realized that the two reds I used were very closely matched. I grabbed some red ink and a finger dauber and decided to add some color to the highlight pieces.

Once the red ink dried, I placed all the pieces on my work surface. As always, I lay the pieces together before adding any adhesive. I used a piece of blue vellum for the “glass” instead of cardstock. I needed it to be more transparent since the light is going to shine through it.

In order for the light to shine through, I needed to cut a hole in the lantern base. I used the flames to determine where to place the hole and used sharp point scissors to cut it out of the back.


Hey, it almost looks like I know what I’m doing! I really had no idea but it all worked out! If you’d like to watch the process, check out the YouTube video on my channel.
I’m not sure if you can see the small opening right above the flame to the left but that is where I’m focusing on putting the light.

I eyeballed where to place the lantern because that will determine where to put the light mechanism and where to put the “PUSH” stamp. (The PUSH stamp was also purchased from the Pear Blossom booth but is from xxx)
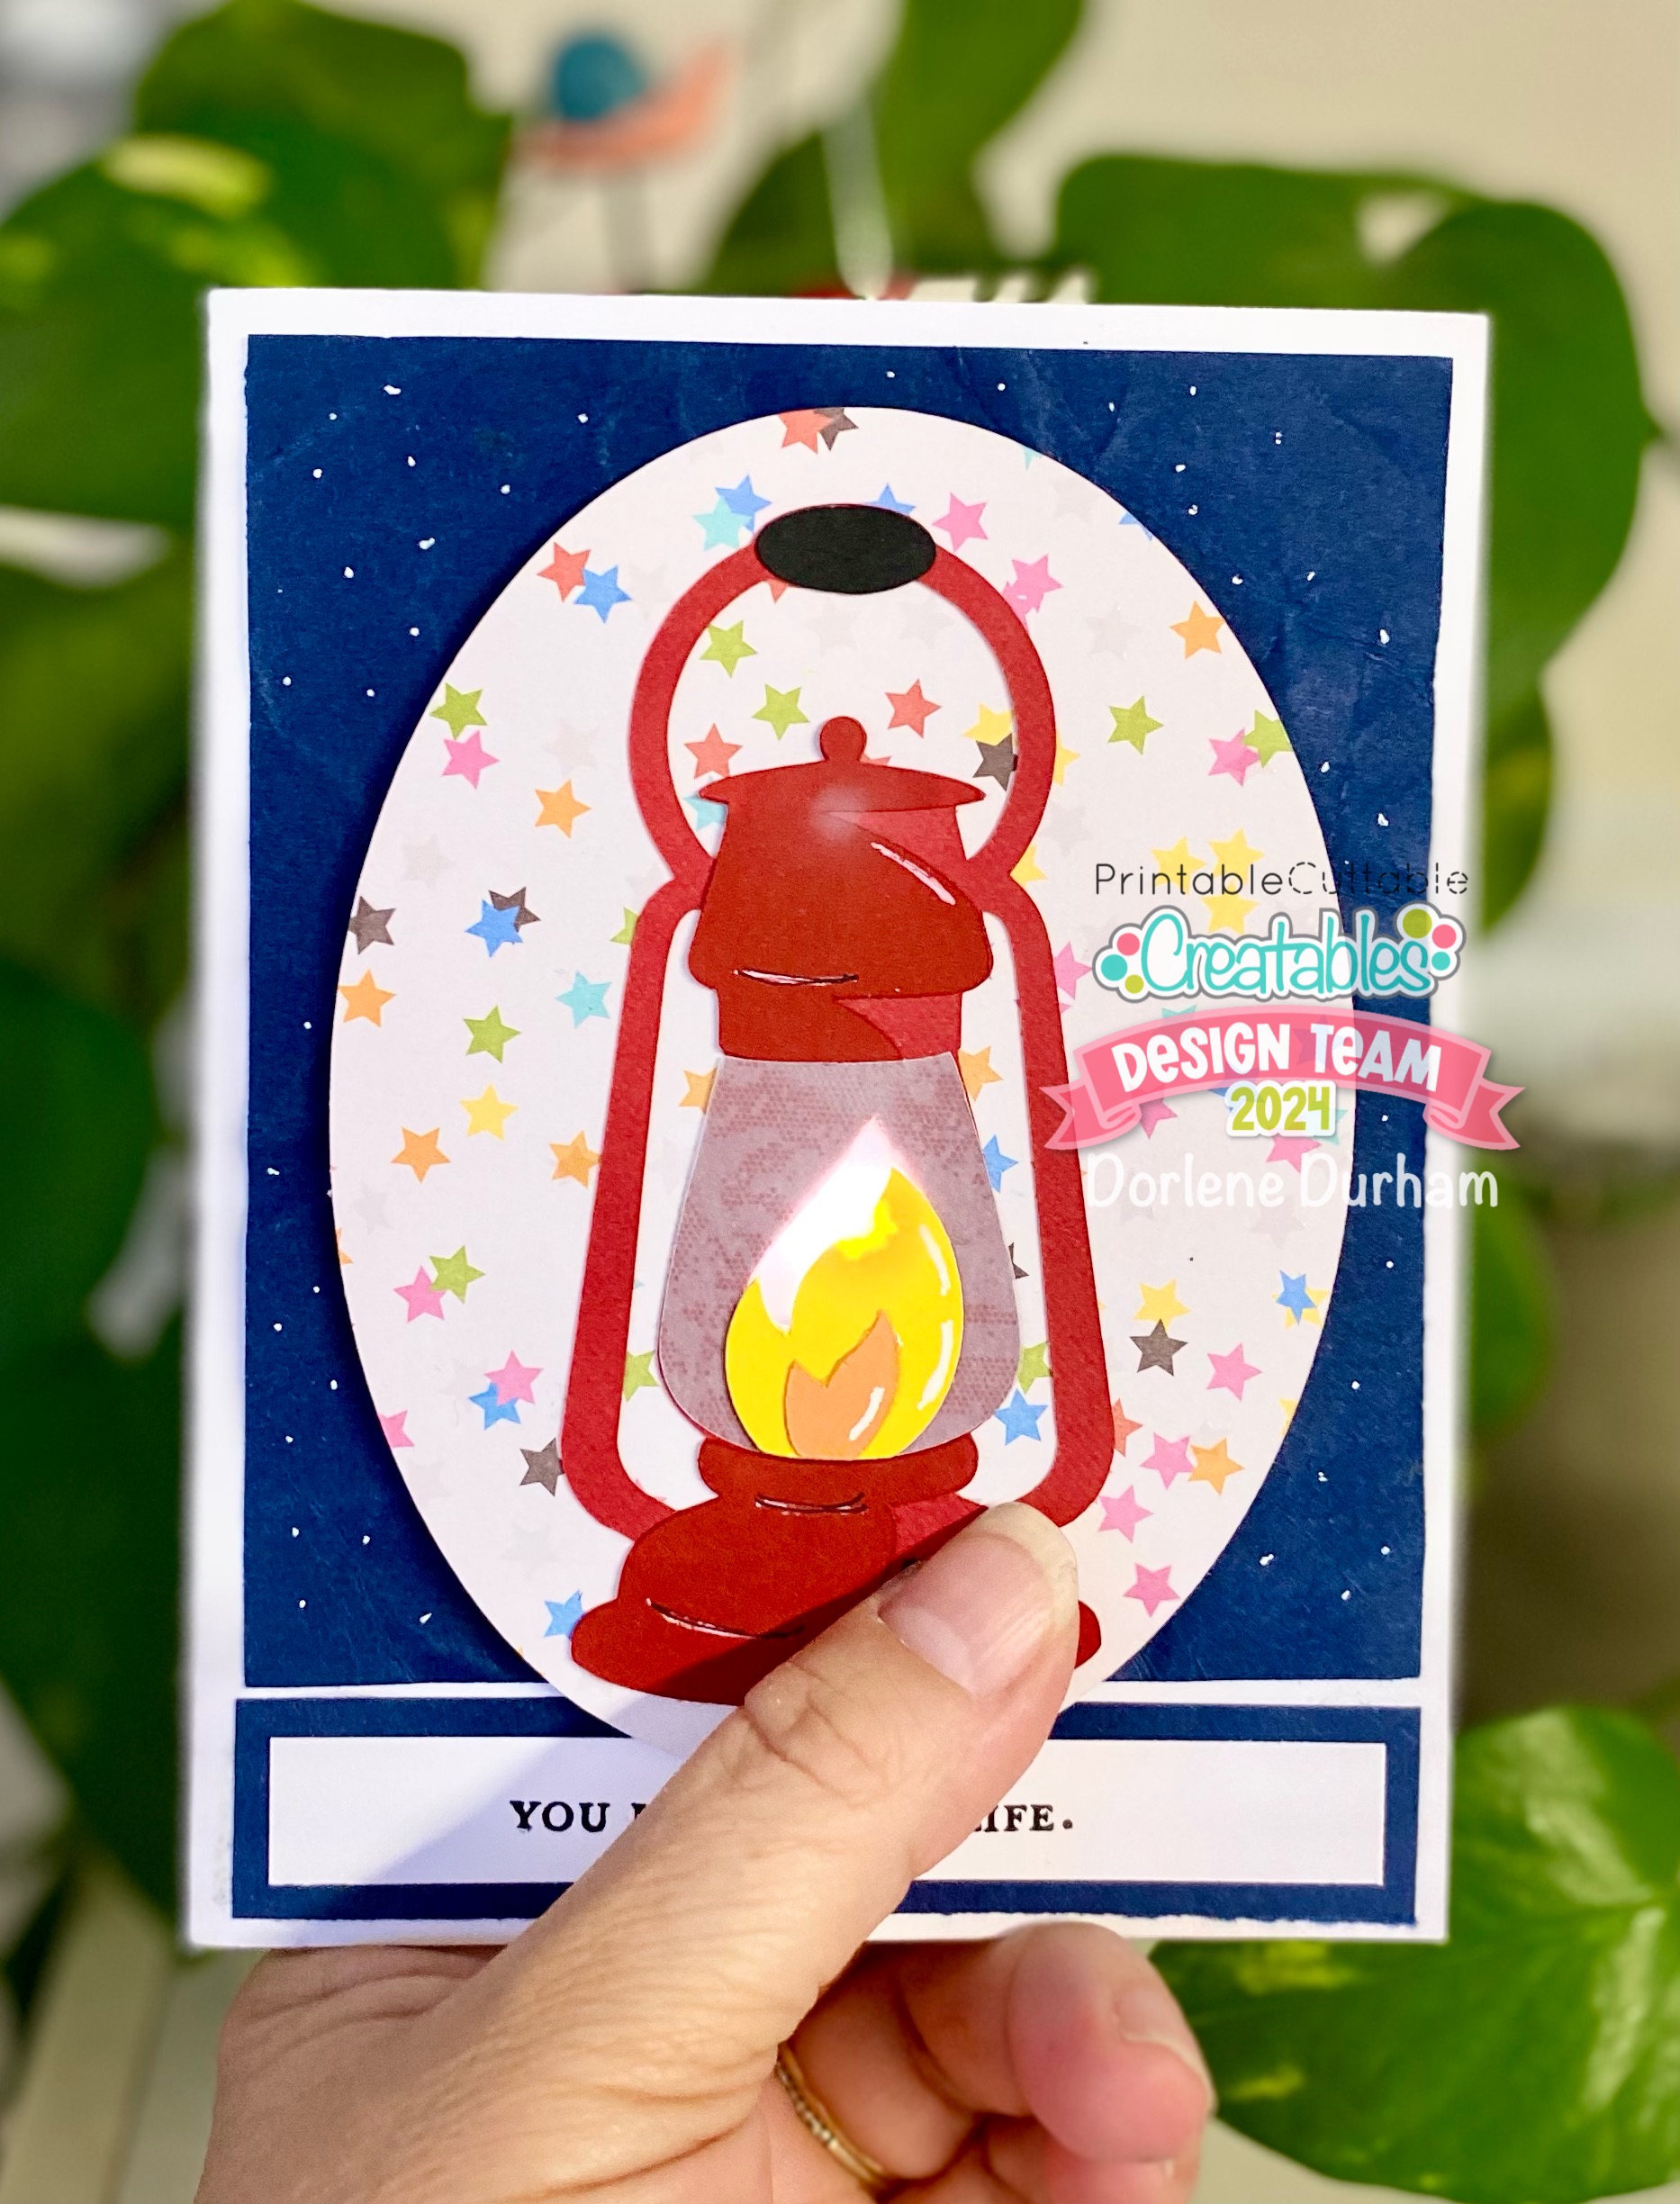
Here’s the final card:

And what it looks like when the button is pushed:
To make sure the light will shine through, I also had to cut a hole in the star oval. I didn’t worry too much about exact placement as long as the hole was around the flame. Foam adhesive was placed around the light mechanism and around the oval to keep the oval/image even.
The blue cardstock on the card front was placed incorrectly, but when I tried to remove it, it wrinkled and tore a bit. Guess what? I then decided to purposely ball it up to make it very wrinkly before straightening it out again. I love how this OOPS became a piece of interest on the card front. And a few white dots makes it look like a dark starry sky!
I have two more of these light mechanisms and now that I’m no longer afraid to use them, you better believe they’ll be showing up somewhere else soon!
No comments:
Post a Comment
Thanks for visiting. I appreciate your comments. I love sharing my projects with you and hope to encourage you to create things on your own. Thanks again!