Monday, April 1, 2024

Little Golden Book Part II; Signatures


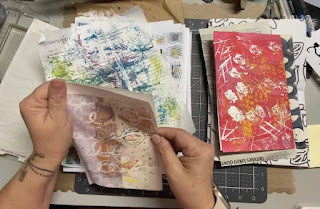
I bet you forgot all about this project...well guess what? So did I. I've got so many projects going on because of the craftroom overhaul and this one took a backseat. But I finally decided to work on it and sew in the signatures! 


I gathered 10 pieces of paper together for each signature which makes 20 pages for each signature and this journal will have four.


If you missed the first post, be sure to read/watch THIS to see how the cover and the signatures were created.

Now to stitch them into the journal. I added a layer of duct tape to the inside of the spine to add some more structure to it. I feel pretty confident that this is secure enough to hold all the signatures & any additions as the journal grows. How fun is that zebra print?!

I used a scrap piece of paper the same size as the spine and drew four lines so I knew exactly where to place each signature and to keep them relatively straight. 


I decided to use 3 holes for the binding stitch since it seemed the easiest (to be honest) for this stitching step.  I punched the holes by using this hole punch from Martha Stewart. This was gifted to me from a friend who was getting rid of supplies. 


Watch the process on this YT video:


I am by no means a pro at this. I'm learning as I go and I watch YouTube videos too. This style worked for me and I hope it works for you as well. Either way, it's fun to see something created from nothing and I hope you agree. I may end up covering the spine or adding ribbon but I haven't decided yet.


I haven't really played with my paints and other fun mediums and I am looking forward to it. It's so freeing and I love it!


Friday, March 29, 2024

Snackle Box?

Snackle boxes. Have you heard such a thing? I saw these boxes for $1 at Target and grabbed three! One for each of my granddaughters for Easter. It says they are food safe but dry food only. I plan on putting parchment paper in some of the compartments for the salami and cheese.

I went a little nuts on St Patricks Day so I’m keeping it simple for Easter this year. I plan on filling these up with snacks and then wrapping with ribbon.


Check out the quick video showing how I added their names using vinyl and the Cricut!

These will be perfect for games and road trips too!


Watch this short to see how I filled them THIS


TGIF; Thankful Friday #311


Oh another Friday to be thankful! This week I'm thankful for the new floors that are arriving at our home. We're pulling out the old stained carpet and replacing with new tile (entryway), new Pergo laminate (front room) and new carpet (family room).

A whole new look for our downstairs floors! I'm thankful that we can afford to do it and that we're finally taking care of it!


What are you thankful for this week?

Thursday, March 28, 2024

Joy Layout


This layout was a little tough to create because it brought up so many feelings. I remember this moment and how sentimental we all got. This photo reminds us how my son was in life - fully aware of his emotions and completely fine with showing them.

The layout started with one goal...use as much of this collection as possible. There’s only a little bit left and I didn’t want to hold onto it any more.


I chose to use the pocket insert sheet as the base of the layout and then I used as many of the scraps as possible. The bottom right corner was covered with a tag (that's part of the collection) and that's where the word "JOY" came in.

I handcut and embellished the holly leaves & berries and I stamped the word 'joy' using all sorts of different stamps from my stash.

The idea of multiple stamping was a complete afterthought and one I am so happy with! Check out the YouTube process video to see how it all comes together.


Product Line:  Theresa Collins Candy Cane Lane

Monday, March 25, 2024

Card Making Frenzy Round Two


Hey there, I just want to brag a little...I made an additional NINE cards using stuff on my desktop. You know all those scraps of paper or little items that didn't quite make it on the original project? Well, I decided to make cards using only what's on my desk.


I still have lots of random scraps & supplies left on my desk but now they are more organized. I may have to do a Round Three. I'm always happy to challenge myself and some of these were surely a challenge.


The YouTube video does not show how I made all the cards, but you can see the process on four of them and of course if you have any questions, please leave a comment.


Card One: Rectangles are 1.75x2.5 and then cut diagonally
Card Three: White mat is 4x5.25; Green 3.75x5 and the strips are 
Card Four:  Cut two sets of four 1.25" squares plus one extra.

Raggedy Ann & Pumpkin Spice cards:  Rectangles are 2.5x3.75 and cut diagonally (check out THIS post for more details) As a matter of fact, this card is why I have these scraps on my desk!


Friday, March 22, 2024

TGIF; Thankful Friday #310


It's Friday! YAY! Are you thankful? Yes, me too. But I'm also thankful for the wonderful spring weather we've had all week.

I think it's supposed to get cold again but that's ok. We had a peek and it was nice! 

I was able to get in the garden this week and surprised to see this little guy sprout up. Honestly, when I saw it growing, I thought it was a weed. I'm so glad I decided to wait a little bit before plucking it because it is certainly NOT a weed!


What are you thankful for this week? Share in the comments.


Adding a Cricut Title to a Layout

Check out the YouTube process video showing how I added a title to a layout. Although the title changed from the time I created the title in Design Space to the layout, the idea is the same.


I'm getting close to finishing the wedding album and can't wait to share it with my nephew & new niece!


Reminder:  I started this album project by making lots of base pages so when the photos were ready, all I had to do was add photos and embellishments. This was such a huge timesaver and I did the same process when making wedding albums for my two sons.

I gathered all things Navy, Orange and Gold and placed them in one 12x12 container. It also helped with the construction of the layouts by having 'all the things' in one place.