Tuesday, May 7, 2024

Beware Ogre Signs; Shrek Anyone?


I love custom orders and this one was a fun one for sure! This started off as a discarded (in the recycle bin of course) box that I cut down to size. They are both around 12x20" and perfect for wood signs.

I used a combination of two shades of brown, brick red and white acrylic paints to change the look of cardboard to wood planks. Then I cut the ends of the planks very jagged to emulate old wood.

The "Stay Out" sign I used a thick point white Posca paint pen and then highlighted them with a fine point black pen. I tried to write it sloppy and a little juvenile.


The "Beware Ogre" sign was a little harder to finish because well...I wasn't sure how to make an ugly ogre! I used two shades of green, red and white to finish him up. Luckily I had a photo to assist with the drawing and I think he turned out as he should - mean & ugly!


Another Trash to Treasure project that I love! The person who ordered it loved them too and that's what is important!


Sunday, May 5, 2024

Celebrating Cinco de Mayo


This is a simple way to dress up a bottle for Cinco de Mayo. I used the Lemons & Limes E140 cut file from Printable Cuttable Creatables for the fruit and lots of shades of yellow and green paper scraps!


The bottle tag is available on Cricut Design Space but can easily be made by punching a circle in a rectangle. I used red to make the fruit really stand out! 

As always, I stacked the layers to make sure the placement is correct before adding adhesive.


I used a sand stamp from a ocean stamp set that I have to add some texture to the lemon and lime with Versamark ink so it would blend in. What a difference that makes to the flat paper!


The complete lemon and lime were adhered using liquid adhesive and the sliced lime was adhered with foam adhesive.  


Watch the process video to see all the details! There is stamping, scoring, marking and other cool things going on to make this project so fun! All it needs is a little salt!


Salud!

Be sure to click over to the Printable Cuttable Creatables blog for lots of inspiration and use code 3SONS15 for 15% off your purchase.


SNS #265


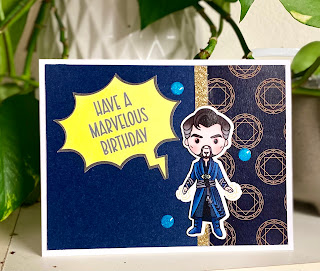
May is going to hold a Birthday Bash on the Sketch n Scrap site. I'm working with card sketch #265 this month and it's a good one especially when you are mass creating - like I did!

I bought some paper & die cuts from Scrappy Boys from the Stamp & Scrapbook Expo in March and thought they would be perfect for this sketch. In fact, so perfect that I made FIVE cards using this sketch and five different characters.


The first thing I did was cut a piece of cardstock at 5.25x4". I cut & attached a piece of 3.5x4" piece of paper to the left of this piece of cardstock and a 1.75x4" piece on the right. Each 1/4" strip is a little different too. Some are straight and some have a scalloped edge.


I used the Print then Cut option in Cricut Design Space to make the sentiment rectangles & bursts since I didn't have stamps to go with these MARVELous die cuts.

Be sure to join the challenge at Sketch n Scrap blog or FaceBook page.

Friday, May 3, 2024

TGIF; Thankful Friday 316

I don’t know about yours, but my week went fast! I’m thankful for that for sure but more specifically thankful for my health.

It seems that most people around me are sick - some with allergies- but a lot just sick. I’m thankful that I’m not. 

I drink a lot of water and every day I add some Hydration & Immunity booster that is from a company called Salud. They have great flavors and are low in sugar.

Try some. You’ll thank me later!

What are you thankful for this week?

Thursday, May 2, 2024

Let's Get Messy May


I'm starting a new series this month - Let's Get Messy May. I'm going to post a YT video and blog post each Thursday in May (there are FIVE) featuring messy art in my Junk Journal or just getting messy in general.

I love seeing my hands like this. Of course this happens because I love using my favorite tool - my fingers!


What products did I use for this spread?
Watercolor Paint
Color Sprays
White Acrylic Paint
Stencil
Painty Scraps
Script Stamp & Black Archival Ink
Black Fine Point Pen

I'm actually pretty excited about this project because it's the first one in my new Junk Journal. I don't know why it took me so long to get messy here. I love the whole "let's see what happens" process when I play in my Junk Journal and it's so relaxing for me.


The paint brush that is mentioned in the video is from a store in San Diego called Art Form. They accept donations on art supplies as well as recycled goodies. They support their local schools by providing art classes and art fun. If you're in the area, it's worth going because they also have a store where you can purchase donated items. It's an artsy thrift store! I donated a bunch of rubber stamps but of course had to buy something while I was there!

Check out all the fabulous layers in the final spread! Everything medium is seen through it all!


Watch the YouTube video to see how the final project evolved.


Be sure to subscribe to my YT channel so you can watch all five of the videos for this series.

Wednesday, May 1, 2024

Engraved and Painted Rock; LTCCB


It's time for another six week challenge from the Love To Craft Challenge Blog (LTCCB)! You know I love all things crafty so when I saw this engraving tool at Grocery Outlet, I grabbed it. It was less than $5 so what did I have to lose?


I hand wrote the word 'GROW' and some leaves on the side of this flat rock in pencil before using the engraver on it. Ok, gotta tell ya, the rock may have been a little too hard of a surface for this engraver, but it did do what it was supposed to do. 

Now, I have no patience so I basically scratched the surface but I'm sure if you really went over it, it would have a really nice groove. I still recommend getting it since it was so inexpensive & batteries were included!


I used paint to highlight the engraved areas as well as all over the rock surface & sides. 


And it looks so great in its new home - a planter in my backyard!


Be sure to click on over to the LTCCB website to add your crafty project to the challenge or just check out all the inspiration projects!

Be sure to watch this quick YouTube process video to see how cool this tool is!


Monday, April 29, 2024

TKS 2 Stick It Down Layout

I got 12 photos on this two page spread! You know I love getting lots of photos on a page so you know I’m happy about that! I used a sketch by Stick It Down as my starting point. Check out their Facebook page for more sketches.

Here’s the sketch:


And here’s what I did with it:


The red piece is cut at 11x11" and placed near the inside edges of the two pages. The patterned paper with the words is cut at 5x11"; both turquoise strips are 1/2" each.


I was able to get 12 photos on this layout spread which makes me so happy. I don't normally put titles on both sides of a two page spread, but it really worked for this one. The photos on the right side were in response to a "Walk with a Buddy" challenge that we did and the other side just needed one! 

I use the Print/Cut option in Design Space for the titles, I cut out stars & walk icons with my Cricut and the foam fingers and smaller sentiments were stamped & die cut.

Be sure to check out the video for all the details!


Also Design Space for the file if you want the titles & stars. There are other "marathon" type things on this file that I will probably use for other layouts for our Second Annual TomKat Strut.